STEM & Discovery
Build a Cardboard Marble Run: A Design Challenge for Kids
 Facebook
 Pinterest
 X
X LinkedIn
 Reddit
 WhatsApp
 Telegram
 Bluesky
 Email
Email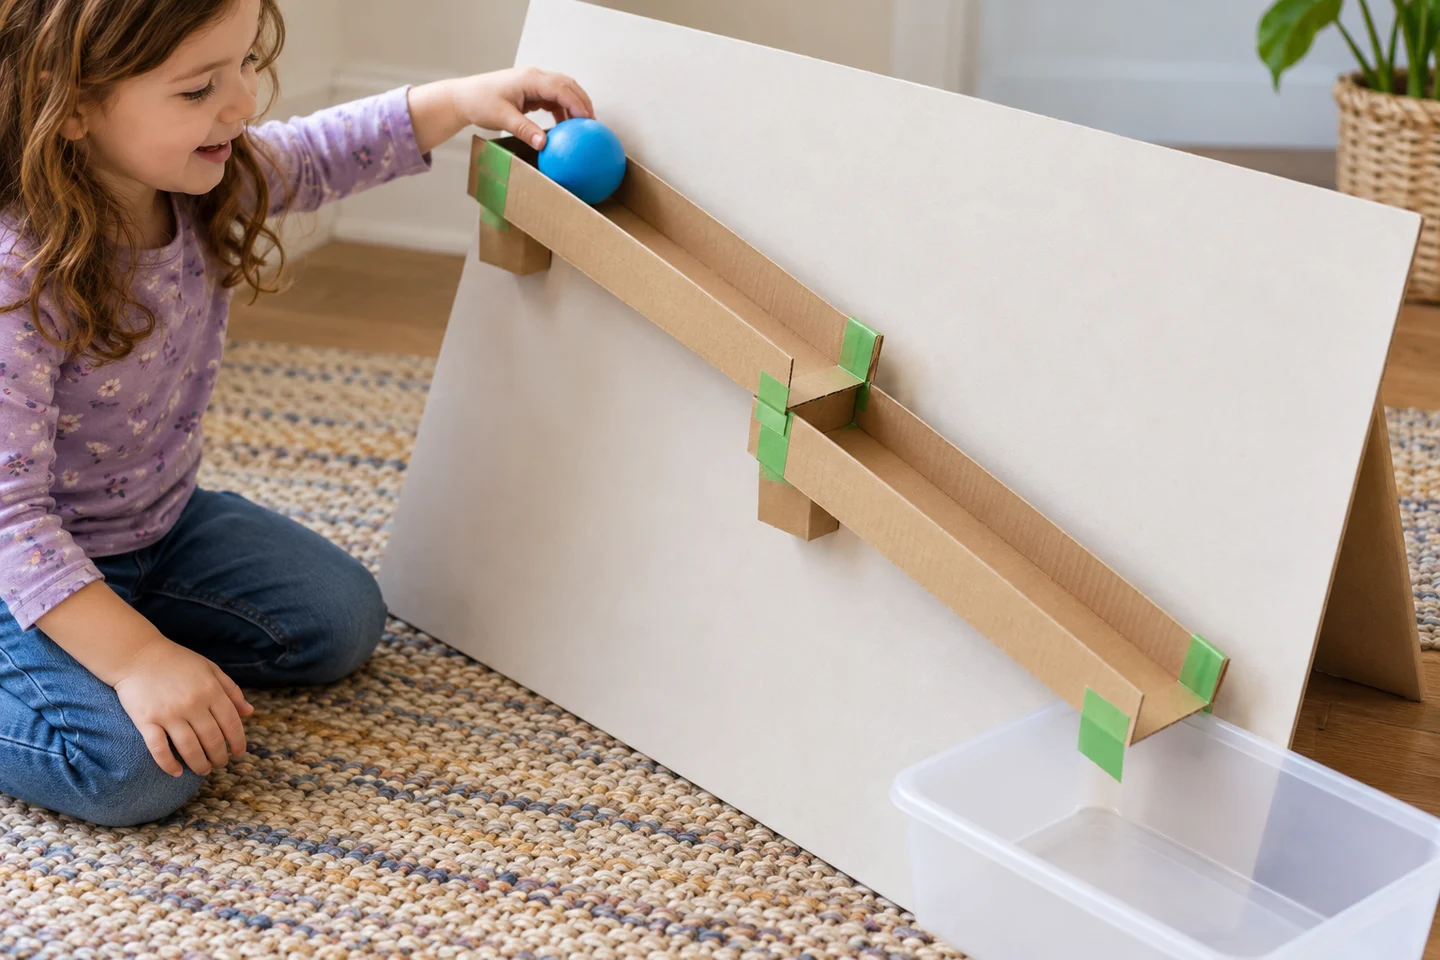
A ball rolls down a cardboard channel, reaches a join, and—will it keep going? Building a short marble run gives children a satisfying design problem they can see and improve one section at a time.
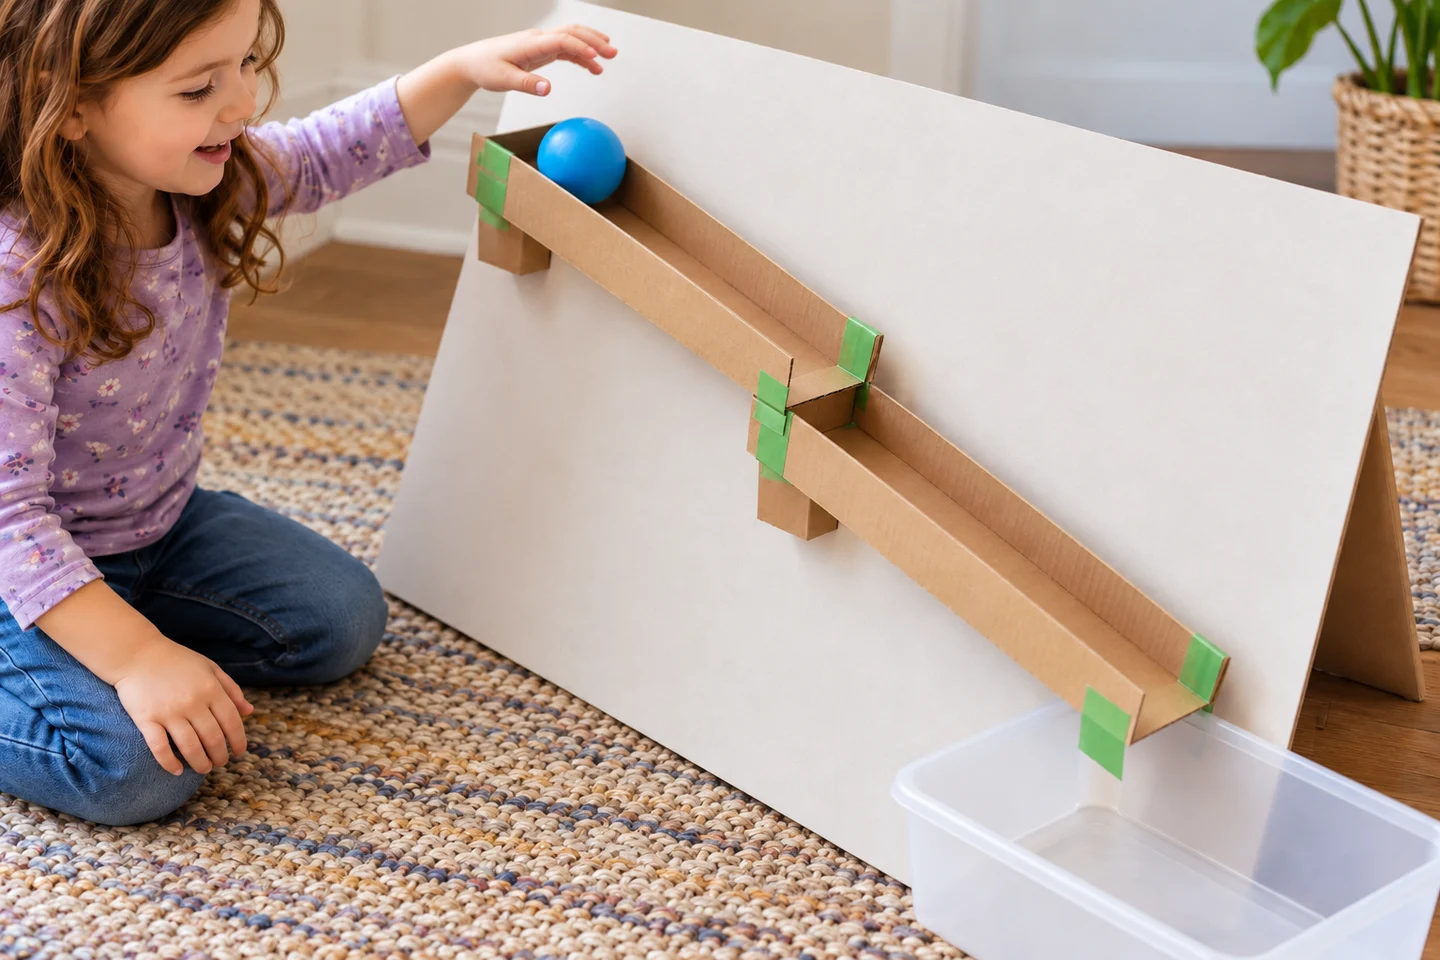
Start with two channels and a catch tray. A larger age-appropriate toy ball can replace a marble when small parts are unsuitable; make sure the track is wide enough for the ball you choose.
At a glance
| Detail | Plan |
|---|---|
| Suggested ages | 6–10 with adult preparation and supervision |
| Preparation | About 20 minutes; 30–45 minutes for classroom materials |
| Building time | 35–50 minutes |
| Group size | One builder with an adult, or teams of three |
| Mess level | Low to moderate |
What you need
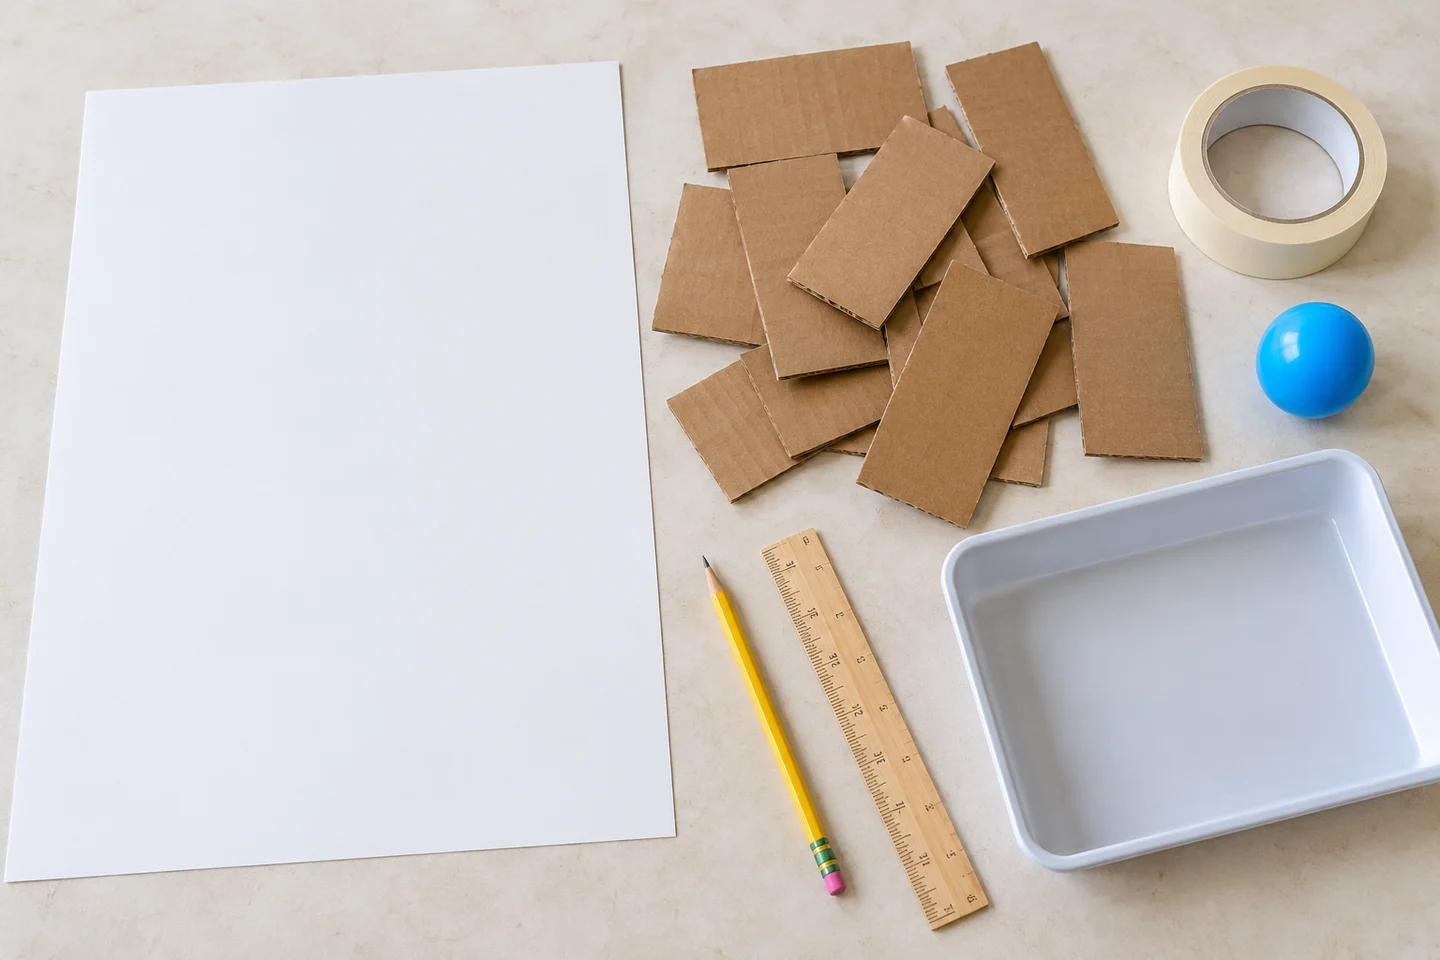
- A sturdy cardboard backing about 18 × 24 inches.
- Three thin-card blanks, each about 5 × 8 inches.
- Masking tape, planning paper, and a pencil.
- One smooth, freely rolling ball and a catch tray.
- Ruler and scissors for adult preparation.
For 24 children in eight teams, gather eight backings, balls, and trays, plus 24 channel blanks. A ball roughly 1½–2 inches across suits the wider track described here if appropriate for the children. Marbles need a narrower route and direct supervision; keep them away from younger children and anyone who mouths objects.
Get ready
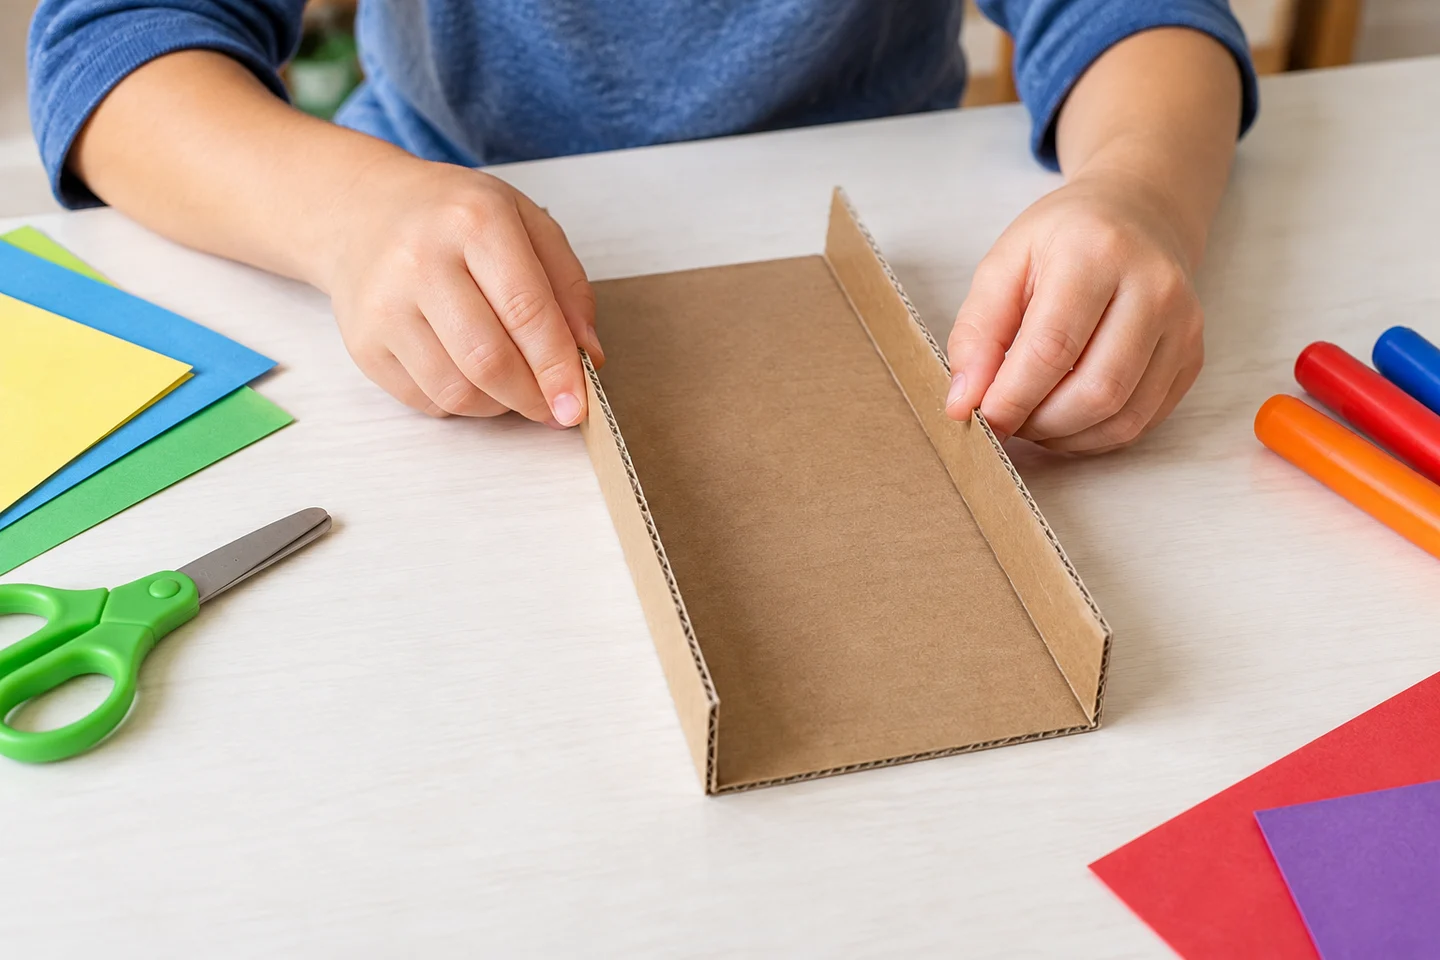
An adult secures the backing at floor level against a stable support so it cannot tip. Remove staples and prepare difficult cuts. Fold a one-inch strip upward along each long edge of a blank: the resulting channel is eight inches long with a three-inch-wide floor. Check that the ball fits comfortably.
Build a rolling route
1. Sketch the path
Draw a start and finish, connected by two downhill sections. Begin with channels continuing in the same direction. Save turns and longer routes for another version.
2. Attach the first channel
Tape the outer walls or tabs to the backing, keeping tape off the rolling surface. Start with a gentle slope, perhaps a drop of 1–2 inches over the channel’s length, then adjust for your ball.
3. Test that section
Put the tray beneath the exit and release the ball without pushing. Watch where it slows, stops, or leaves the side. Adjust the slope or walls until this short section works.
4. Add a smooth join
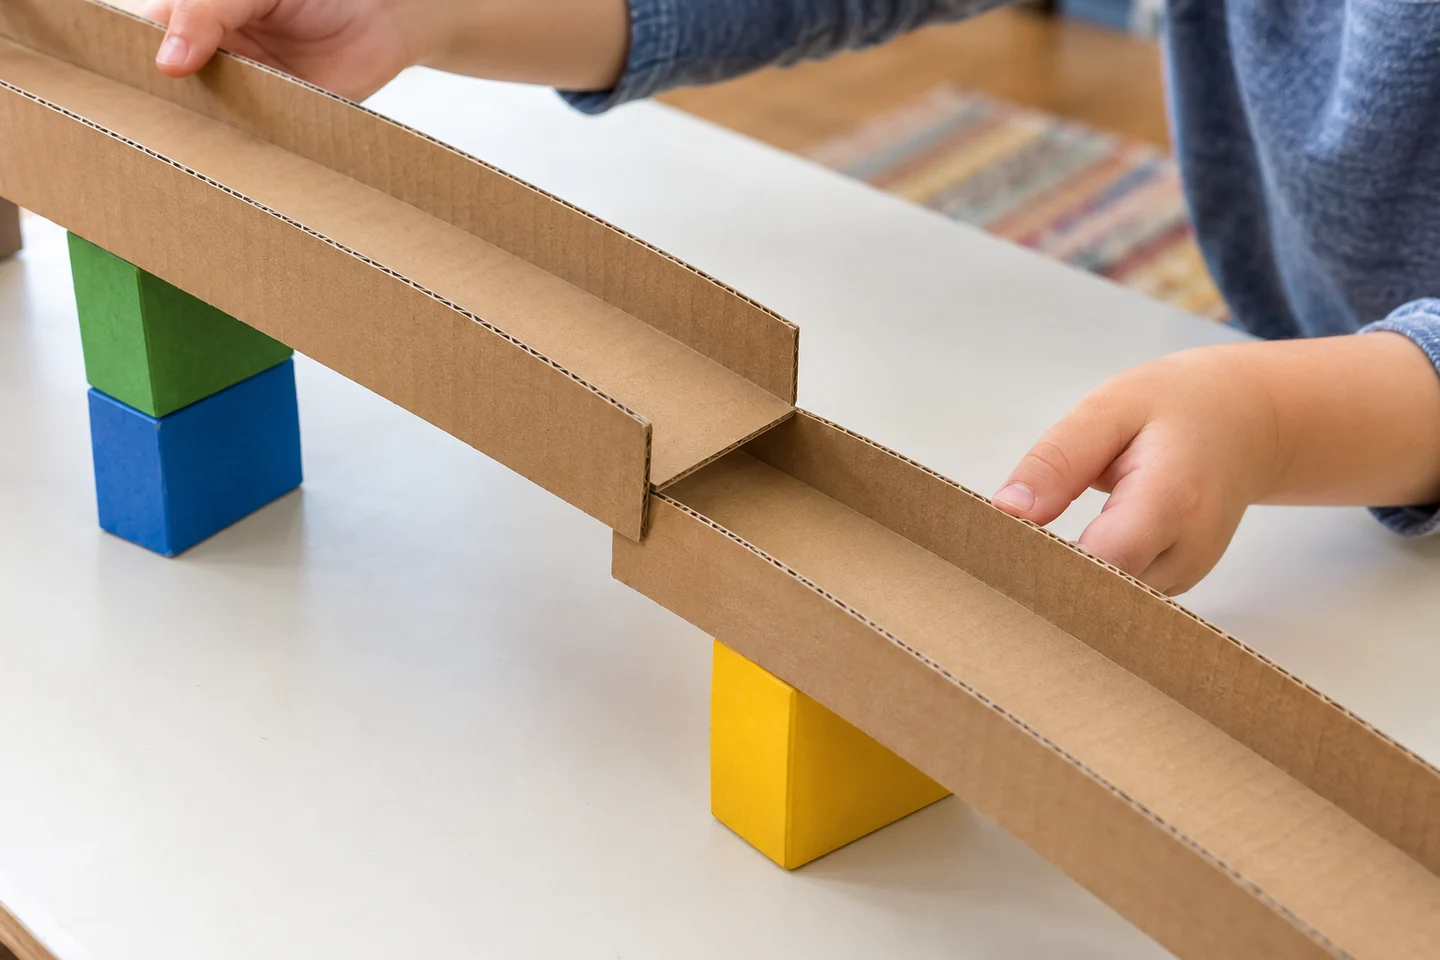
Overlap the first channel’s outlet above the second channel’s inlet, like roof shingles. A half-inch overlap is a useful starting point. The ball should roll down onto the next floor rather than meet an upward-facing edge.
5. Try the complete route
Release from the same spot three times. Notice whether the ball reaches the tray each time. Use a simple note such as “stopped at join” or “reached tray” to remember what happened.
6. Improve one part
Change a slope, overlap, or wall position, then test again. Once the route works reliably, try the third channel if the backing has room. A smooth short track is a worthwhile finished design.
What children can explore
Gravity pulls the ball downhill, while bumps, surfaces, and joins affect its movement. Ask, “Where did it slow down?” or “Which part should we change first?” Testing a short section helps children connect a change with its result.
At home and in the classroom
At home, build beside the child and let them choose adjustments. In class, teams can swap planning, attaching, and testing roles. Keep hands clear of the track while the ball rolls and collect it in the tray after each trip.
Make it work for your group
Provide folded channels, use a larger suitable ball, or let a child direct a partner. Older builders can add a turn after the straight route works, checking the new join carefully.
Helpful fixes and cleanup
A stalled ball may need a smoother join or slightly more slope. A ball leaving the track may need higher walls or less drop. Retape loose supports before continuing. Collect all balls, return tape supplies, and store the track securely for another session.