Arts & Crafts
Folded Pop-Up Scene: Make a Simple Step-Tab Paper Card
 Facebook
 Pinterest
 X
X LinkedIn
 Reddit
 WhatsApp
 Telegram
 Bluesky
 Email
Email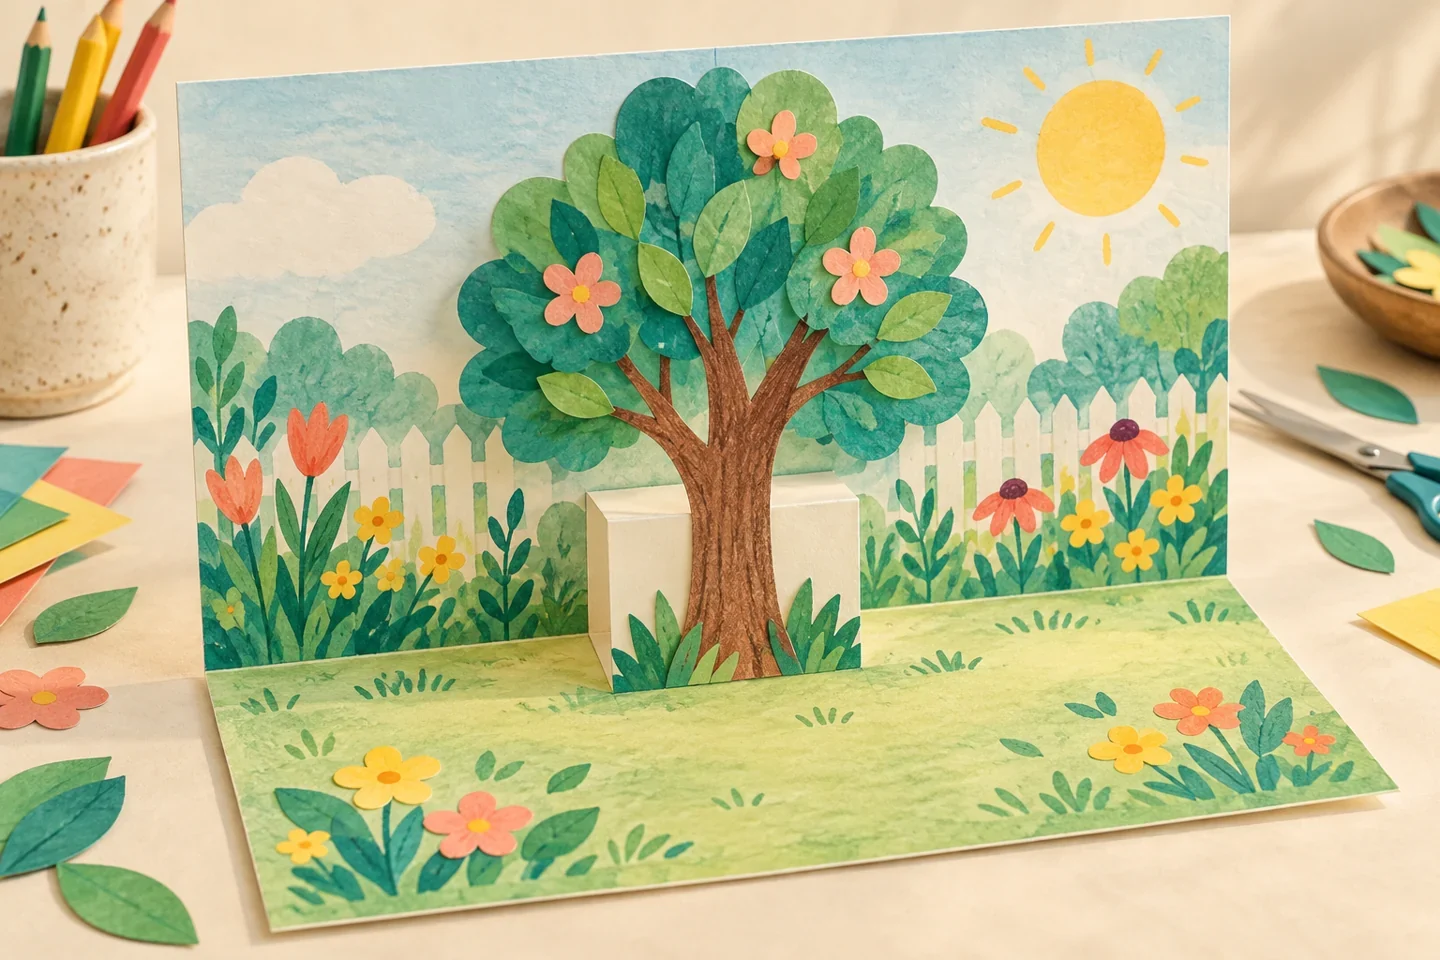
Two short parallel cuts can turn a card's center fold into a small step tab. When the card opens to a right angle, the inward-pushed tab supports one lightweight paper scene element. Start with the mechanism on a spare card, then decorate a garden, room, or imaginary setting. The card should open and close gently; it does not need several tabs or a complicated three-dimensional building.
At a glance
| Suggested ages | 6–10 |
|---|---|
| Activity time | 35–50 minutes |
| Adult setup | 15 minutes |
| Participation | Individual or small group; watching, pointing, and partner assistance are welcome |
What you need
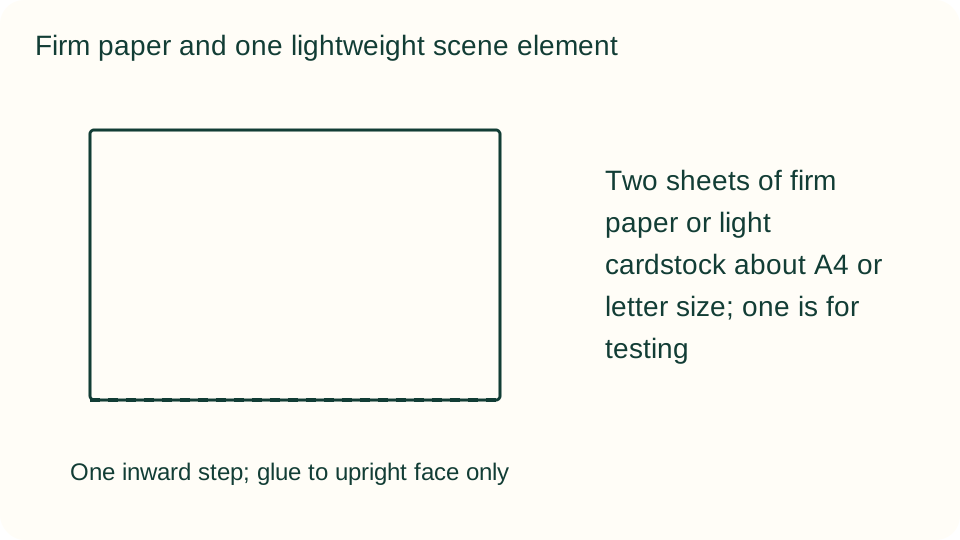
- Two sheets of firm paper or light cardstock about A4 or letter size; one is for testing
- One lightweight paper scene element no more than about 6 cm tall and 4 cm wide
- Pencil, ruler, crayons, and a glue stick
- Scissors used with adult help for the two mechanism cuts
Get ready
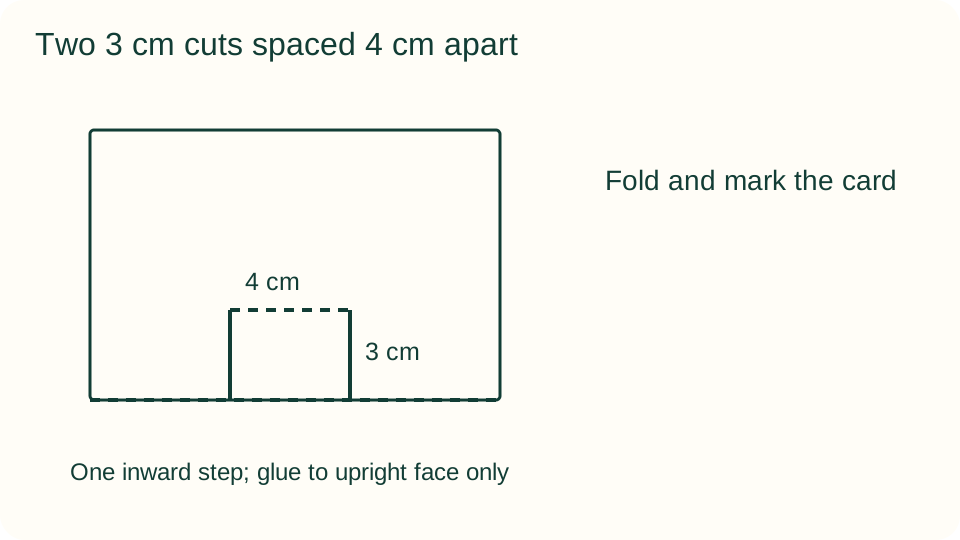
An adult demonstrates the mechanism on the spare sheet and assists with cutting. Use paper that folds cleanly without cracking. Keep the scene element small and light, and avoid loose decorative objects. Clear a table space for testing the open card. The diagram is an illustration of the steps, not a print-to-scale cutting template.
Try the activity
1. Fold and mark the card
Fold the sheet in half by bringing its short edges together, crease, and keep it closed. Along the folded edge, mark two positions 4 cm apart near the middle. From each mark, draw a 3 cm line perpendicular to the fold into the closed card. Do not mark cuts along the outer edges.
2. Make two short parallel cuts
With adult help, cut along both 3 cm lines through the two layers of the folded card. Leave the area between them attached; it becomes the tab. Do not cut across the ends of the lines. Check the cuts on the spare card before repeating on the final sheet.
3. Crease and reverse the tab
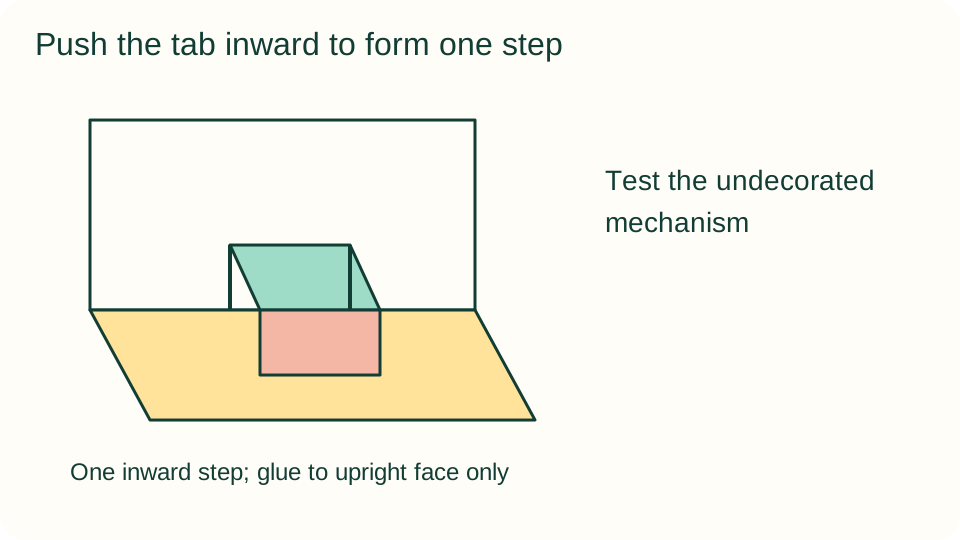
Fold the cut tab forward along the line joining the cut ends, crease, then fold it backward along the same line. Reopen the card carefully and push the tab inward, reversing its original center crease. Open the card to about a right angle so the tab forms one rectangular step inside.
4. Test the undecorated mechanism
Close and reopen the card slowly. The tab should fold inside rather than stick outside or tear at the cut ends. If it catches, an adult checks whether the tab's folds are reversed correctly. Reset the spare sample if needed before adding decoration; glue cannot fix an incorrectly formed fold.
5. Attach one scene element
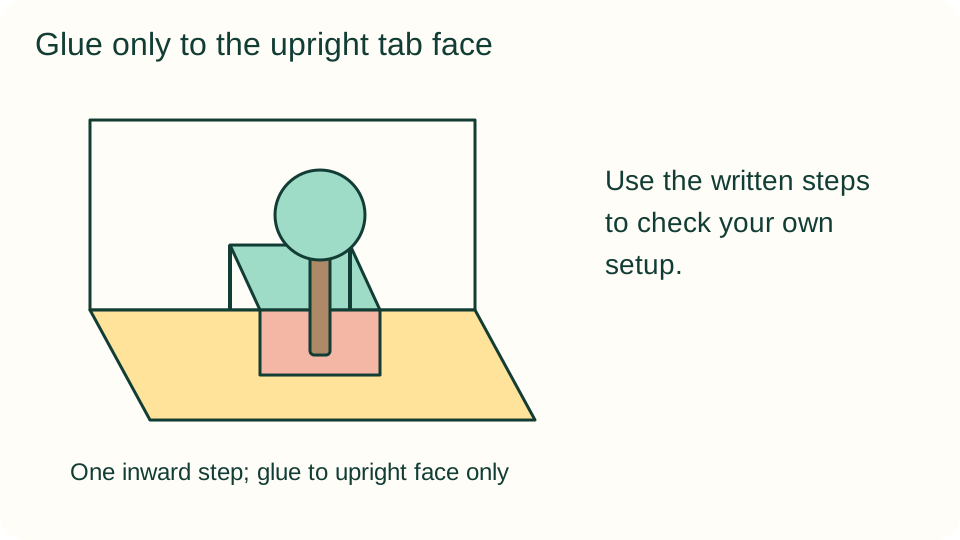
Arrange a simple lightweight paper tree, character, or other scene element on the tab's upright face. Glue only its lower attachment area to that face, not to the horizontal top or surrounding card. Let the adhesive settle, then close gently to check that the element remains within the card edges.
6. Draw the setting and check again
Decorate the flat background and lower card surface with crayons, keeping moving folds clear. Open and close again after the glue dries. If the scene element extends beyond an edge or catches, trim it with adult help or replace it with a smaller piece. Share the open scene without forcing the card flat.
What children can explore
Notice how a reversed fold changes the tab's position inside the card. Ask which surfaces move together and why attaching one element across two moving surfaces would cause a problem. Decorations can vary widely while the mechanism stays the same. Avoid adding multiple tabs until the basic example works consistently.
Make it work for your group
Offer an adult-made working card to children who prefer decorating to construction. Older participants can draw two different settings for the same single-tab mechanism without changing its dimensions. A flat folded greeting card is an alternative if the cuts or moving parts are frustrating. A partner can operate the finished card while the maker describes the scene.
At home and in the classroom
At home, work through the spare test card first and take a break while glue dries. In a classroom, adults can prepare the two cuts and demonstrate the inward reversal with a large sample. Keep spare working cards available. Let each child choose a scene rather than require one holiday or occasion.
Keep your creative choices
Save a sketch, a small test, or a short dictated note about one choice the maker wants to remember. A later version can use different colors, shapes, or decoration without matching the example. Let the maker decide whether to continue, share the work, or keep it private.
Helpful fixes and cleanup
If a cut tears, restart on a spare sheet rather than reinforce the mechanism with heavy layers. Use only light glue and keep it away from the folds. Gather cuttings, close scissors and adhesive, and let the card dry open at a comfortable angle. Store it closed only after a final gentle movement test.