Summer & Patriotic Days
Make a Summer Shadow Observation Board
 Facebook
 Pinterest
 X
X LinkedIn
 Reddit
 WhatsApp
 Telegram
 Bluesky
 Email
Email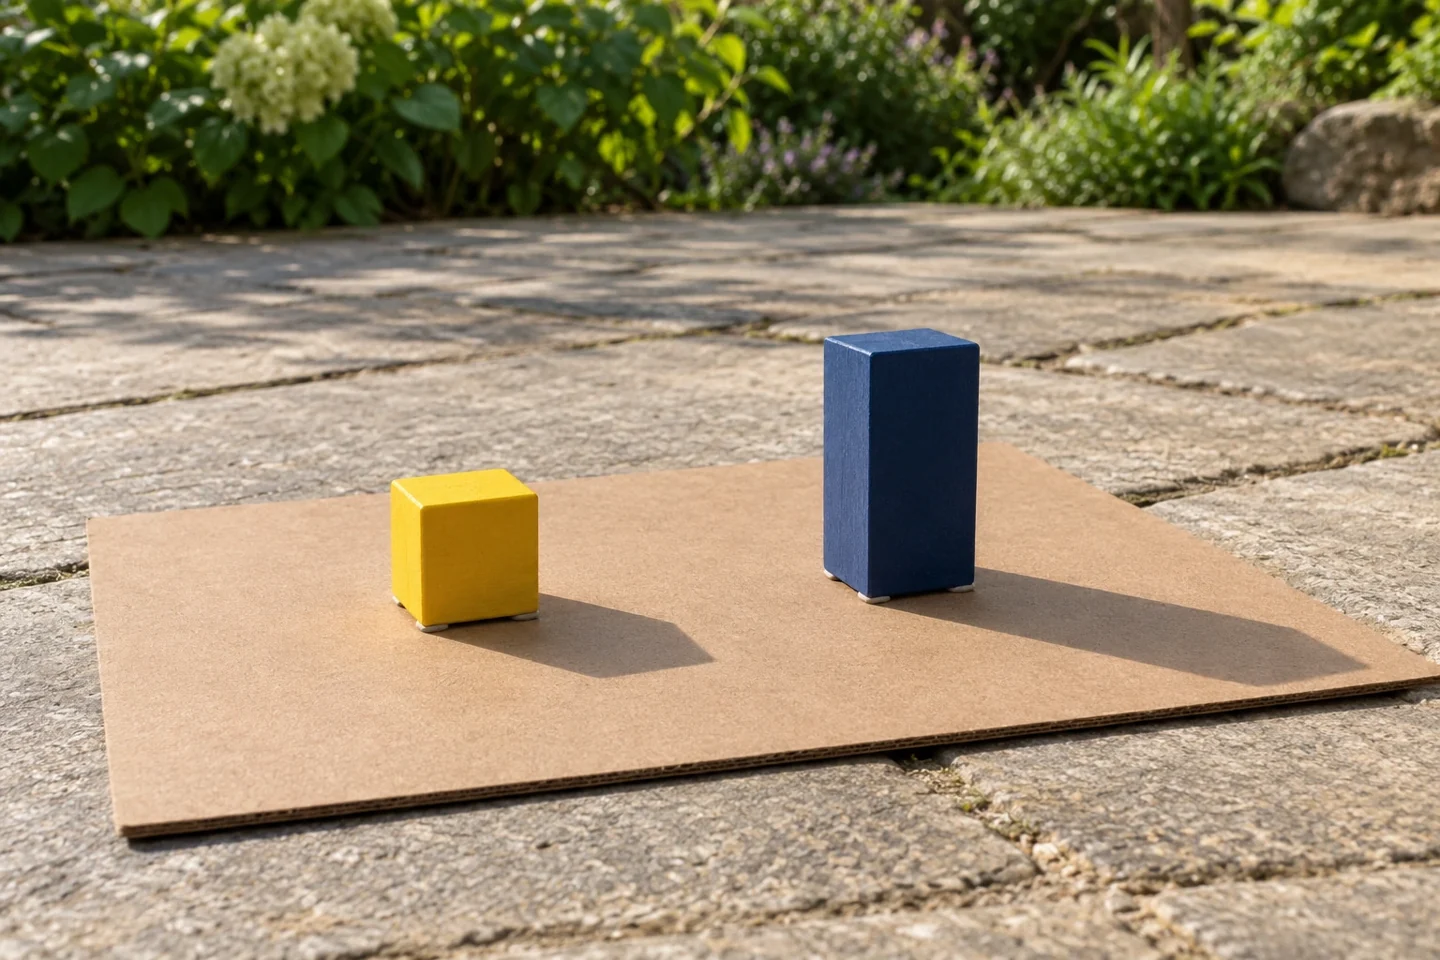
Your activity at a glance
| Suggested ages | 6–11 |
|---|---|
| Activity time | 25 minutes, plus a later observation |
What you need
- One sturdy cardboard sheet about 25 × 35 cm
- Two small opaque objects such as blocks
- Reusable modeling clay if needed to secure objects
- Pencil
- Paper for recording
- A supervised dry outdoor spot
- Blue colored pencil for the second outline
- Optional flashlight for a separate indoor version
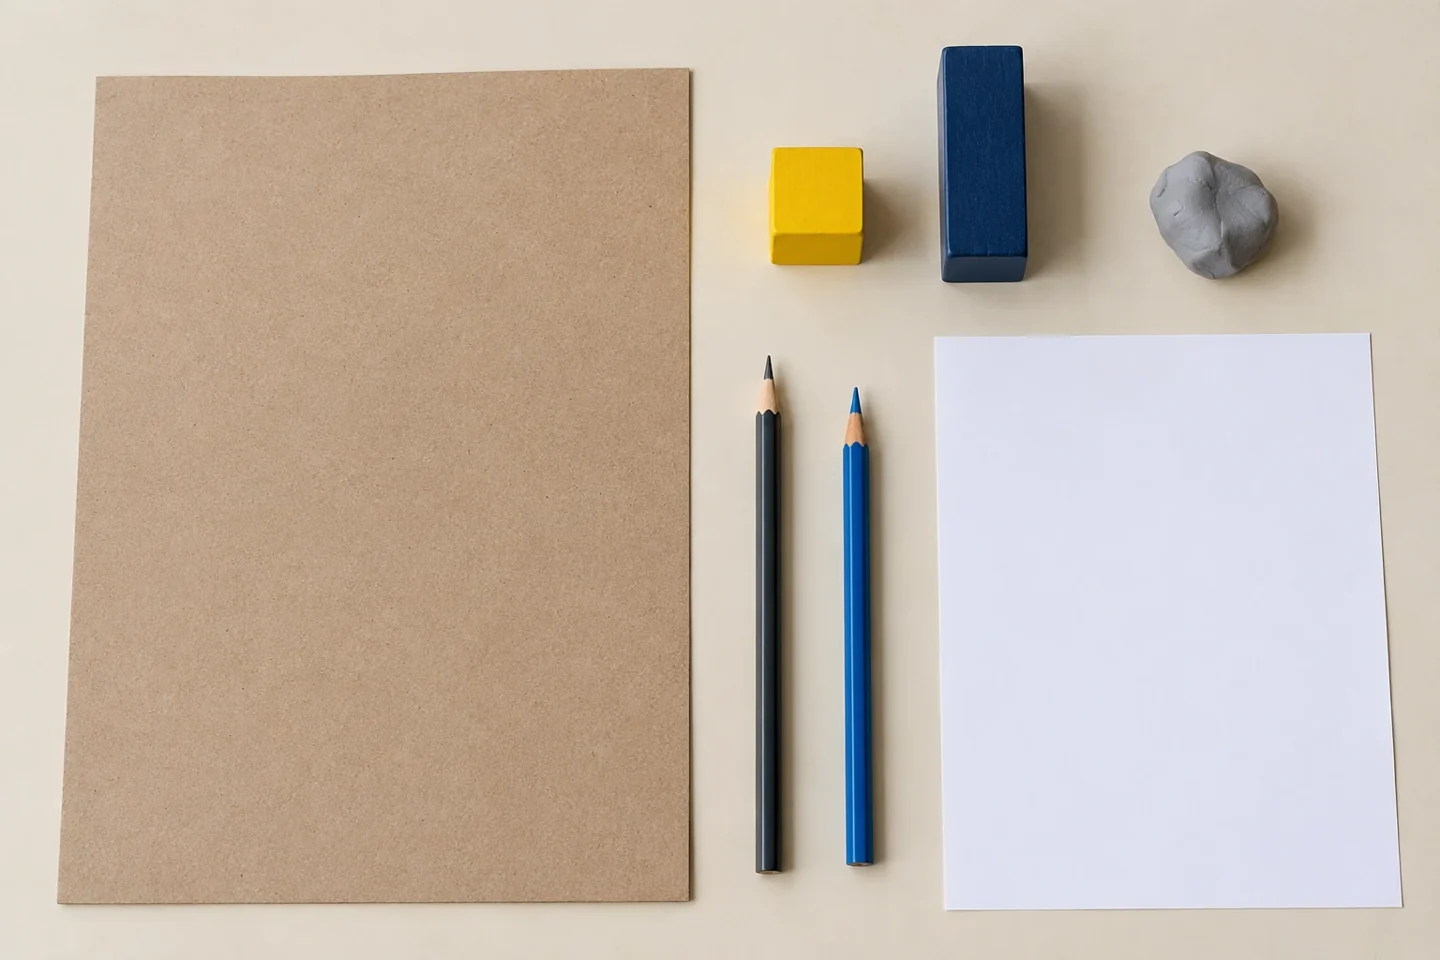
A little project with room for your ideas
Shadows turn a simple cardboard board into a place for noticing change. Children put small objects in fixed positions, trace their shadows, and return later to compare the outlines. There is no need to look at the sun: all observations happen on the board. A pair of ordinary blocks can be enough to start a conversation about light, position, and the difference between a prediction and an observation.
Before you begin
Choose a level dry place where an adult can supervise, away from traffic and water. Do not use lenses, binoculars, or reflective tools. Never look directly at the sun. Observe only the objects and shadows on the ground-level board. If direct sunlight is unavailable, use a flashlight indoors for a different investigation about moving the light source.
Make it step by step
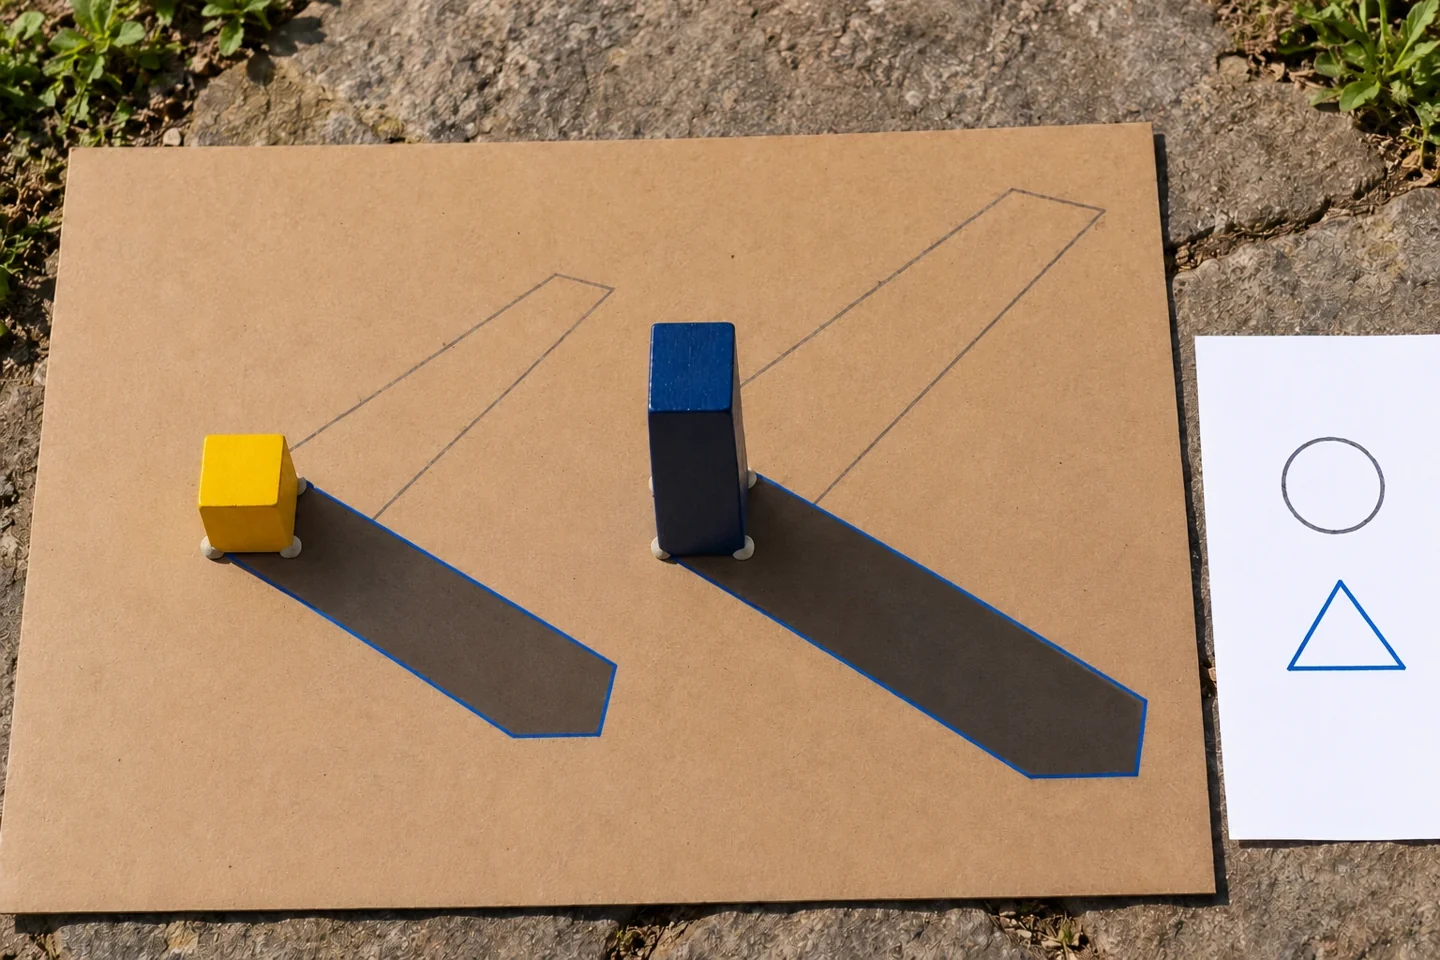
- Arrange the board. Set the cardboard flat and place two small objects several centimeters apart. Choose objects with clear shapes, such as a square block and a short rectangular block. Mark their positions with a light pencil outline so you can replace them accurately if they move. Secure them with a small amount of clay if necessary.
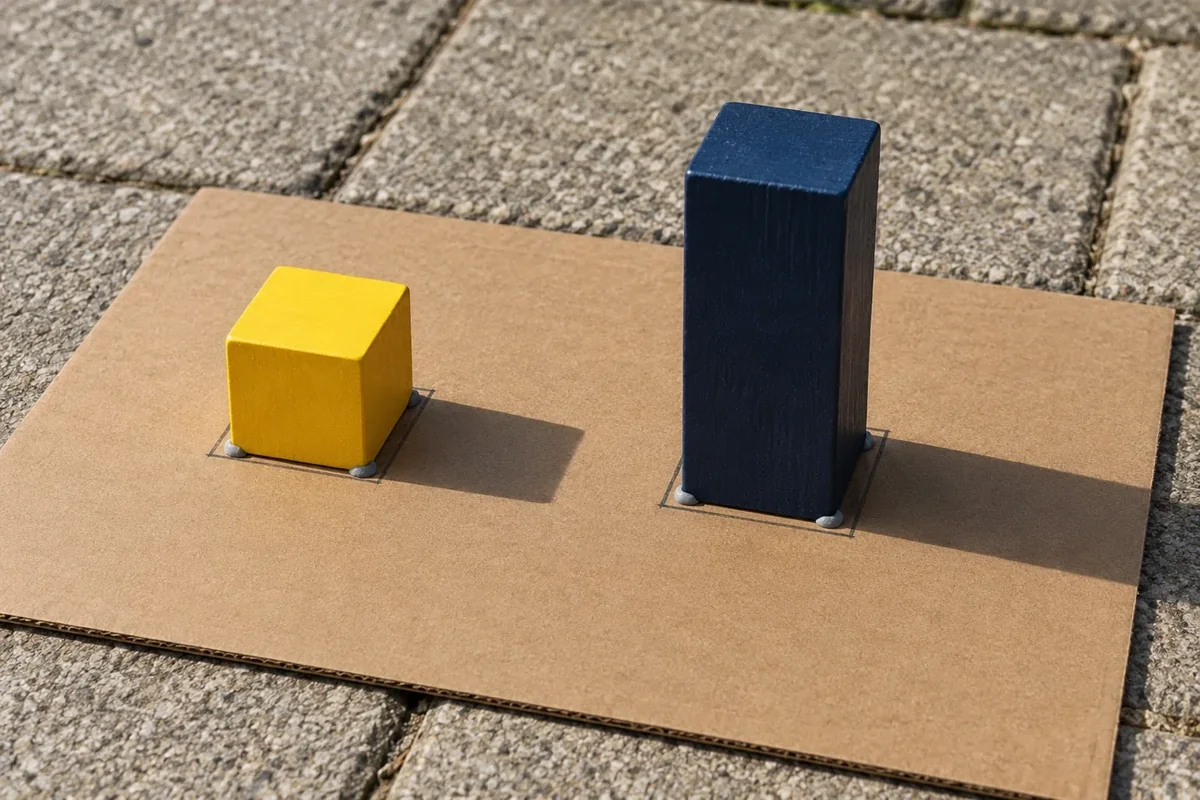
Mark both block footprints so the setup stays fixed between observations. - Notice the first shadows. Look at the dark shapes on the board. Which object makes the longer outline? Point to the edge of a shadow rather than turning toward the light source. Keep hands out of the way while comparing, since your own shadow may cover the objects and change what you can see.
- Trace and record. Trace each shadow lightly with pencil and identify it with a simple mark on your recording sheet. An adult can note the clock time there. Draw the object as well as its shadow so the record is understandable later. Do not claim an exact length unless you actually measure it. Use a small circle beside the first outline and a triangle beside the later outline, and draw the same symbols by their observation times on the recording sheet. This keeps the two visits easy to compare without covering the shadows with labels.
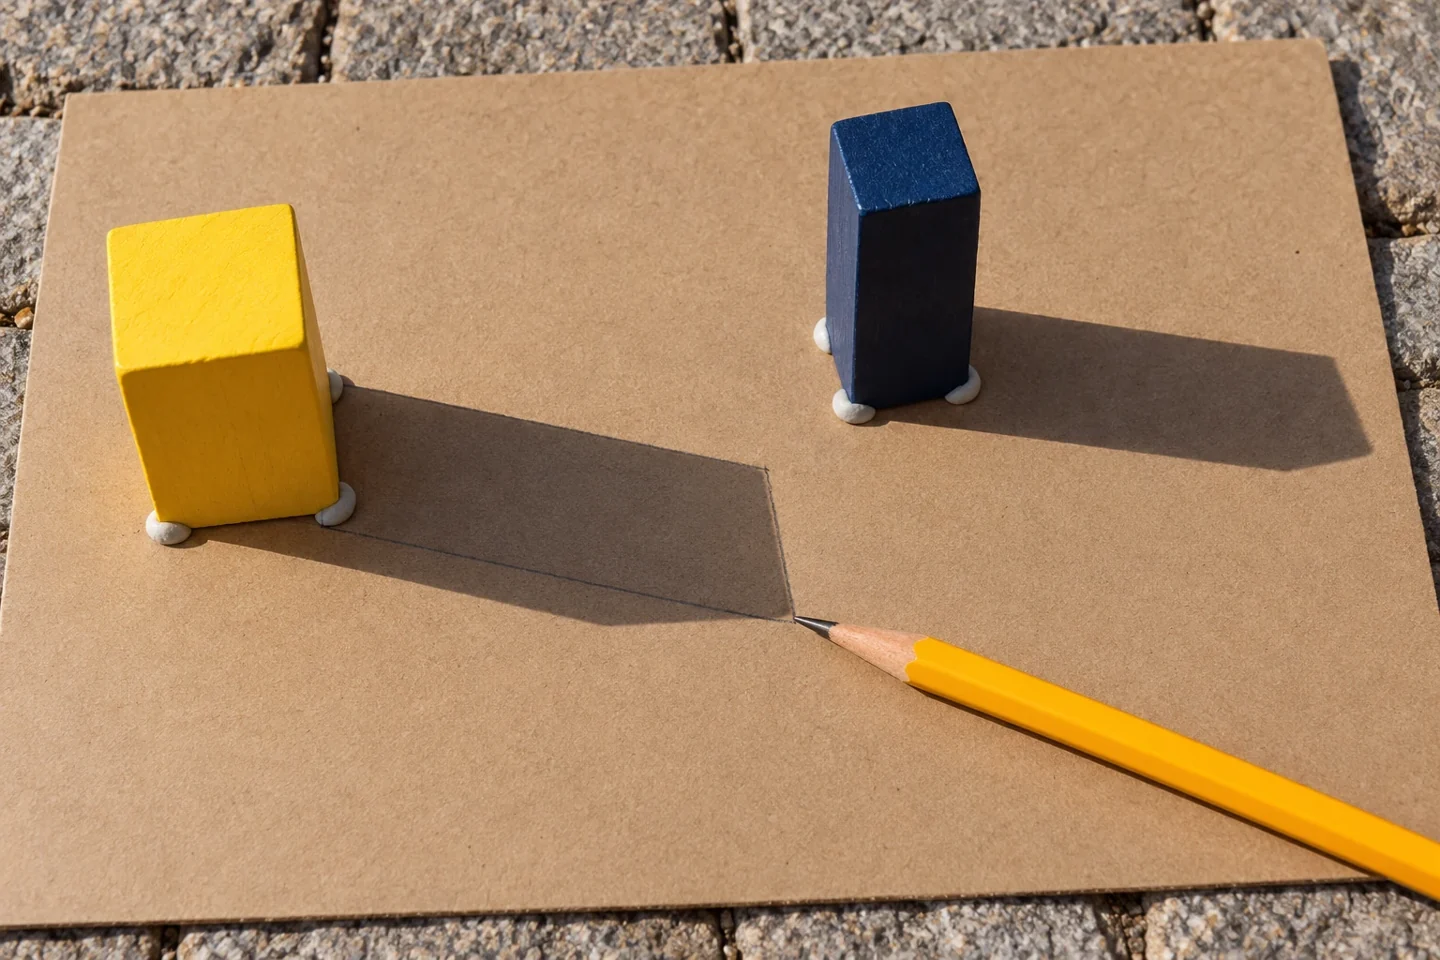
Trace the shadow edge without shifting the block or board. - Return without shifting. Leave the board fixed in place if it can remain safely undisturbed. Return later, perhaps after an hour, and compare the new shadows with the first outlines. If the board moved, restart the comparison rather than treating the changed setup as evidence of a time-related change.
- Compare the outlines. Trace the later shadows using the blue colored pencil. Describe changes in direction and length. The sun’s apparent position changes during the day because Earth rotates; the objects did not have to move for their shadows to shift. Cloud cover may soften or hide a shadow, which is another observation worth recording.
Notice, talk, and explore
Ask, “What did we keep in the same place?” and “What did we notice changing?” Fixed object positions make comparisons more useful. The indoor flashlight version can show how moving a light changes a shadow, but do not combine its results with the outdoor record as though they were the same experiment.
Make it work at home or in class
At home, compare two observation times rather than waiting outdoors continuously. In class, assign a small supervised group to make each record, then discuss the drawings together. Younger children can point and describe while an adult traces. Bring the cardboard indoors after use, remove clay, and return the objects to their usual place.
When a shadow is hard to see
Thin cloud can make the edge fuzzy, and thicker cloud may remove the clear outline altogether. Record that observation rather than drawing an imagined edge. An object with a broad opaque shape generally makes a more visible shadow than a narrow transparent item. Do not move the board to chase sunshine during a timed comparison; moving it changes the setup. Restart at a new fixed position if necessary. For the flashlight alternative, place the light safely on a table and move it between two known positions while keeping the objects still. Compare only those indoor observations with one another.
Cleanup and storage
Bring the board indoors and remove the objects and clay. Return the objects to their usual place, wipe away clay residue, and store the cardboard flat. Clip the observation sheet to the board or keep both drawings in a folder for the next comparison.
Keep the creativity going
Put the two observation drawings side by side after bringing the board indoors. Ask your child to point to one change they can see and one part of the setup that stayed fixed. If they predict what a third observation might show, save the prediction separately so it does not get mistaken for a measured result. Another day’s investigation may produce different shadows because the conditions have changed. Counting, comparing lengths, and describing positions can continue in a suitable math workbook, without needing to repeat the outdoor test immediately. Choose a short activity that suits your child’s confidence and preserves their interest in noticing details.