Christmas
Craft-Stick Christmas Tree Decorations
 Facebook
 Pinterest
 X
X LinkedIn
 Reddit
 WhatsApp
 Telegram
 Bluesky
 Email
Email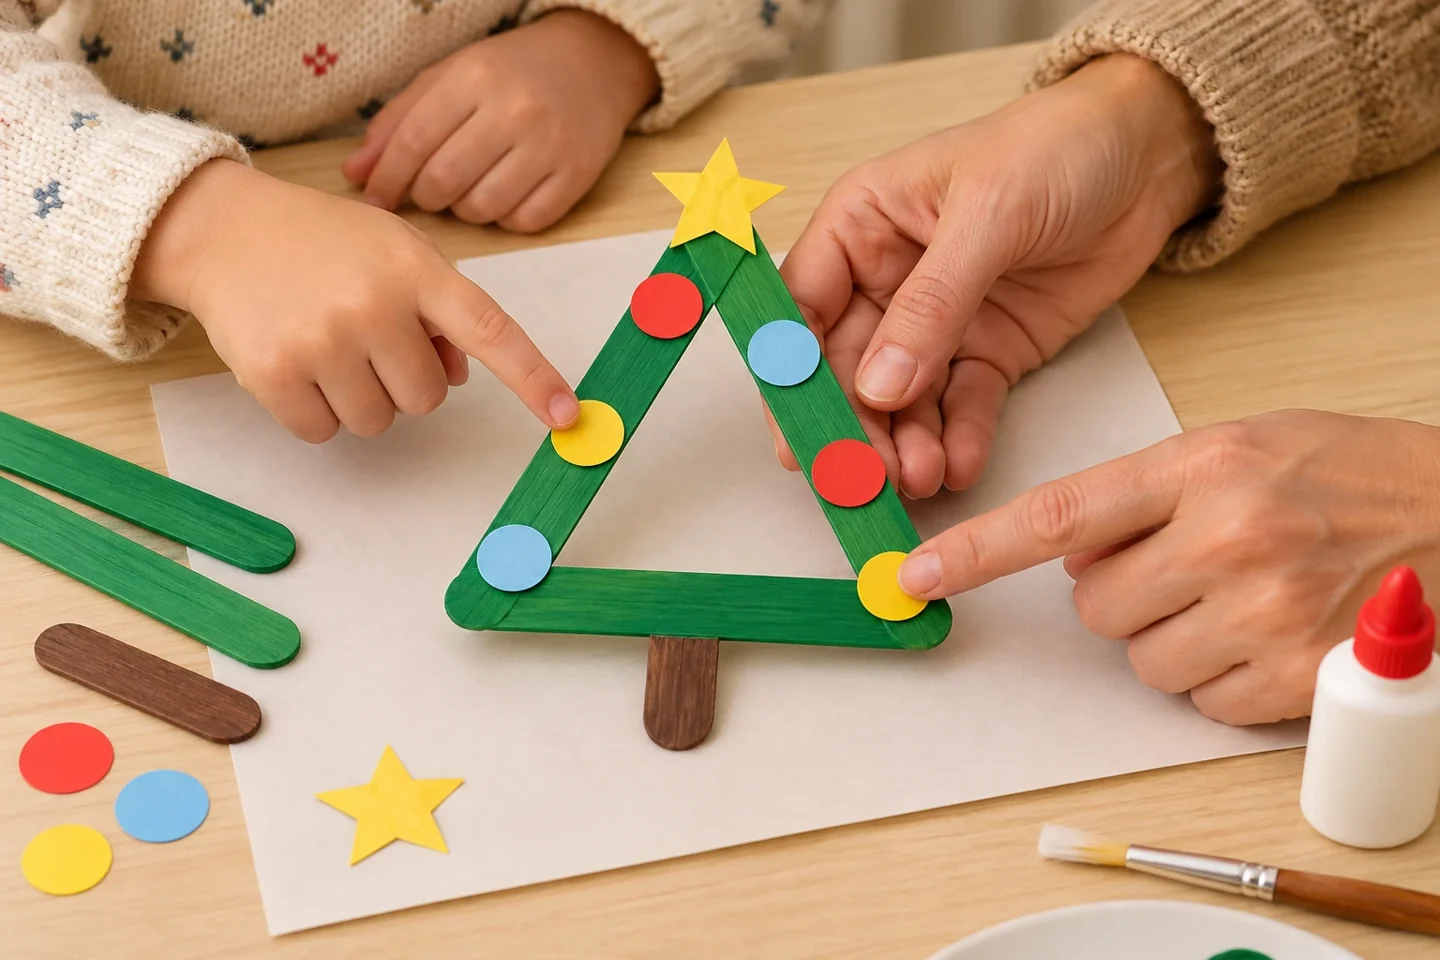
Your activity at a glance
| Suggested ages | 5–9 |
|---|---|
| Activity time | 30–40 minutes plus drying |
What you need
- 3 craft sticks and 1 shorter stick per tree
- Washable paint or markers
- 6 lightweight paper circles and 1 paper star per tree, plus an optional short paper strip for an adult-added hanging loop
- Child-safe craft glue and small brush
- 1 sheet of scrap paper for the drying surface
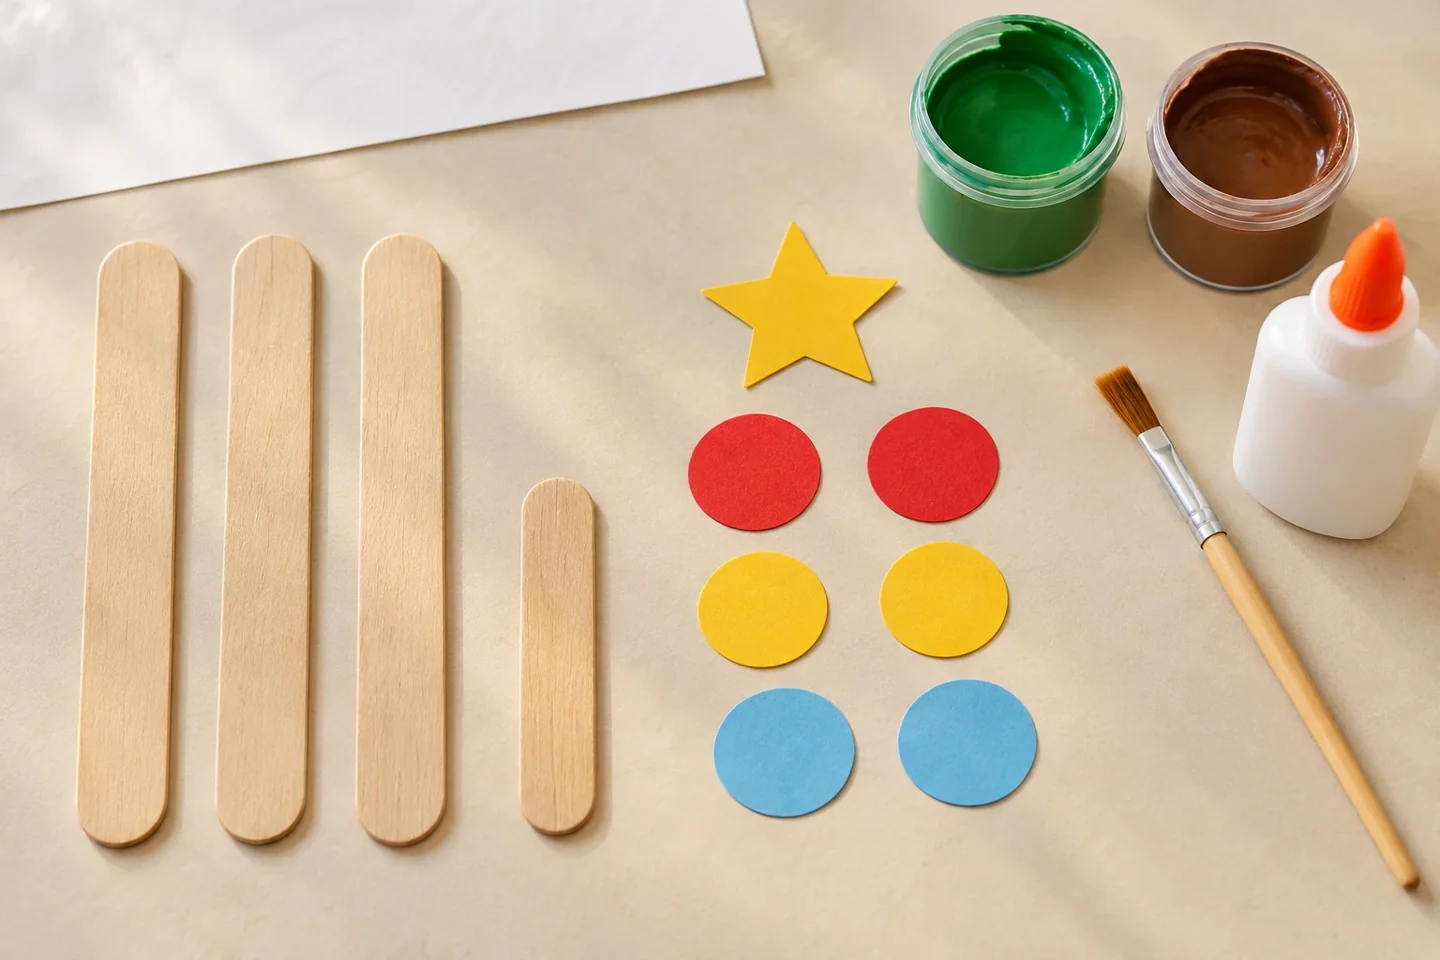
Join a triangle and decorate the edges
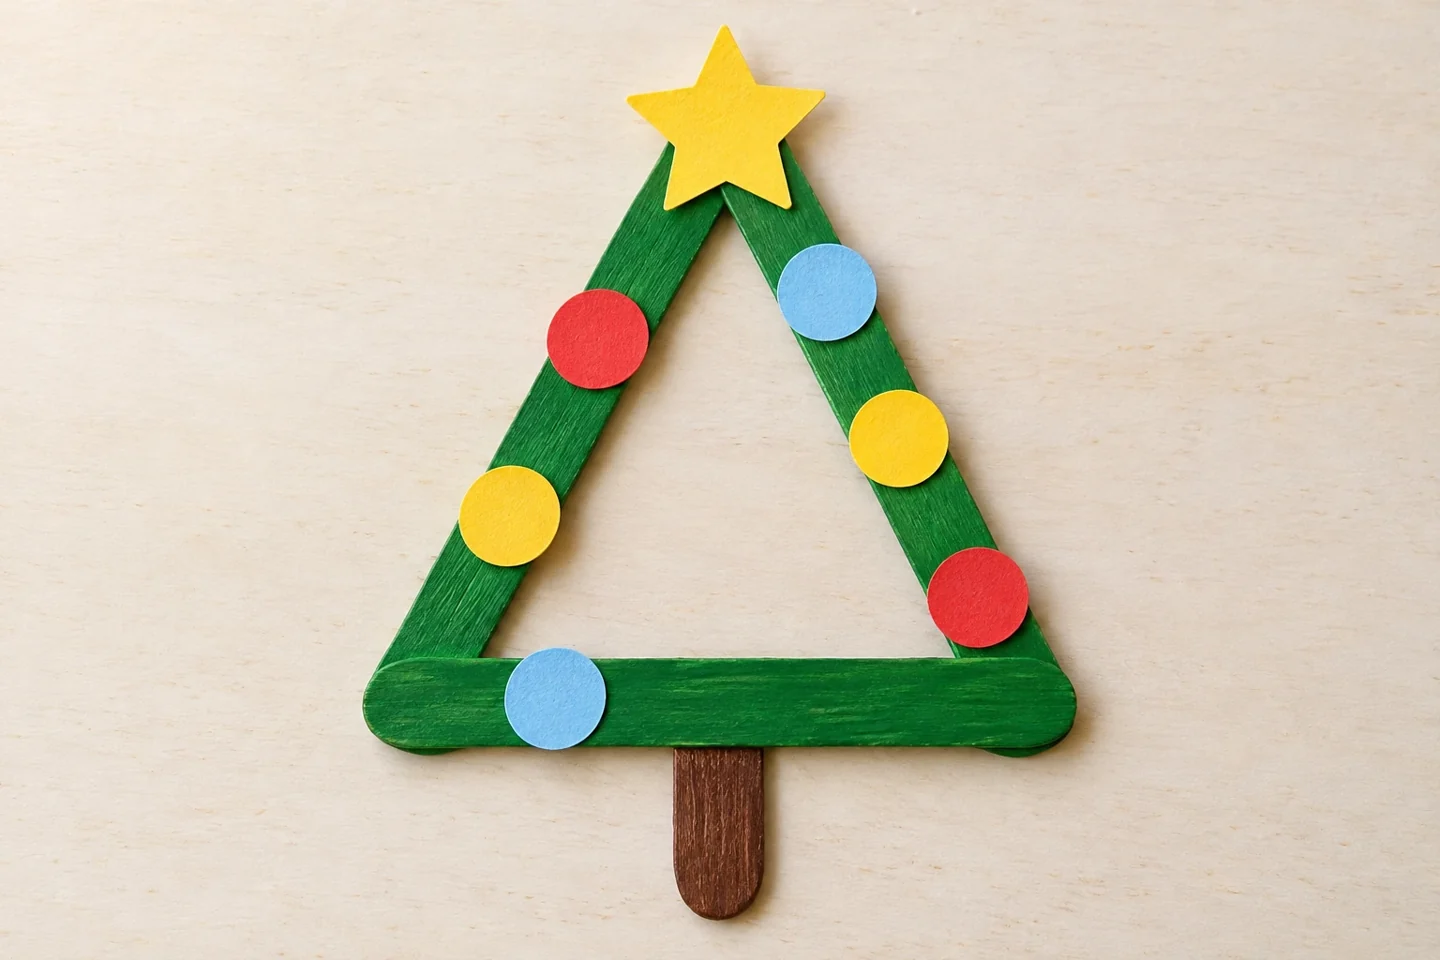
Three craft sticks form the outline of a Christmas tree, with a short fourth piece for the trunk. Children can decorate the triangle with tiny paper ornaments or leave the open center visible. The construction is simple, but waiting for the joints to grip matters. This project works well as a small tabletop decoration or a flat keepsake; adding a hanging loop is an optional adult finishing step.
Before you begin
Set out three equal craft sticks and one ready-made shorter trunk piece for each tree. Check the sticks before coloring and remove splintered ones. Markers allow assembly sooner; painted sticks need to dry first. Make one loose triangle on scrap paper so children can inspect the three overlapping joins before gluing.
Let’s make it, step by step
1. Set out the pieces
Place three equal-length craft sticks and one shorter stick on a covered table. Check for splinters and remove any damaged sticks. Use ready-made short sticks or have an adult prepare a suitable trunk piece rather than asking children to snap wood.
2. Choose a finish
Color the three main sticks green with markers, or paint them lightly with washable paint. Color the trunk brown if desired. Let painted sticks dry before assembly so the joins meet clean wood or fully dry paint instead of sliding through a wet layer.
3. Arrange the triangle
Lay the three sticks into a triangle with their ends overlapping slightly. Put the short trunk beneath the middle of the bottom stick. Try rotating the triangle and compare its corners. Keep the preferred arrangement on the scrap-paper drying surface.
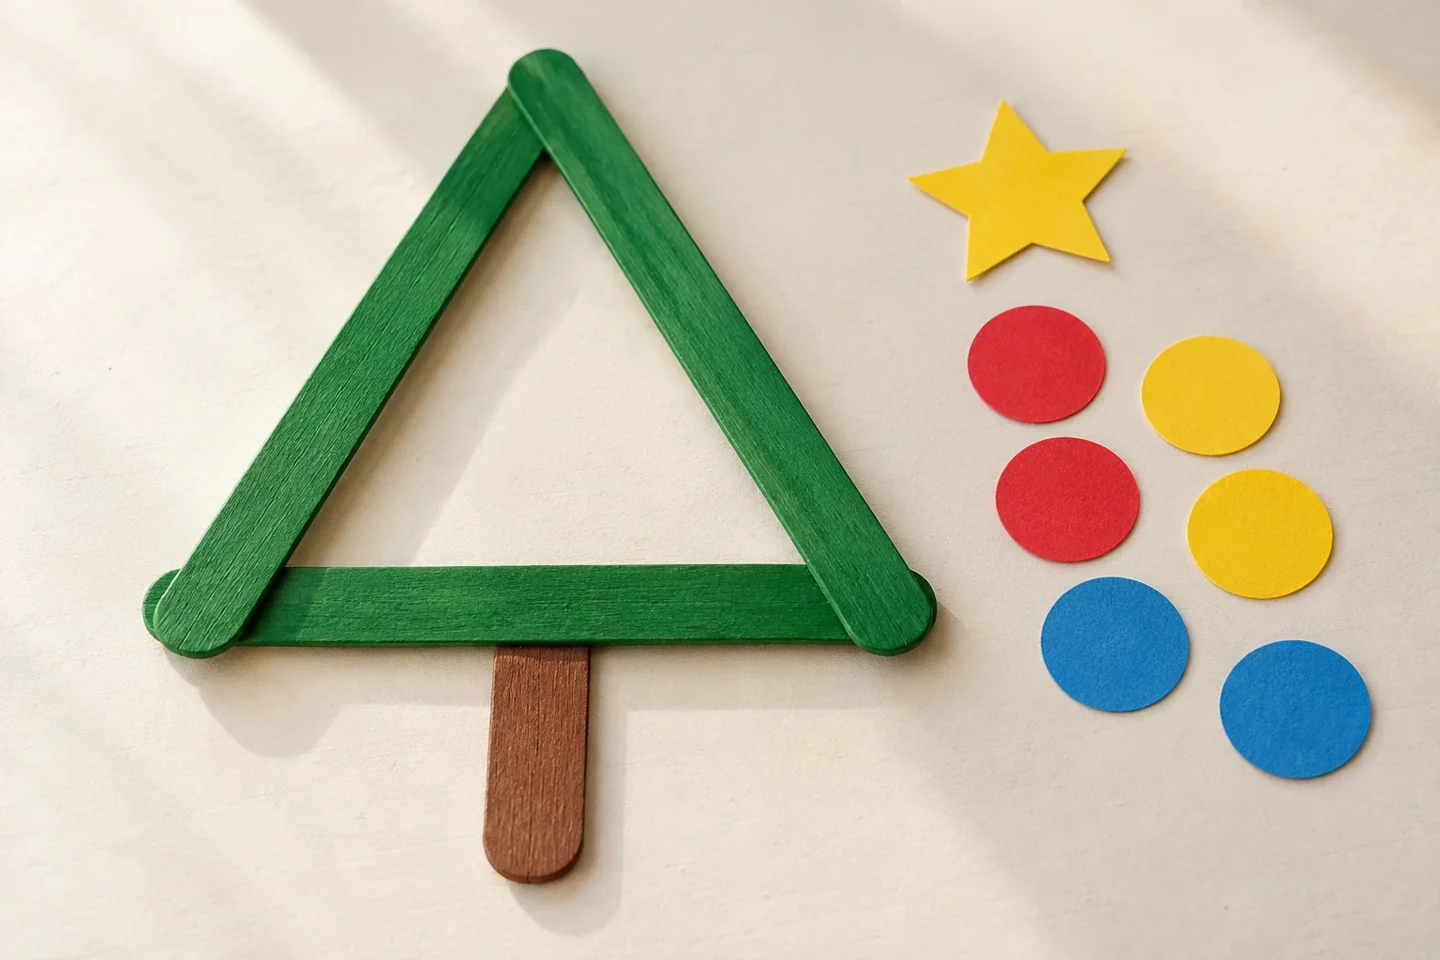
4. Join the first corner
Lift one overlapping end, add a small dot of craft glue, and return it to place. Press gently and hold briefly. Repeat at the other two corners without dragging the whole triangle. Small glue dots are easier to manage than a thick puddle.
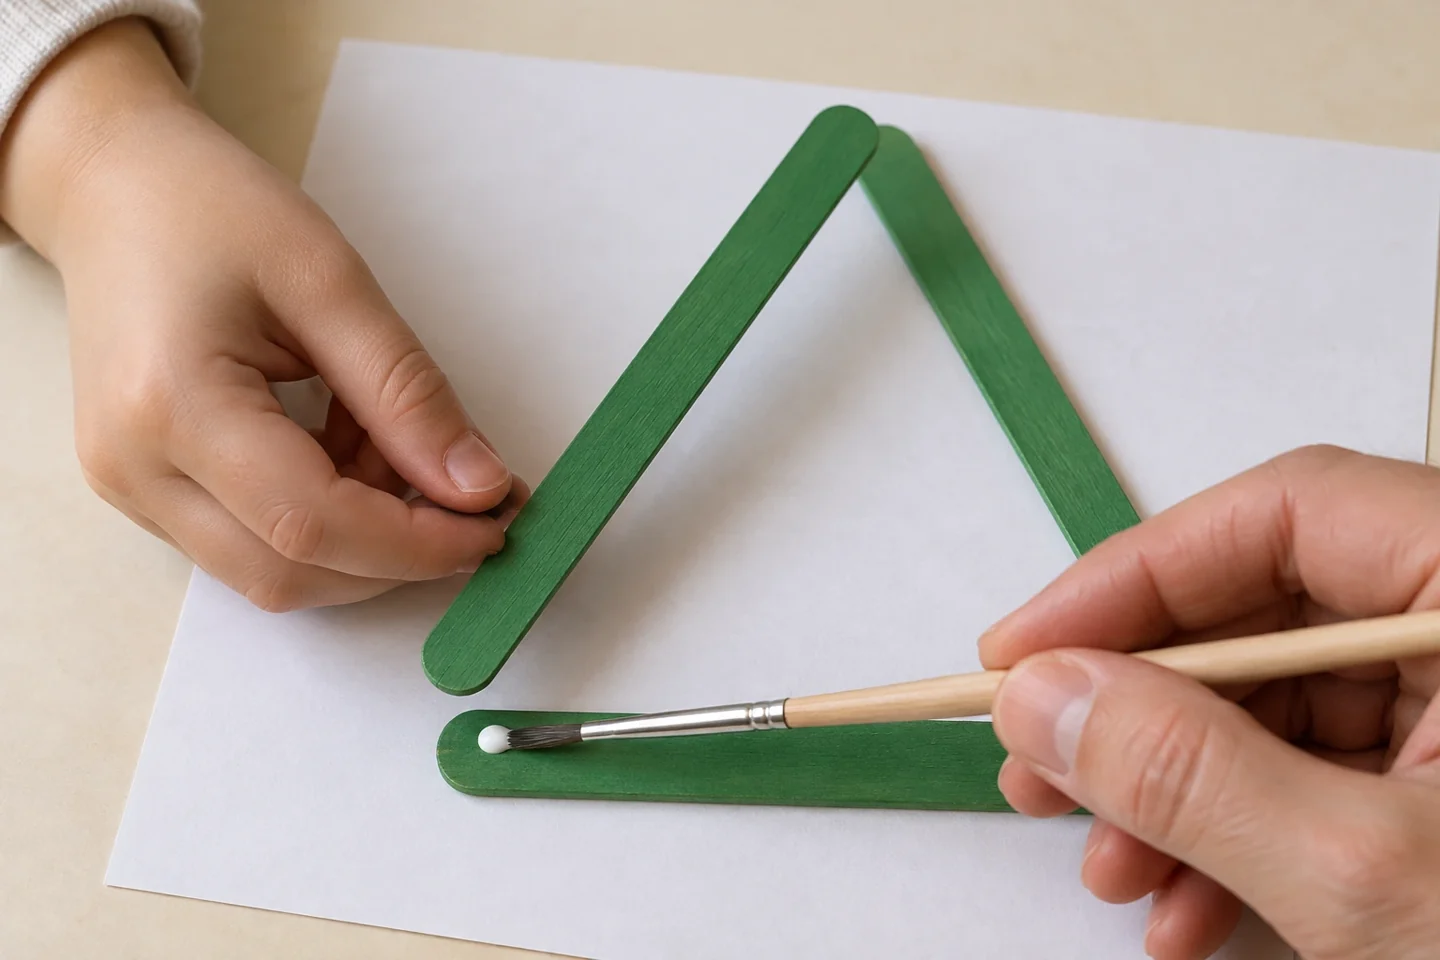
5. Attach the trunk
Glue the upper end of the short stick behind the bottom edge. Check that the visible trunk points down from the center. Leave the structure flat until the glue holds; do not lift it by the star or one corner while the joins are fresh.
6. Plan the decorations
Place lightweight paper circles along the sticks and a star at the top. Decide whether the circles will alternate colors or be freely arranged. Use small amounts of glue so the open triangular center remains visible rather than being covered by heavy additions.
7. Finish and dry
Attach the paper decorations and leave the tree flat for the glue’s recommended drying time. An adult can add a securely glued paper hanging loop on the back after the structure is firm. The loop is for light display, not for swinging the tree.
8. Share or display
Compare finished trees and point to a repeated pattern or a favorite color choice. Display them flat, lean them against a stable backdrop, or hang them with adult help. Place a small name note on the back if they will go home from a group session.
Talk, notice, and learn together
The open triangle makes three sides and three corners easy to see. Ask how the tree changes when the sides overlap more or less, then return to a stable arrangement. Planning paper-circle patterns also gives children a small repeating sequence to explain or extend.
Make it work at home or in a classroom
Younger children can decorate an adult-assembled triangle with larger paper pieces. Older children can compare two differently sized triangles using suitable stick sets. In a class, prepare a separate drying spot for each project and avoid stacking wet trees; coloring and decorating can happen in two short sessions.
Helpful fixes and cleanup
If a joint separates, remove excess damp glue, realign the ends, and add a smaller fresh dot. If paper decorations curl, flatten them gently after drying. Store the trees flat in a shallow box with paper between layers so the wooden corners do not catch on one another.
A useful way to extend the activity
Before gluing, photograph or sketch the triangle arrangement if the child wants to remember their plan. Moving sticks to apply glue can change the overlap at a corner. A small reference helps restore the chosen shape without an adult redesigning it. Keep the star lighter than the wooden structure; a thick stacked decoration can pull on the top joint when the tree hangs.