Fall & Halloween
Cardboard Pumpkin Patch
 Facebook
 Pinterest
 X
X LinkedIn
 Reddit
 WhatsApp
 Telegram
 Bluesky
 Email
Email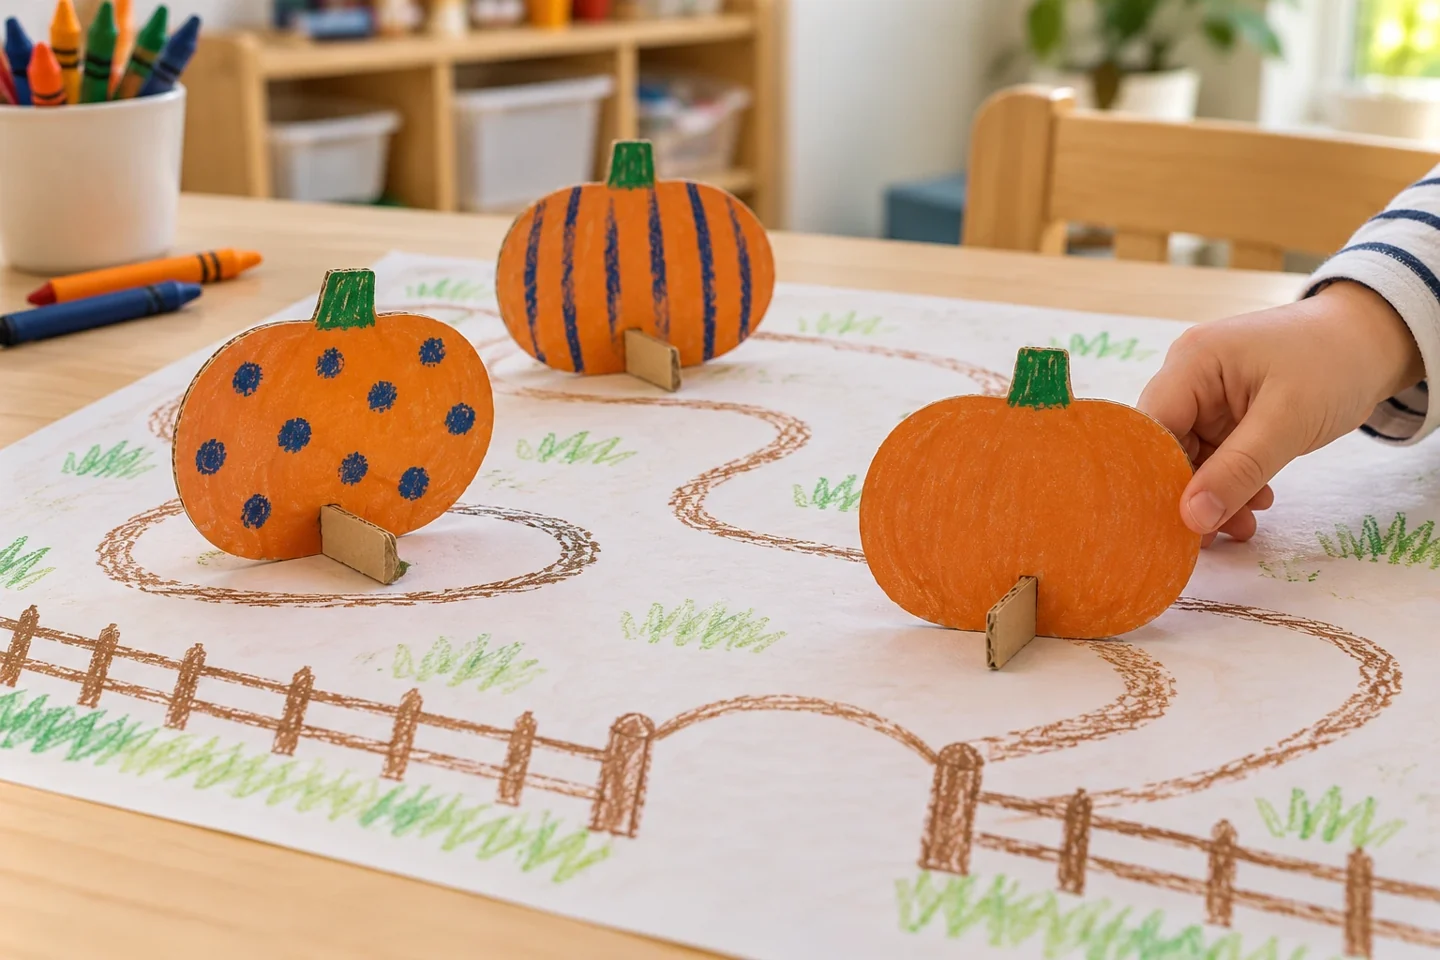
Your activity at a glance
| Suggested ages | 5–10 |
|---|---|
| Activity time | 40 minutes |
What you need
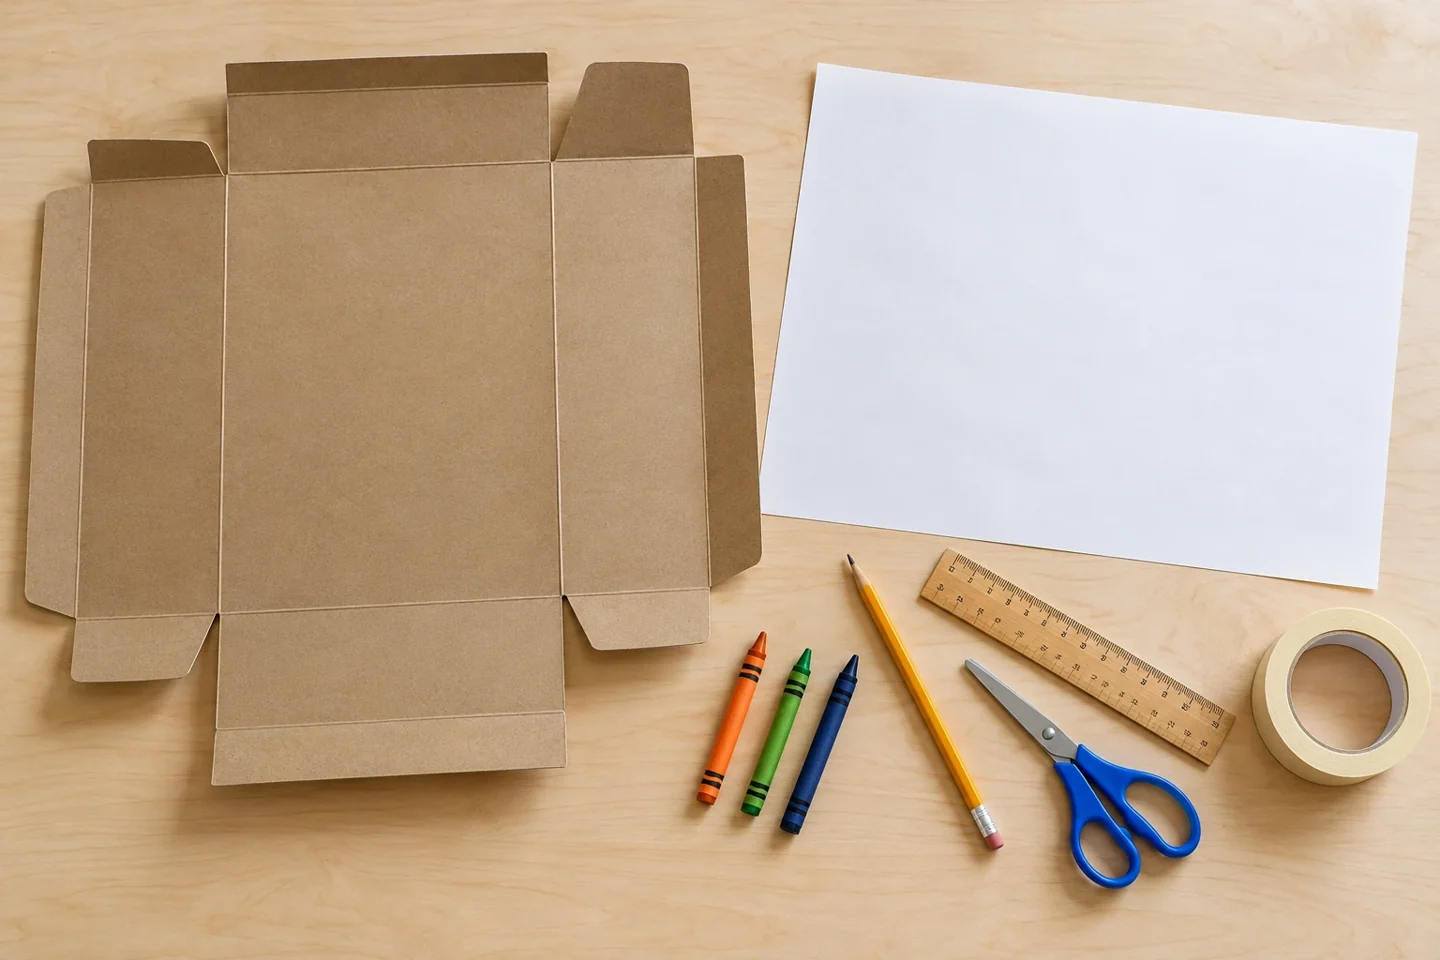
- One clean cereal box or sheet of lightweight packaging cardboard
- three pumpkin outlines about 12 cm wide
- three cardboard bases 8 × 3 cm
- crayons
- scissors
- pencil
- ruler
- masking tape
- one large sheet of paper
A little project with plenty to discover
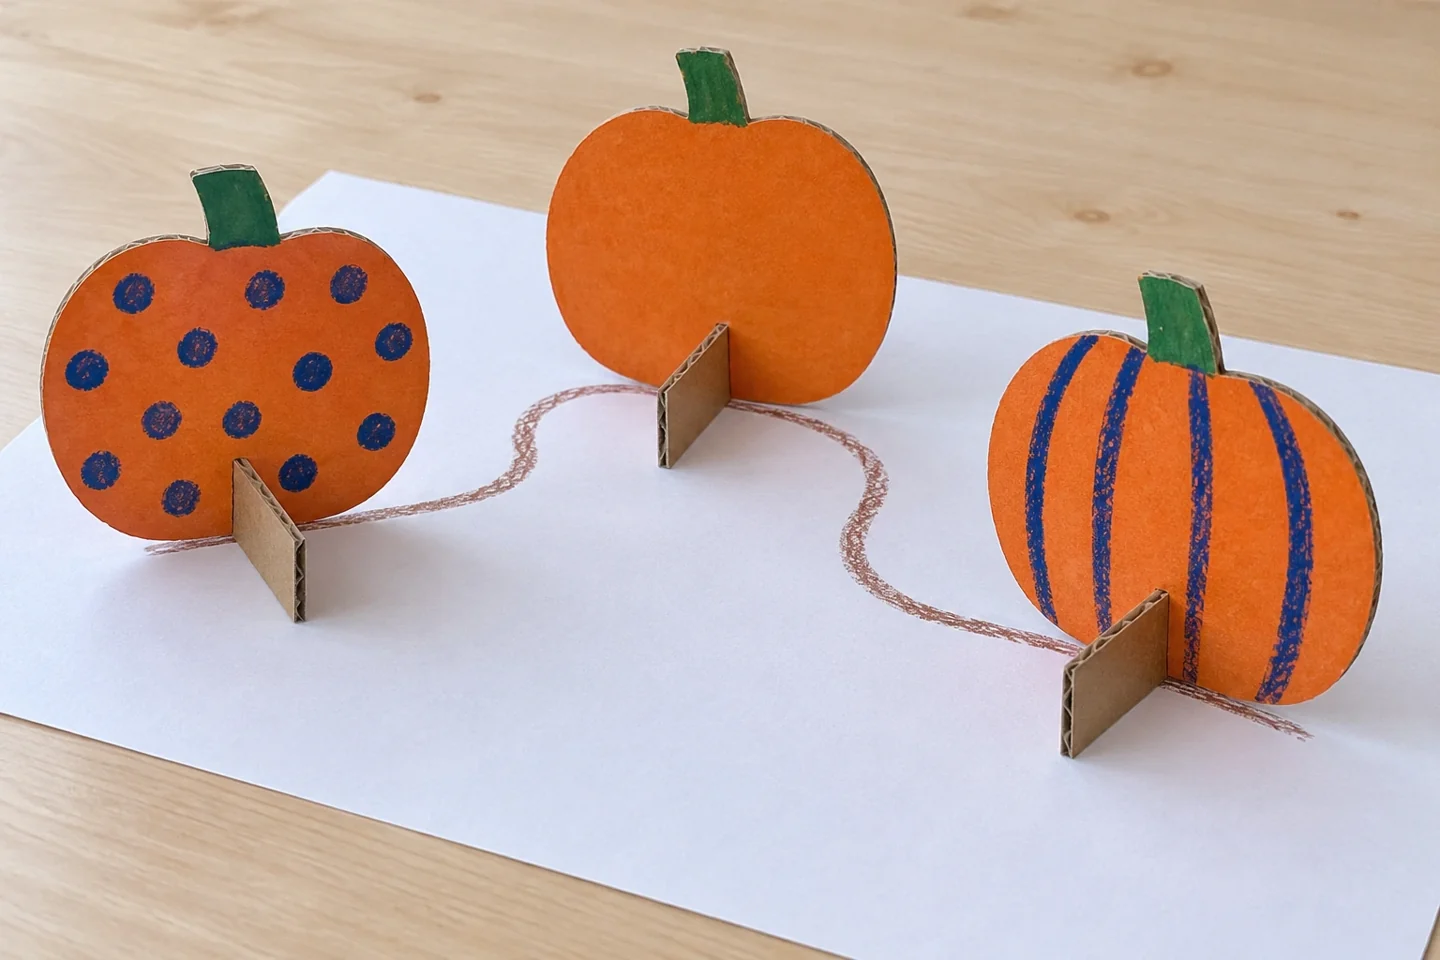
Make a little pumpkin patch with standing cardboard pumpkins, winding paths, and a place for pretend visitors. Children can redesign the layout as their story grows.
Clean cereal-box card is easy to cut and holds a small standing shape. Lightweight packaging cardboard also works for sturdier pieces; an adult prepares any stiff cuts. Open its seams and check the edges before children decorate it. Draw each pumpkin approximately 12 cm wide with a broad lower edge. A narrow neck or long stem makes the silhouette more fragile. Prepare three bases measuring 8 by 3 cm; their crosswise direction is what supports the pumpkins. Keep the large map sheet separate until the stand-up pieces have been tested.
Get the setup right
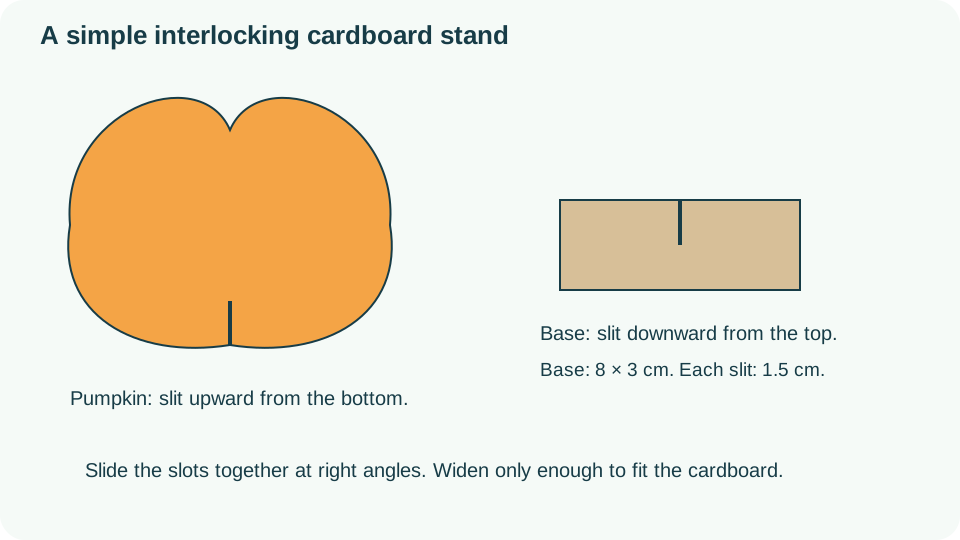
The two slots must approach from opposite edges: upward from the pumpkin bottom and downward from the base top. Begin with a 1.5 cm depth and a narrow cut. Slide the slots together to form a cross when viewed from above. If the pieces stop before their lower edges align, check the opposing slot directions, then deepen a tight cut a little at a time. A slot that is much wider than the cardboard makes a loose joint, so avoid removing a broad rectangle unless the material genuinely needs that space.
Before joining the pieces, lay the base upright with its 8 cm edge along the table and its 3 cm height above it. The slot comes down from the top halfway through that height. The pumpkin’s slot rises from its bottom by the same 1.5 cm. Slide the two cuts together gently; the base should meet the pumpkin at a right angle, with both bottom edges resting on the table. If the pumpkin leans, check that the slots are centered and the base is square before deepening a cut. Deepening already-fitting slots can weaken an otherwise good join.
Make it step by step
- Open the cereal box into a flat sheet, or lay out the packaging cardboard. Draw and cut three broad pumpkins and three rectangular bases; adults handle stiff cardboard.
- Cut a 1.5 cm slit upward at the center bottom of each pumpkin. Cut a matching slit downward from the center top of each base.
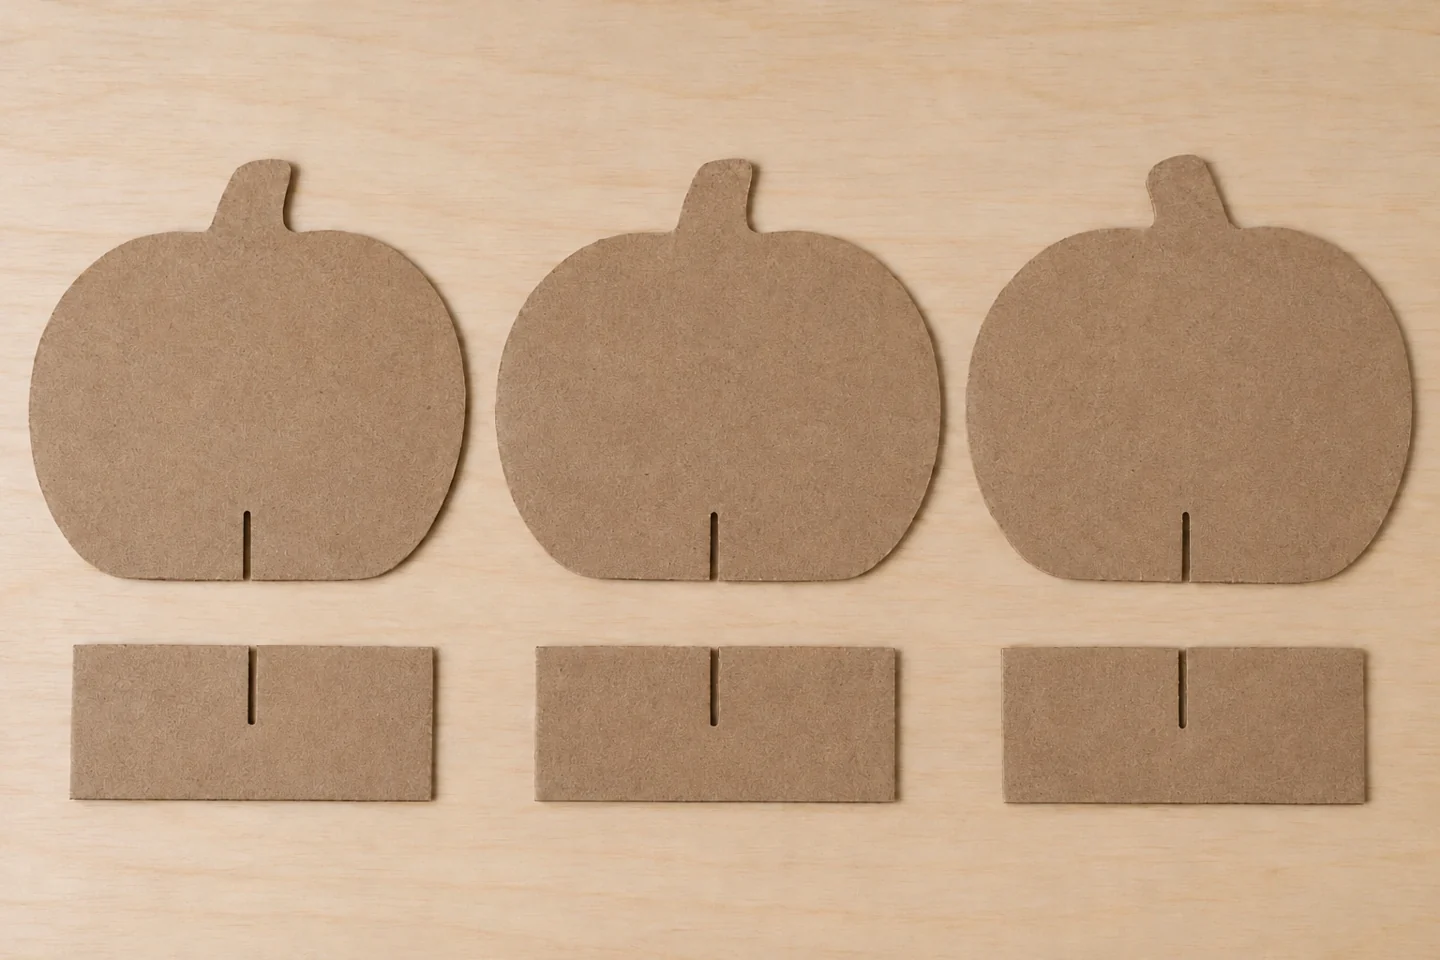
Cut the pumpkin slit upward and the base slit downward so the two pieces can cross. - Color both sides of the pumpkins. Draw stems rather than attaching heavy decorations that would make them tip.
- Slide each pumpkin slit into a base slit until the edges meet. Test its balance and add a small folded tape brace only if needed.
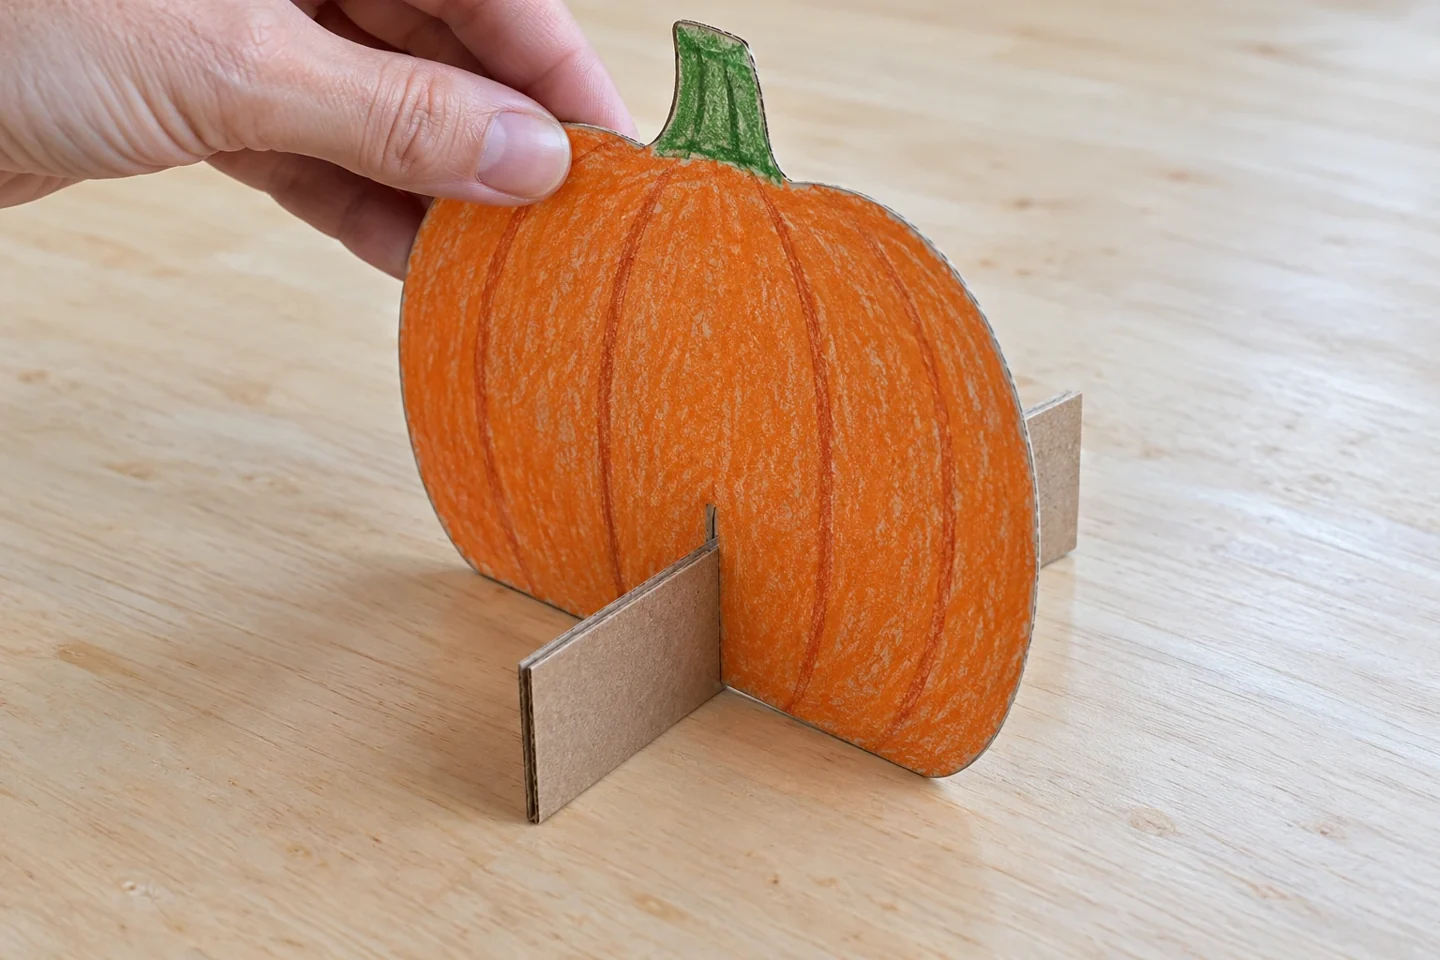
Slide the opposing slits together until the base crosses the pumpkin and both lower edges meet the table. - Place the pumpkins on the large paper. Draw paths, a fence, and an entrance, then tell the story of someone visiting your patch.
Make it work at home or in your classroom
Adults can cut the silhouettes and slots while younger children decorate both sides and choose their locations. A pair of children can divide the jobs into building pumpkins and drawing paths, then exchange roles. For a classroom display, give each group its own paper patch before combining the maps side by side. Older makers can design another broad standing shape, such as a sign or scarecrow, using the same opposing-slot join. Test a plain shape before investing time in a detailed drawing.
Talk, notice, and learn together
Which path reaches every pumpkin? How could you arrange the patch for someone pushing a small cart?
Invite a visitor story after construction: Where would someone enter? Which pumpkin would they choose? What happens if the path ends at a fence? Move the stand-up pieces while the story develops rather than gluing them to the map. Add a paper cart or a drawn picnic place if the child suggests one. Children can count the pumpkins along one route and compare two routes by tracing them with a finger. The map remains a setting for play, not a test of navigation.
Helpful fixes
A pumpkin leans: check that the base meets it at a right angle and both lower edges reach the tabletop. Adjust a shallow slot only when it prevents that alignment. A base bends: use a second layer of cardboard.
Give your pumpkin patch a new story
Add a simple sorting game to the pretend patch. Decorate one pumpkin with dots, another with stripes, and another with plain orange; then ask a visitor to find a pumpkin described by one feature. If you make additional pumpkins, change size as well and give two clues, such as small and striped. Keep the decorations flat so the slotted bases still balance. Children can draw a little order card for a pretend customer and move the selected pumpkin to an exit area. Return every pumpkin afterward so the map remains reusable and the next story can begin with a new arrangement.
Finish display and clean up
Store the map flat and remove the pumpkins from their bases before packing. Keeping the small bases in a separate envelope makes the next setup easier. Leave each pumpkin upright until any glue decorations have dried, then stack the silhouettes without crushing raised pieces. Reuse cardboard scraps for signs, gates, or repair braces. Before the next play session, check the slots for splits and reinforce a worn edge with a small tape piece, trimming only if the slot becomes blocked.