Fall & Halloween
Fall Leaf Window Art
 Facebook
 Pinterest
 X
X LinkedIn
 Reddit
 WhatsApp
 Telegram
 Bluesky
 Email
Email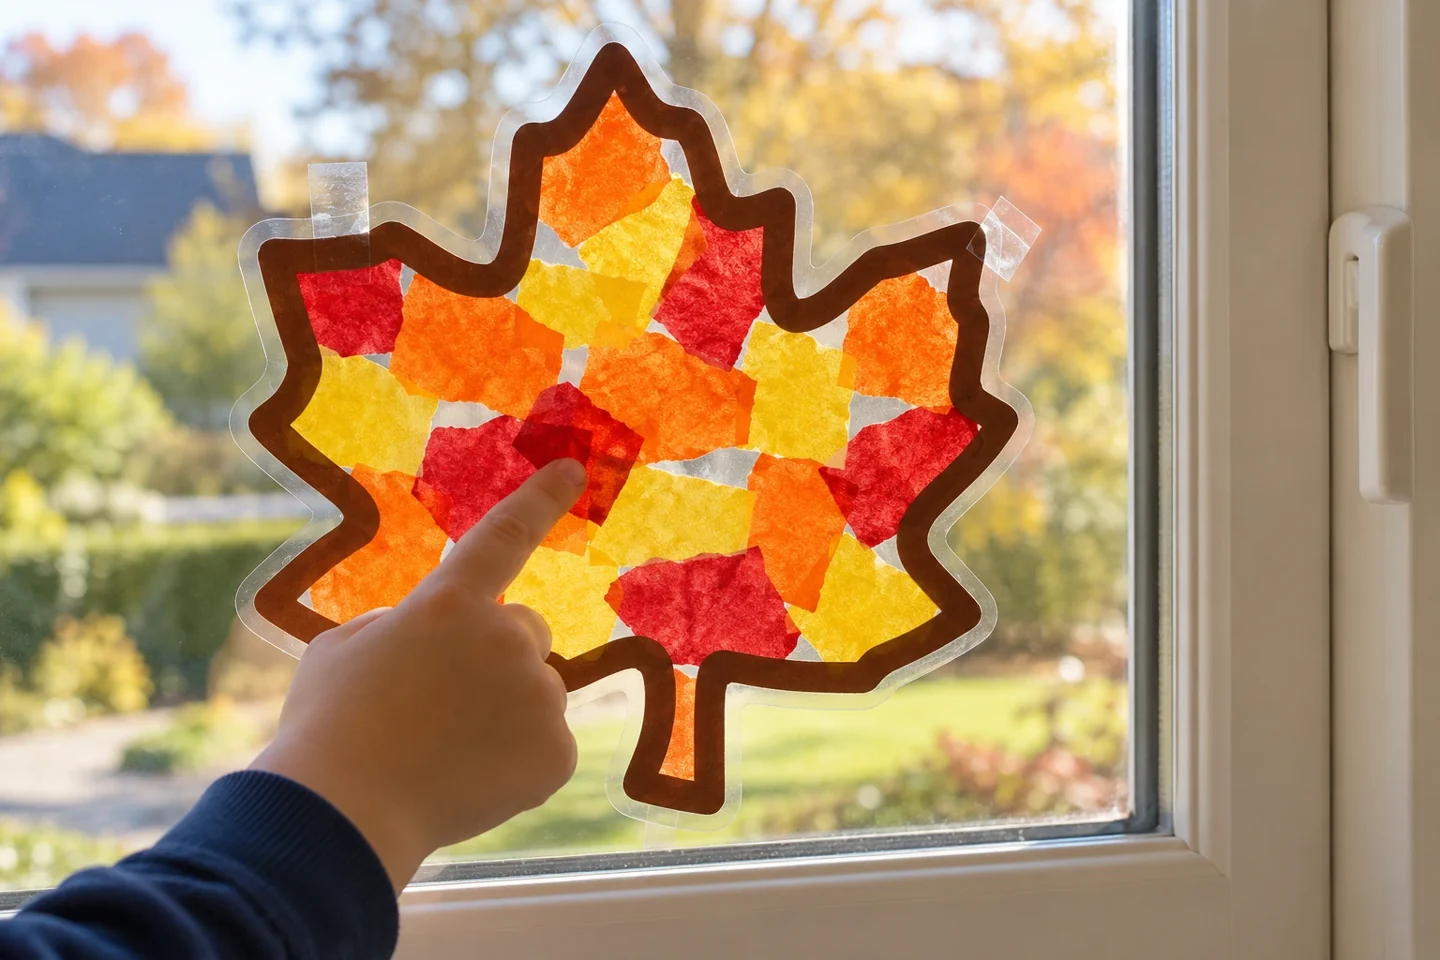
Your activity at a glance
| Suggested ages | 4–9 |
|---|---|
| Activity time | 25 minutes |
What you need
- One 15 cm paper leaf outline with a 2 cm border
- two 20 × 25 cm sheets of clear adhesive film
- fifteen torn tissue-paper pieces in orange, yellow, and red
- scissors
- removable window tape
- Optional shallow tray for keeping tissue pieces together
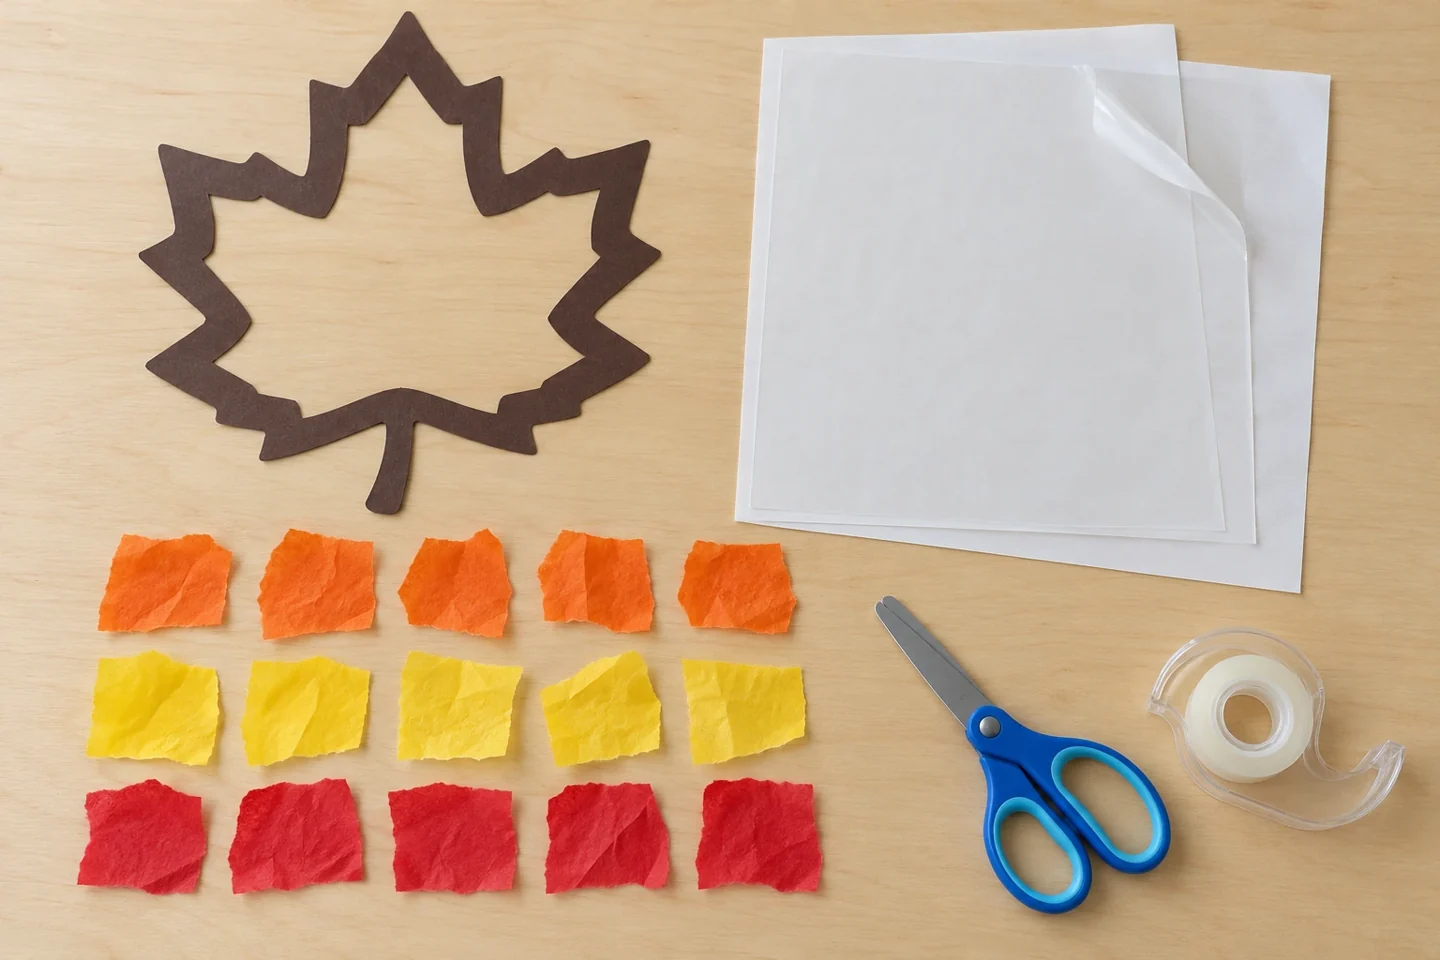
A little project with plenty to discover
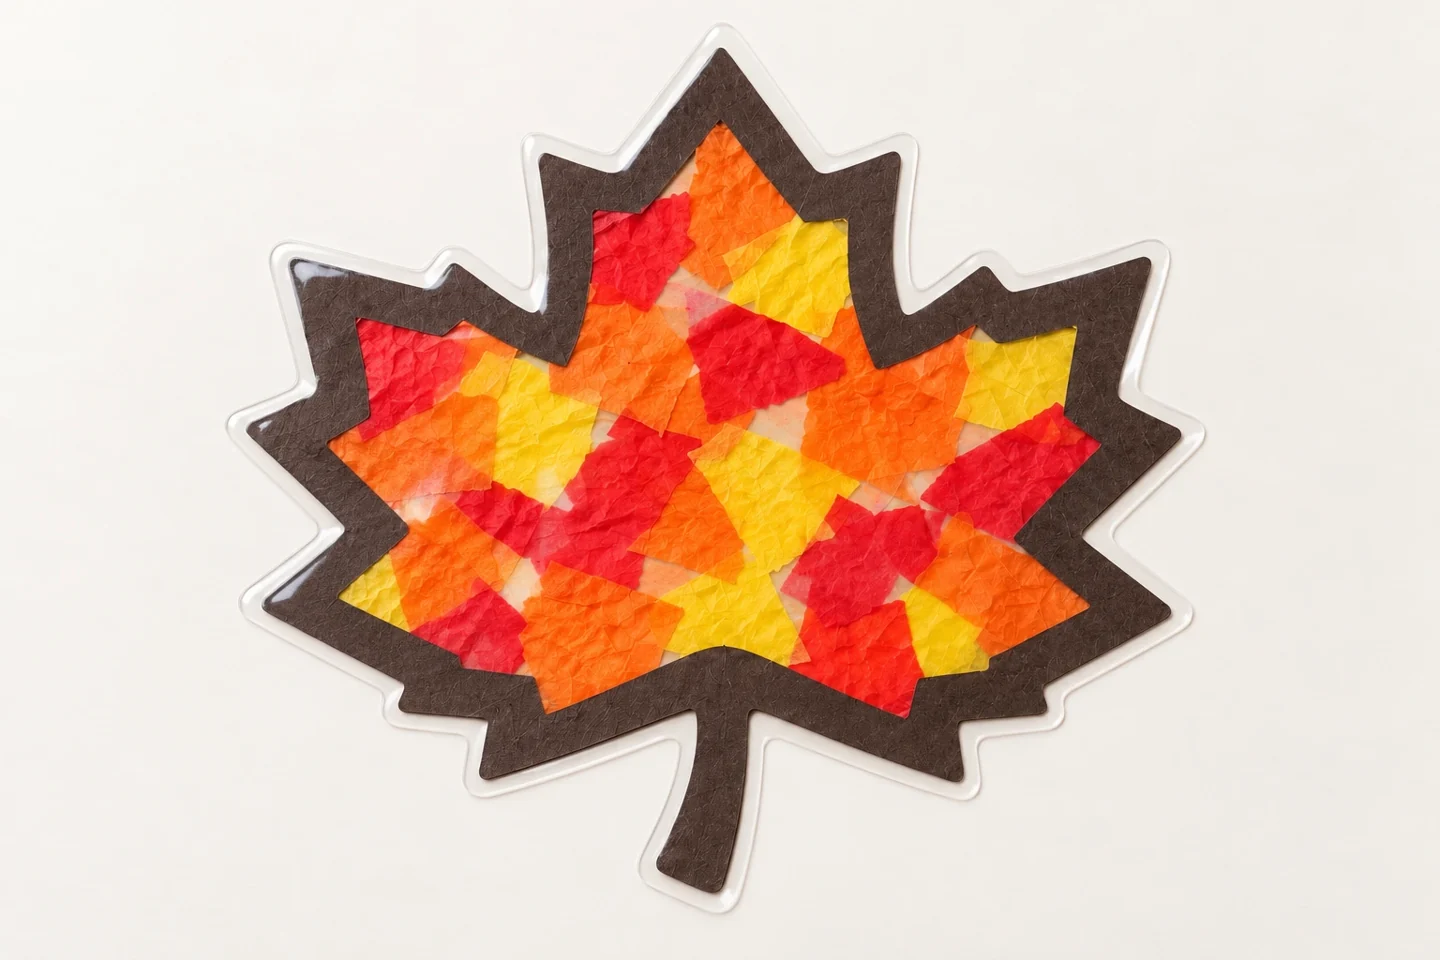
Tiny patches of translucent color become a glowing leaf when daylight passes through them. Children can choose a scattered mosaic or group colors into distinct sections.
The leaf border gives children a visible area to fill and helps the finished piece keep its shape. Make the outline approximately 15 cm wide and leave a border about 2 cm wide so it does not tear when lifted. Use ordinary tissue paper rather than opaque construction paper for the colored middle. Tear the pieces into sizes children can pick up comfortably. On a first attempt, fifteen pieces in three colors are enough; a large heap encourages unnecessary layering and hides the light.
Get the setup right
Peel the first film backing slowly and keep the sticky surface facing up. Tape the outer corners down to prevent the sheet from following a hand across the table. Place the border once before adding tissue: lifting it repeatedly can stretch the film and weaken the paper. Children can lay pieces with clear spaces between them, then deliberately overlap two colors in one small area. Smooth the top sealing sheet from one edge to the other, leaving the adult to trim the outside margin.
Cut the tissue pieces about 3–4 cm across so fifteen pieces can fill much of the leaf without needing a thick pile. Use the removable tape to anchor the first film’s outer corners as well as for the final display. When sealing, peel only a narrow strip of backing from the second sheet at first. Line up that exposed edge with the bottom sheet, then peel and smooth gradually across the leaf. This gives little hands a clear stopping point and reduces trapped folds. Trim with roughly 5 mm of clear film outside the paper border so the two sheets stay sealed.
Make it step by step
- An adult cuts the center from a paper leaf shape, leaving a continuous border. Place the first film sticky-side up and anchor its corners to the table.
- Lay the paper outline on the sticky film. Keep the whole border within the film edges so it will seal cleanly.
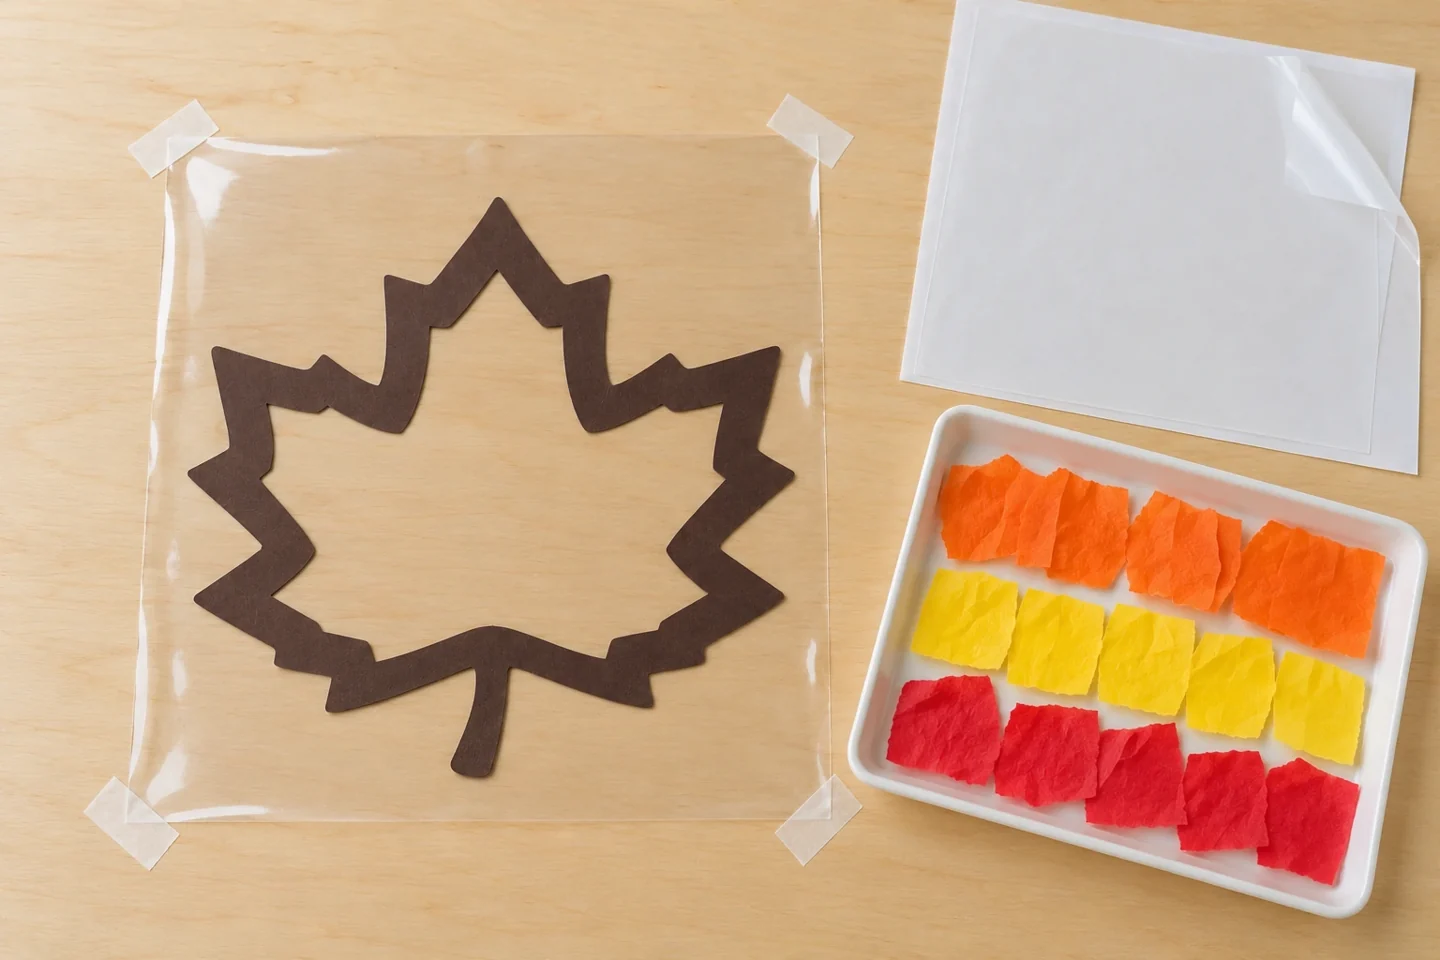
Anchor the first sheet sticky-side up, then place the empty border before adding tissue. - Place tissue pieces inside the leaf. Leave a few small clear gaps and overlap some pieces to compare the resulting color.
- Lower the second film over the first from one edge, smoothing as you go. An adult trims around the leaf, leaving a small sealed margin.
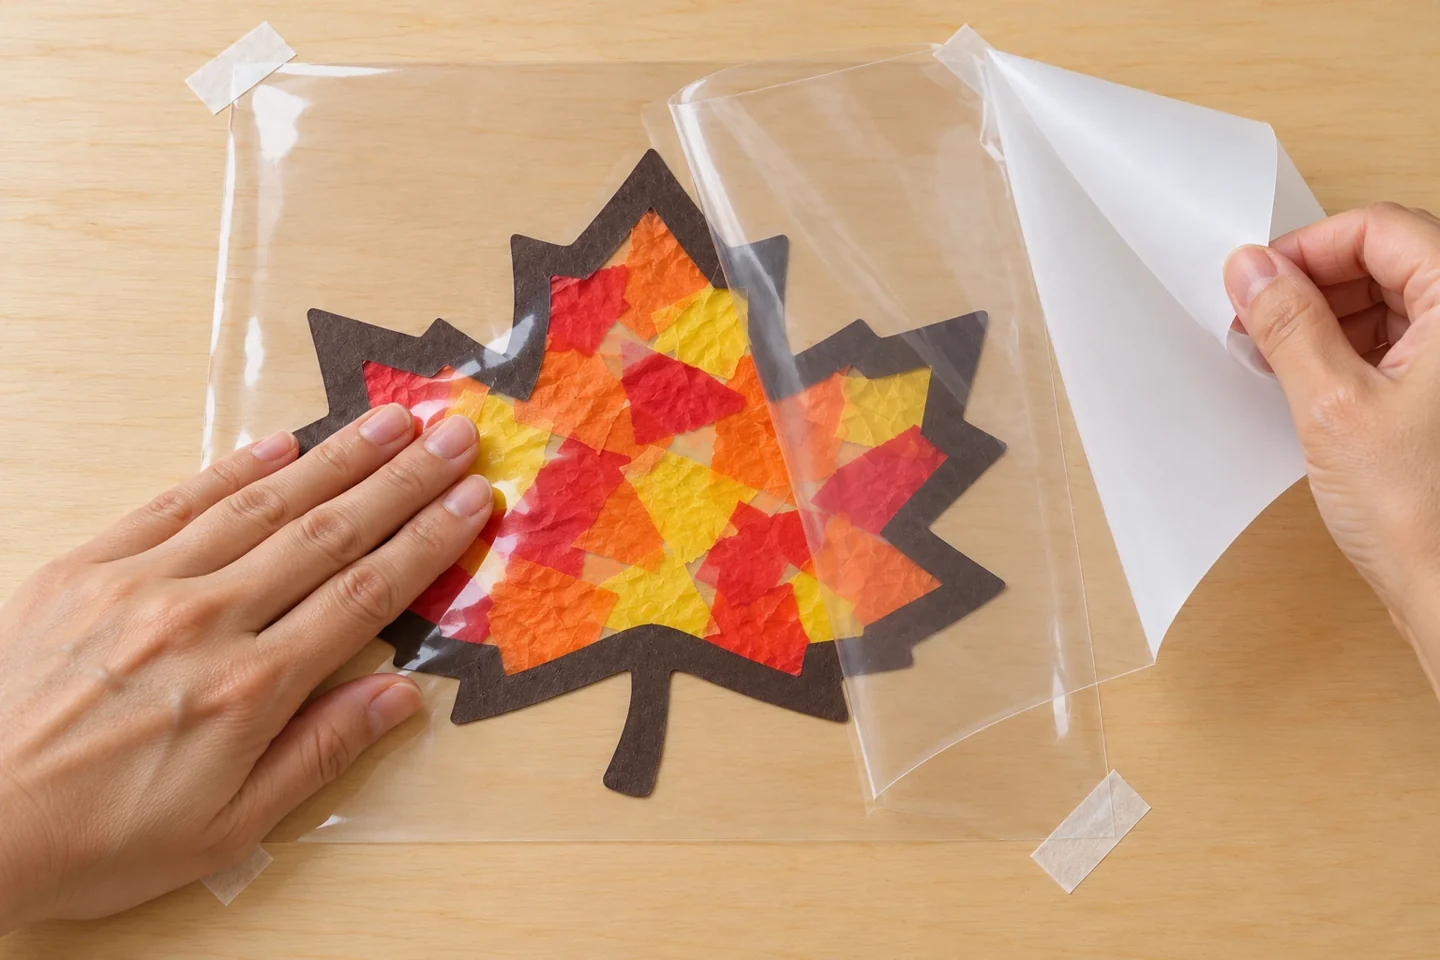
Peel and smooth a little at a time so the second sheet seals without large folds. - Attach the leaf to a window with removable tape. Look at it in daylight and again against the tabletop to compare its appearance.
Make it work at home or in your classroom
A young maker can tear tissue and place pieces while an adult handles the sticky sheets. Provide larger pieces if picking up tissue is frustrating, or use a shallow tray to stop it floating away. In a classroom, prepare the film-and-border bases before the station opens and seal each finished piece as children complete it. Older children can draw their own outline and predict how a narrow or wide border changes the available space. Both sparse and full mosaics can make attractive windows.
Talk, notice, and learn together
Which colors overlap? Where does the light shine through most clearly?
Compare the leaf on the tabletop and at the window. Ask which sections appear brighter, and look closely at one overlap where the tissue is thicker. This observation is about what the materials do with light, not a lesson on natural leaf chemistry. Make a small separate film square with one, two, and three layers of the same tissue color if children want a clearer comparison. Hold it near the leaf and describe the differences using words such as lighter, darker, clear, and cloudy.
Helpful fixes
Film wrinkles: smooth from the middle outward and accept small creases as texture. The leaf looks dark: use fewer overlapping tissue layers.
Compare two leaf designs
Create a second leaf using mostly one color and compare it with the three-color mosaic. Keep the outline size and tissue-piece sizes similar so the arrangement is the main change. Children might make a warm orange center with yellow edges or a scattered red pattern with plenty of clear gaps. Ask them to hold both leaves against the same window rather than comparing one in bright sunlight with one in shade. They can draw a small picture of their favorite arrangement before placing it in the film, then compare the plan with the actual result. Changes made during construction are worth discussing too.
Finish display and clean up
Choose a window spot with adult help and use removable tape suitable for that surface. Do not cover handles or place the display where someone must climb to reach it. The film can collect fingerprints, so handle the sealed margin where possible. Keep leftover tissue in a dry envelope and discard the peeled backing, which can slip underfoot. When removing the display, peel tape slowly; save the leaf flat if it will be reused rather than bending its border.