Fall & Halloween
Friendly Monster Bookmarks
 Facebook
 Pinterest
 X
X LinkedIn
 Reddit
 WhatsApp
 Telegram
 Bluesky
 Email
Email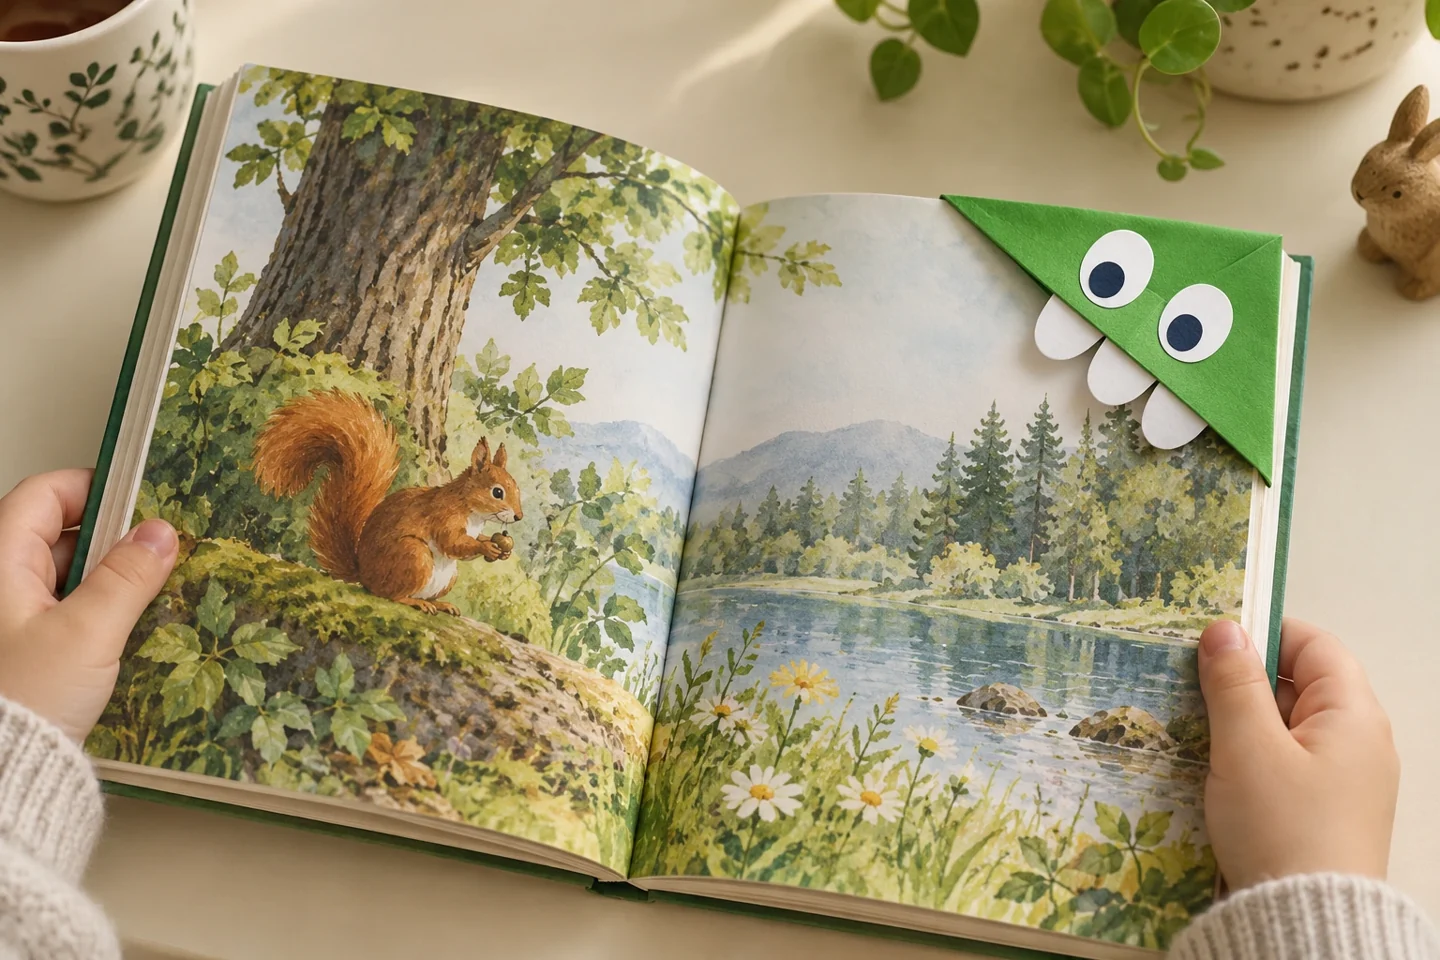
Your activity at a glance
| Suggested ages | 7–11 |
|---|---|
| Activity time | 25 minutes |
What you need
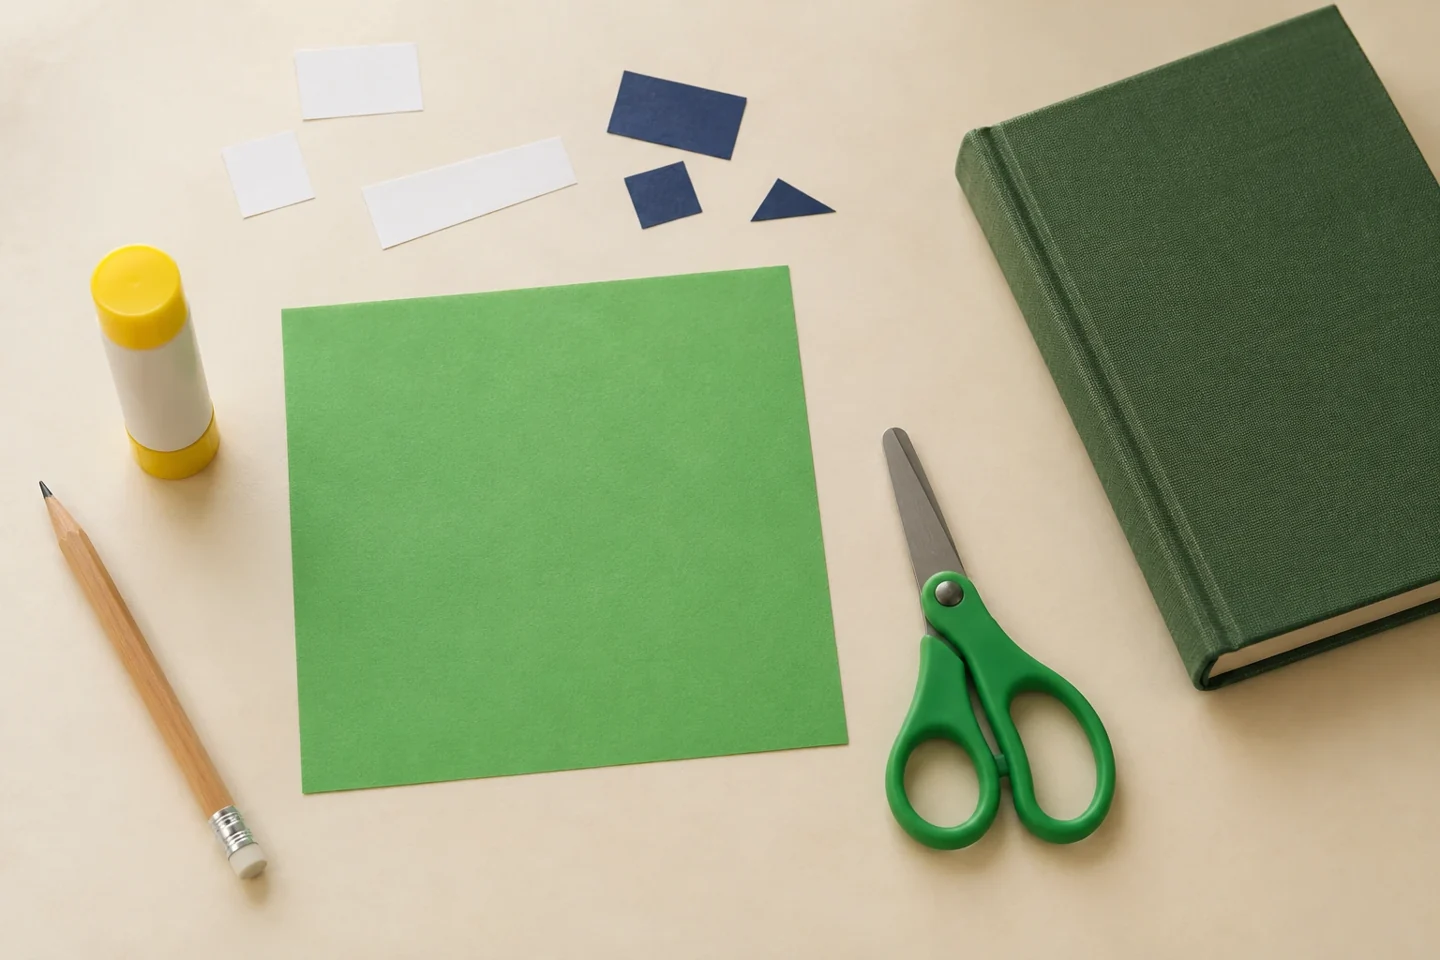
- One 15 × 15 cm paper square per bookmark
- white and colored paper scraps
- glue stick
- pencil
- child-sized scissors
- a book
A little project with plenty to discover
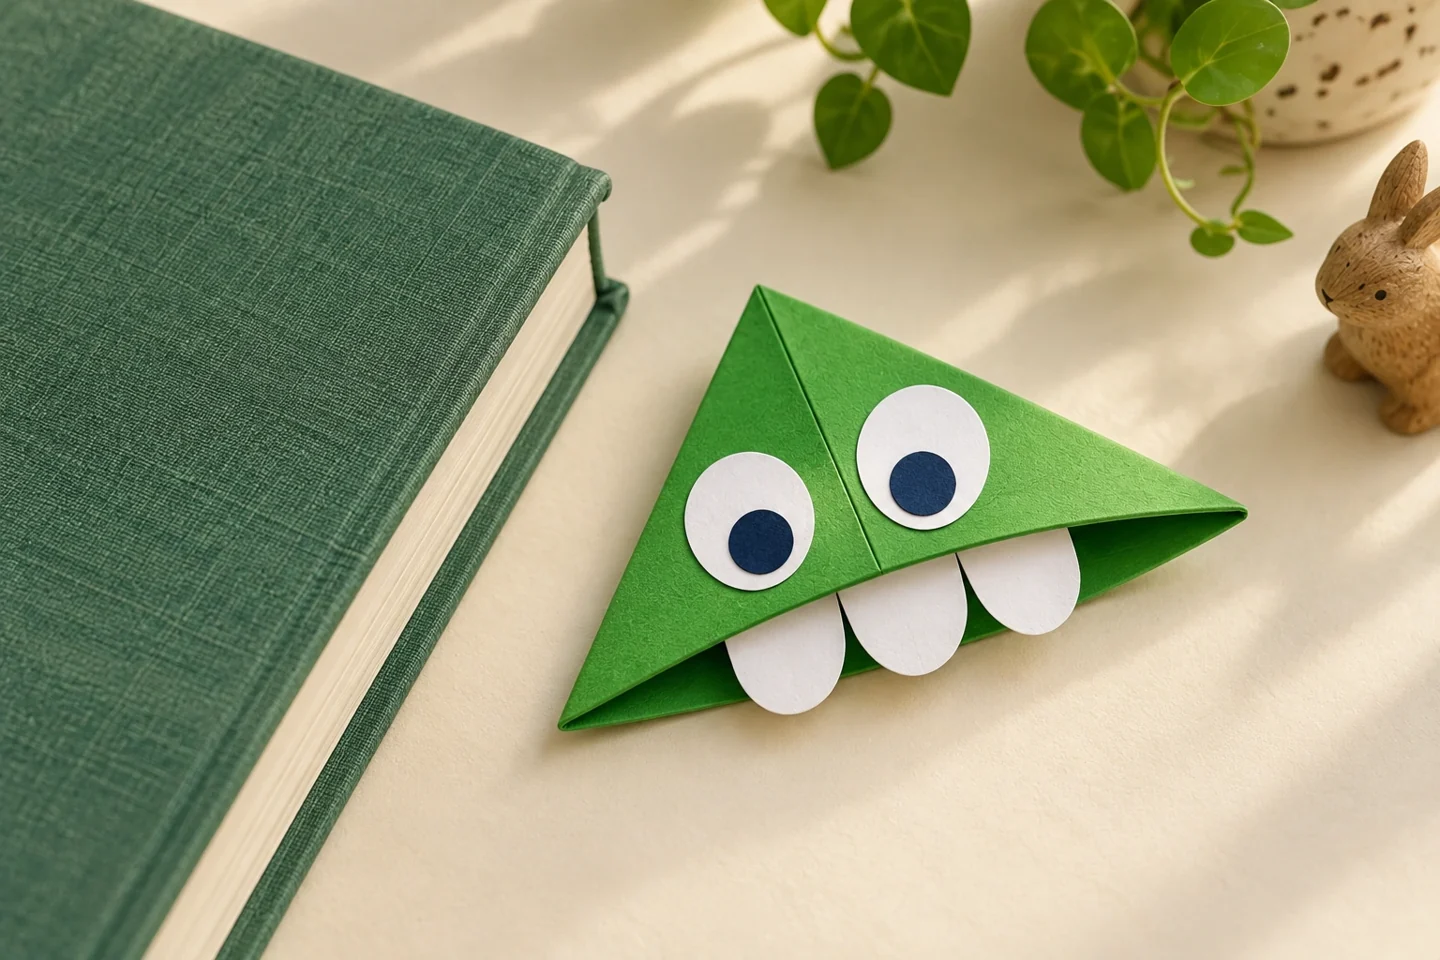
A monster can guard a page without being frightening. This folded corner bookmark becomes a character through children’s choices of eyes, teeth, ears, and expression.
Begin with a square, not a rectangle. A 15 cm square is large enough for small hands to see the folds, and ordinary colored paper folds more easily than stiff card. Choose a book for testing before decorating. The bookmark should hold a corner without forcing the pages apart. Prepare a few eye and tooth shapes, but leave room for children to invent their own face. A rounded tooth can look cheerful; triangles are simply another design choice, not a requirement.
Get the setup right
The pocket is the important construction detail. In the second step, fold down only the front layer of the triangle; the back point stays upright. The two side corners then travel up to that back point before slipping behind the folded front layer. Rub each crease with a fingertip, moving along the fold rather than crumpling its center. Test the plain pocket on a page before adding glue, so a folding issue is easy to correct without disturbing the face.
After raising a side corner to the top point, bend its tip over the pocket lip and tuck it down inside, behind the folded front flap. Repeat with the second corner and flatten the layers gently. If a corner keeps springing out, unfold only that side and match its tip to the top point again before tucking; the other side can stay in place. Add the eyes to the visible front, with the teeth projecting from the pocket lip. Keep wet glue away from the inside so the bookmark can slide onto a page without sticking.
Make it step by step
- Fold the square diagonally into a triangle with the long edge nearest you and the point at the top.
- Lift only the top layer of the upper point down to the middle of the long edge. This creates the front of the pocket.
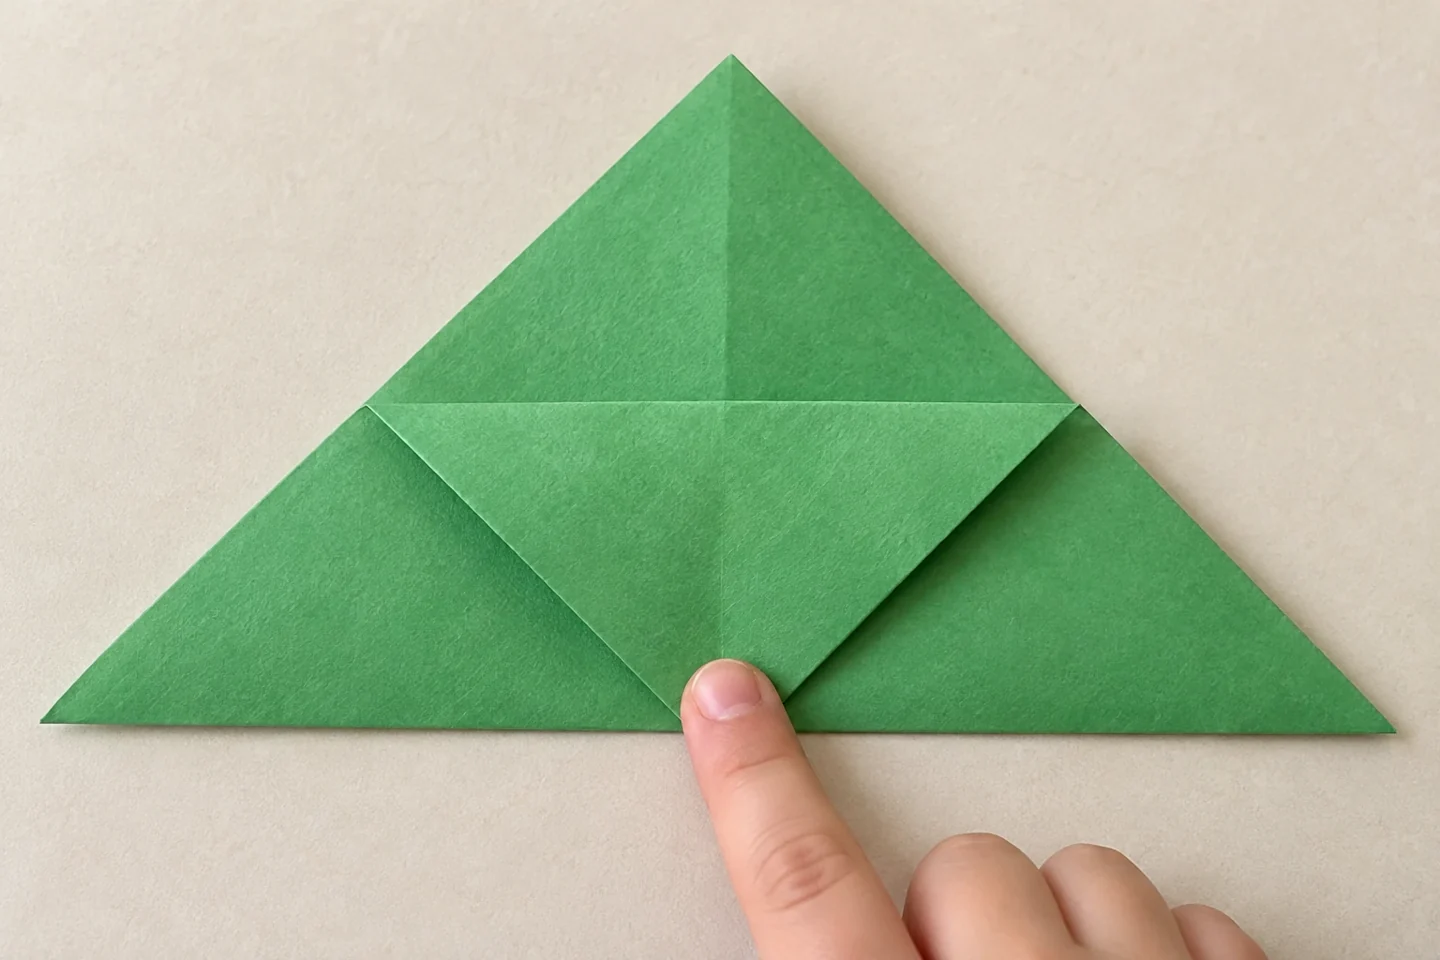
Fold down just the front layer; leave the back point standing for the next folds. - Fold the left and right corners up to the original top point, crease, then tuck each corner into the pocket formed by the folded layer.
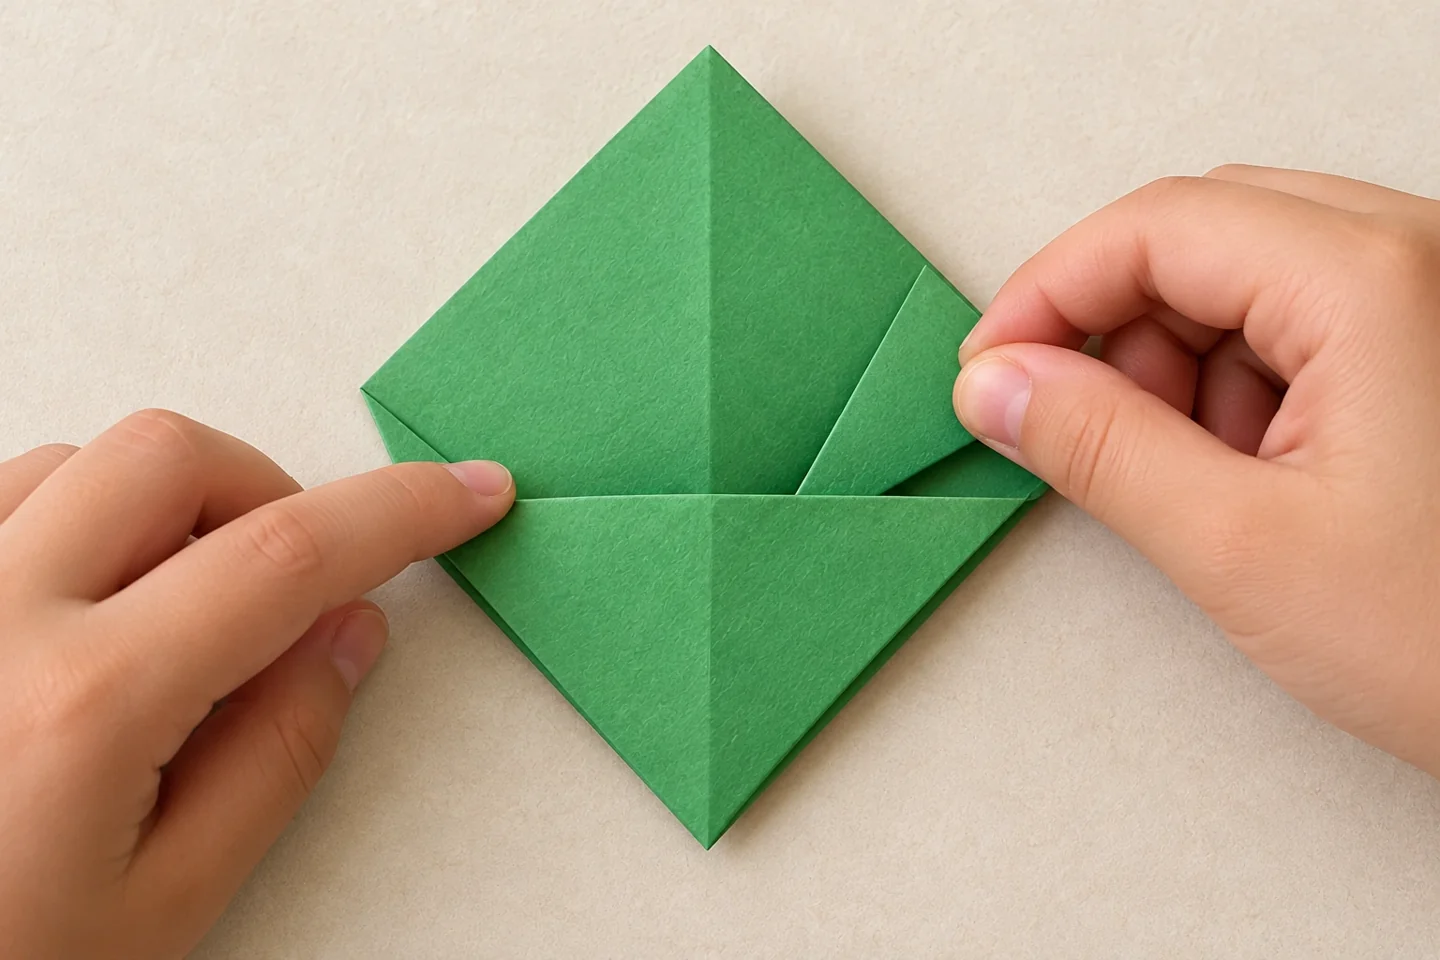
Tuck each raised corner behind the front flap, then gently flatten the layers. - Flatten the pocket. Cut two large paper eyes and a row of friendly teeth; glue the teeth behind the front pocket edge without closing the opening.
- Slide the pocket over a page corner. Add ears if you like, then check that the bookmark still slips on and off easily.
Make it work at home or in your classroom
Younger children can decorate a pocket folded by an adult and still make every character decision. For a child who wants to learn the fold, make your own square beside theirs and pause after each action. In a classroom, put one undecorated sample at the folding station and another finished sample at the decorating station. Keep glue sticks at the second station so pockets do not accidentally close during folding. Older children can make a matching pair of characters with different expressions.
Talk, notice, and learn together
What expression will your monster have? Which decorations can sit outside the pocket without blocking it?
Invent a short job description for the monster: perhaps it watches a mystery, keeps a recipe ready, or guards the next chapter of a story. Ask children to point to the paper parts that show its mood. Move the eyes closer together or farther apart before gluing and compare the expressions. Try changing just the mouth on a second bookmark. This small drawing-and-design experiment connects visual choices to a story without telling children that one face is the correct result.
Helpful fixes
The pocket will not open: check that glue has not joined its front and back. A corner pops out: crease it firmly before tucking again.
Make a pair for reading together
Create a reading pair by making one bookmark for a child and one for an adult or reading partner. Choose a shared feature, such as matching eyes, and let every other detail differ. Each maker can explain where the bookmark will live and why that book suits the character. For a written extension, add a short name on the back, keeping it away from the pocket opening. Do not add thick stickers or layers inside the pocket, where they can rub the page. The practical test is simple: can the monster mark a page, stay flat enough to close the book, and come off gently?
Finish display and clean up
Check every decorated bookmark on an actual page and gently turn the page once. Decorations should stay clear of the pocket opening and should not leave wet glue against the paper. Store finished bookmarks flat in an envelope after they dry. Keep spare squares for another attempt, and put large paper scraps aside for future eyes and ears. If a bookmark becomes bulky, reserve it for a sturdy book rather than pressing it into delicate pages.