Fall & Halloween
Paper Bat With Accordion Wings
 Facebook
 Pinterest
 X
X LinkedIn
 Reddit
 WhatsApp
 Telegram
 Bluesky
 Email
Email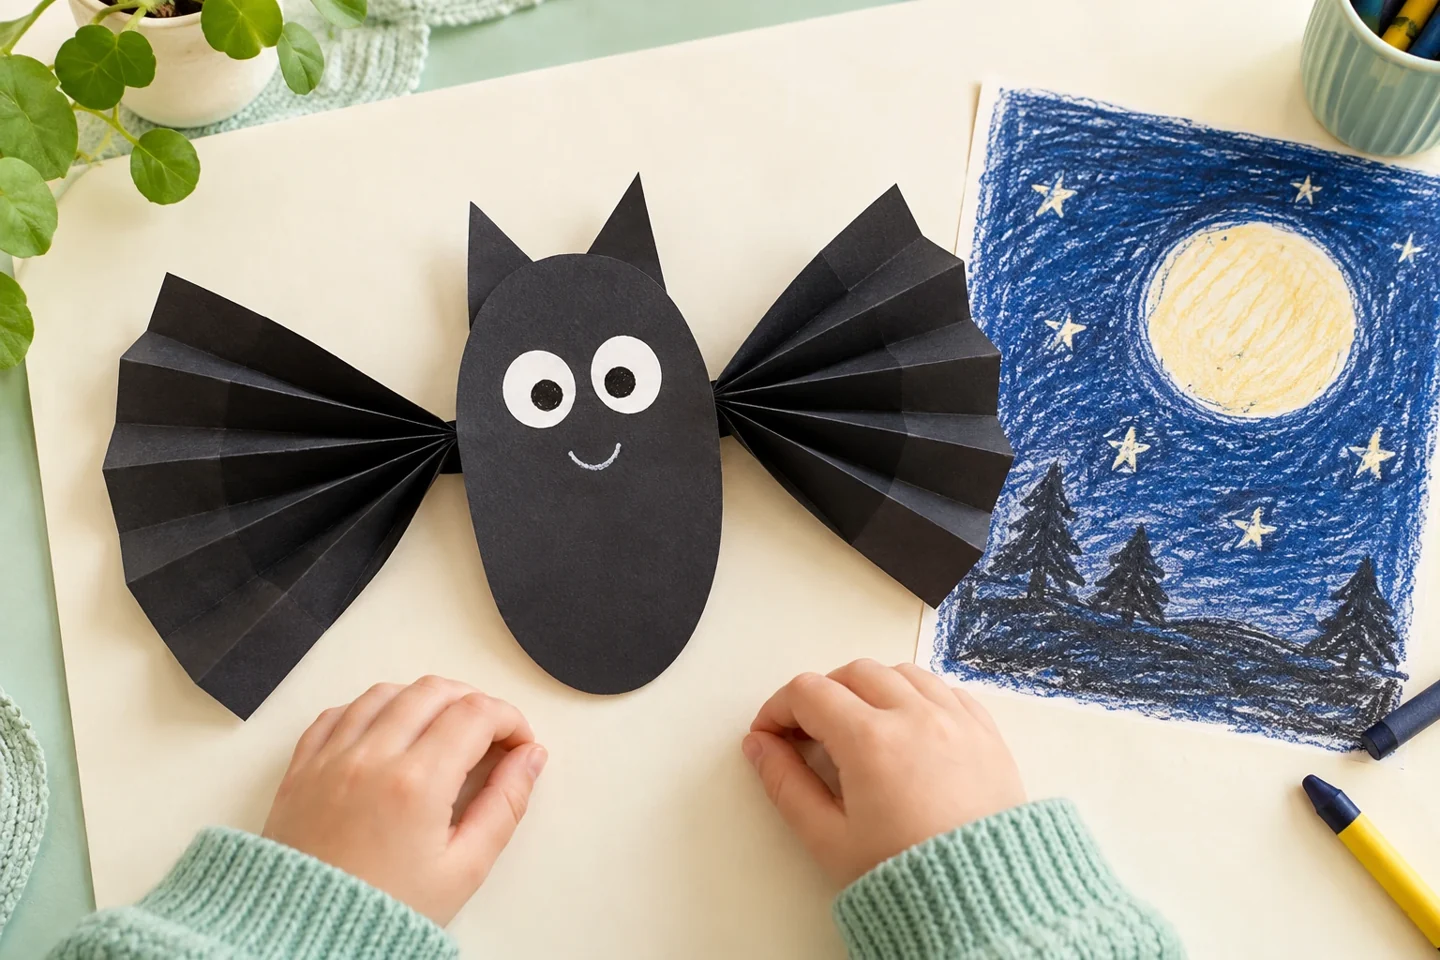
Your activity at a glance
| Suggested ages | 6–10 |
|---|---|
| Activity time | 30 minutes |
What you need
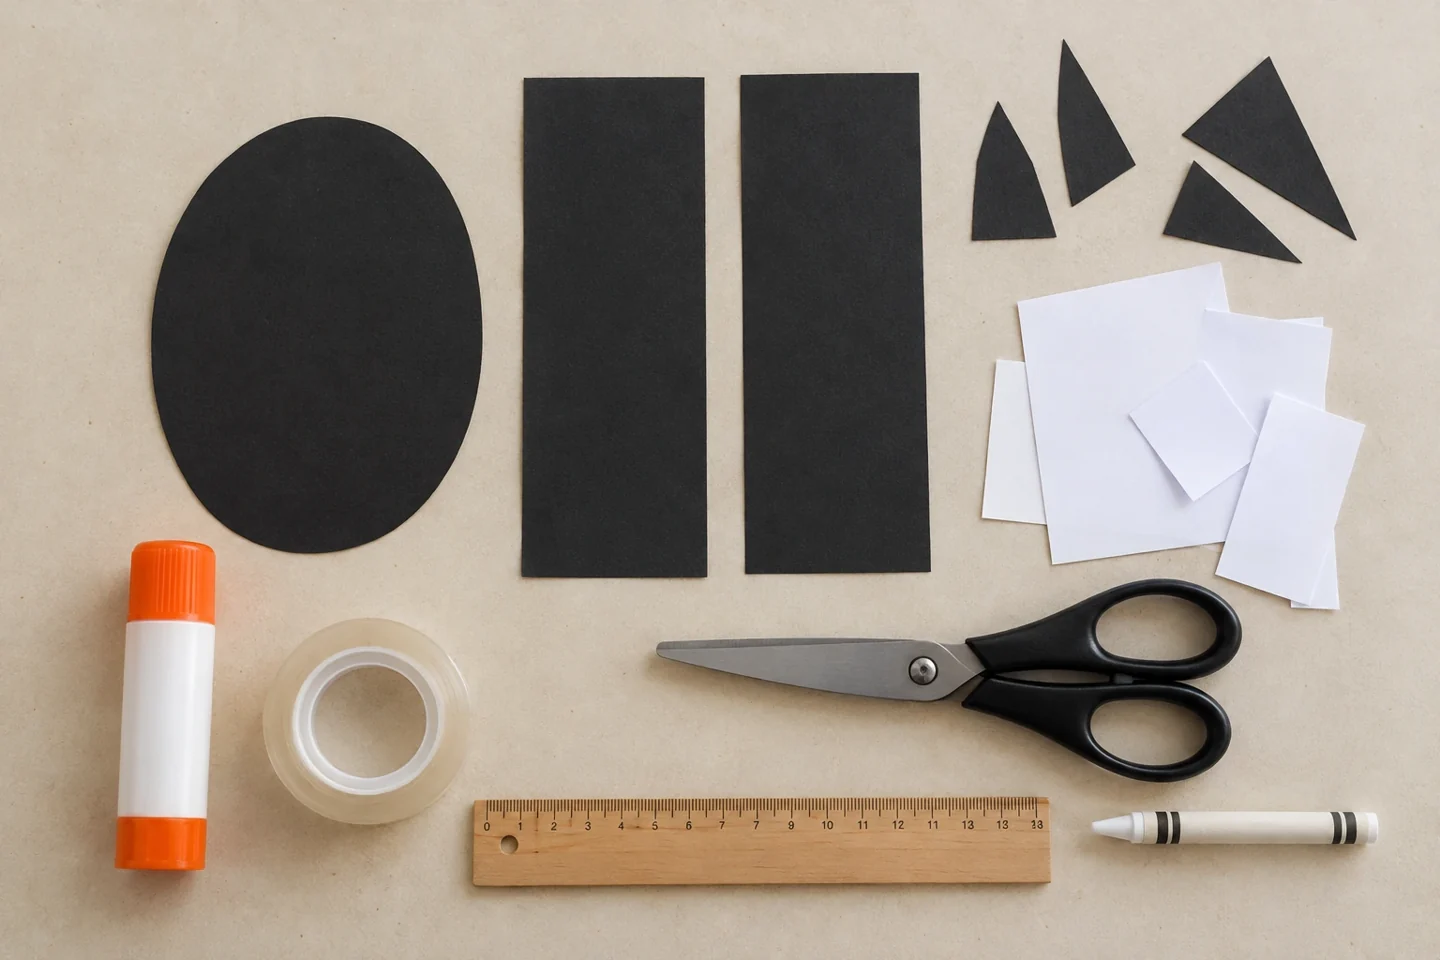
- One black paper oval 8 × 12 cm
- two black wing rectangles 6 × 15 cm
- white paper scraps
- glue stick
- tape
- ruler
- scissors
- Black paper offcuts for two short ears
- White crayon for an optional drawn smile
A little project with plenty to discover
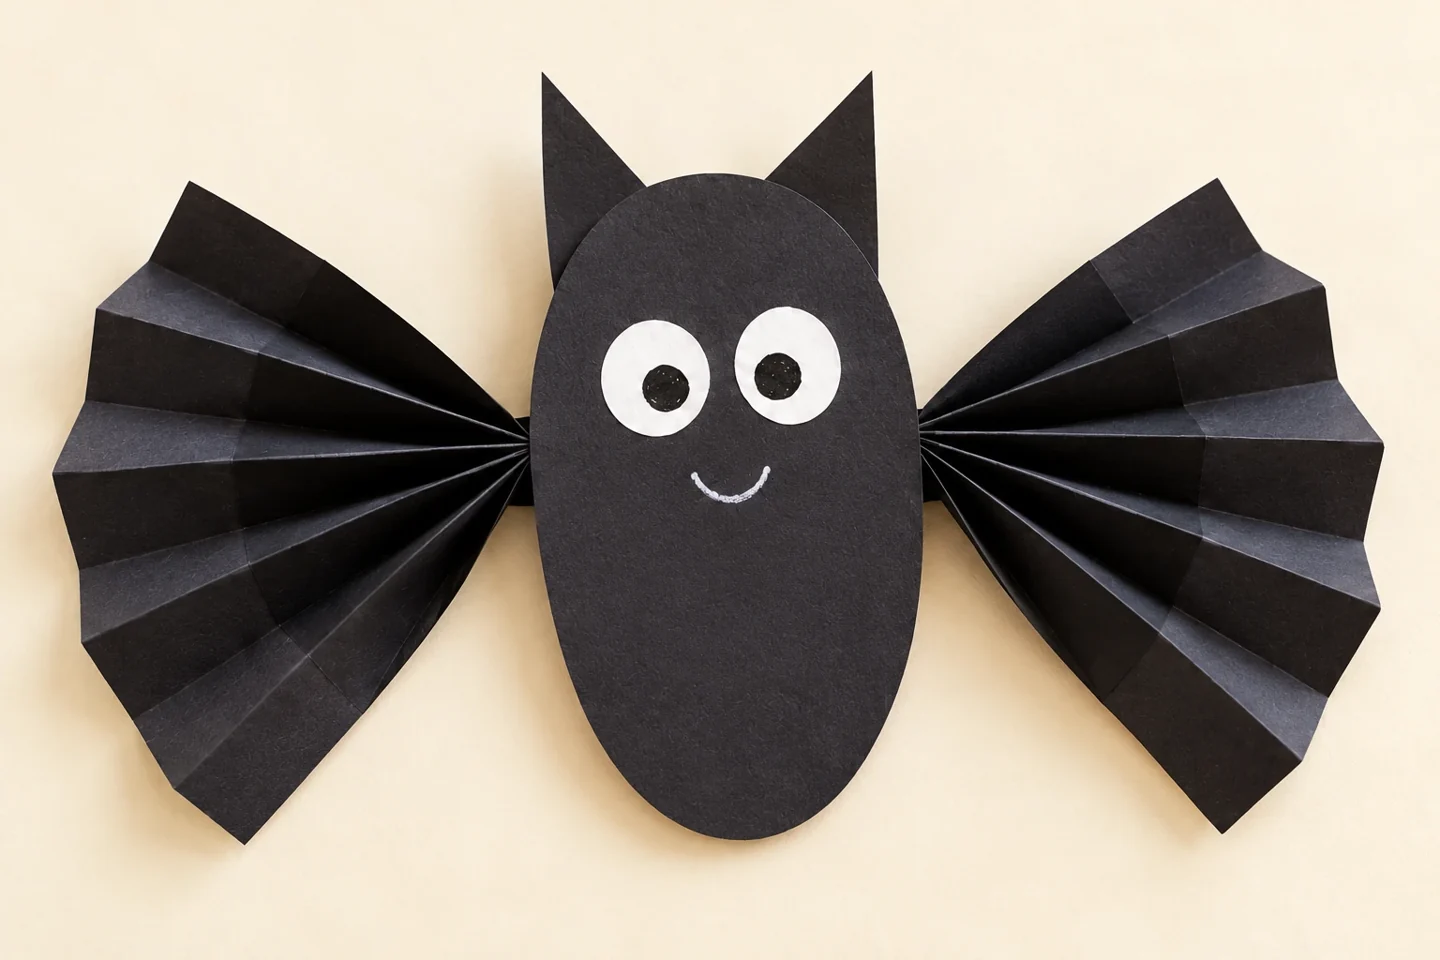
A friendly bat takes shape from one oval and two folded rectangles. The repeated folds make wings with texture and let children explore how paper expands and contracts.
Choose paper light enough to fold repeatedly without stiff resistance. The two wing rectangles should match: 6 by 15 cm gives a compact fan when folded at roughly 1 cm intervals. Cut the body oval approximately 8 by 12 cm so it has room for a face and both wing joins. Keep the ears short, because very long paper tips flop when the bat is moved. White eyes make the face easy to see against the dark body.
Get the setup right
Place one wing rectangle with its short edge nearest you. Fold that edge up about 1 cm, turn the rectangle over, and fold back the same distance. Continue turning after each fold so the paper stacks into an accordion instead of rolling into a tube. Pinch one end of the completed stack and fan the other end. Make the second wing in the same way, then lay both beside the body before taping to compare their direction and spread.
Cut two small triangular ears from the black paper offcuts and draw the smile with a white crayon if cutting a tiny mouth is fiddly. The accordion folds run across the rectangle’s 6 cm width, advancing along its 15 cm length in roughly 1 cm steps. The folded stack is therefore about 6 cm long and 1 cm wide. Pinch one end of that long stack and fan the other end; attach the pinched end behind the body. Open both wings a little at a time so the tape join is not asked to carry a sudden tug.
Make it step by step
- Cut the oval body and two equal wing rectangles. Cut two short triangular ears from the black offcuts and attach them to the top of the body.
- Fold each wing rectangle back and forth at approximately 1 cm intervals, keeping the folds parallel to its short edge.
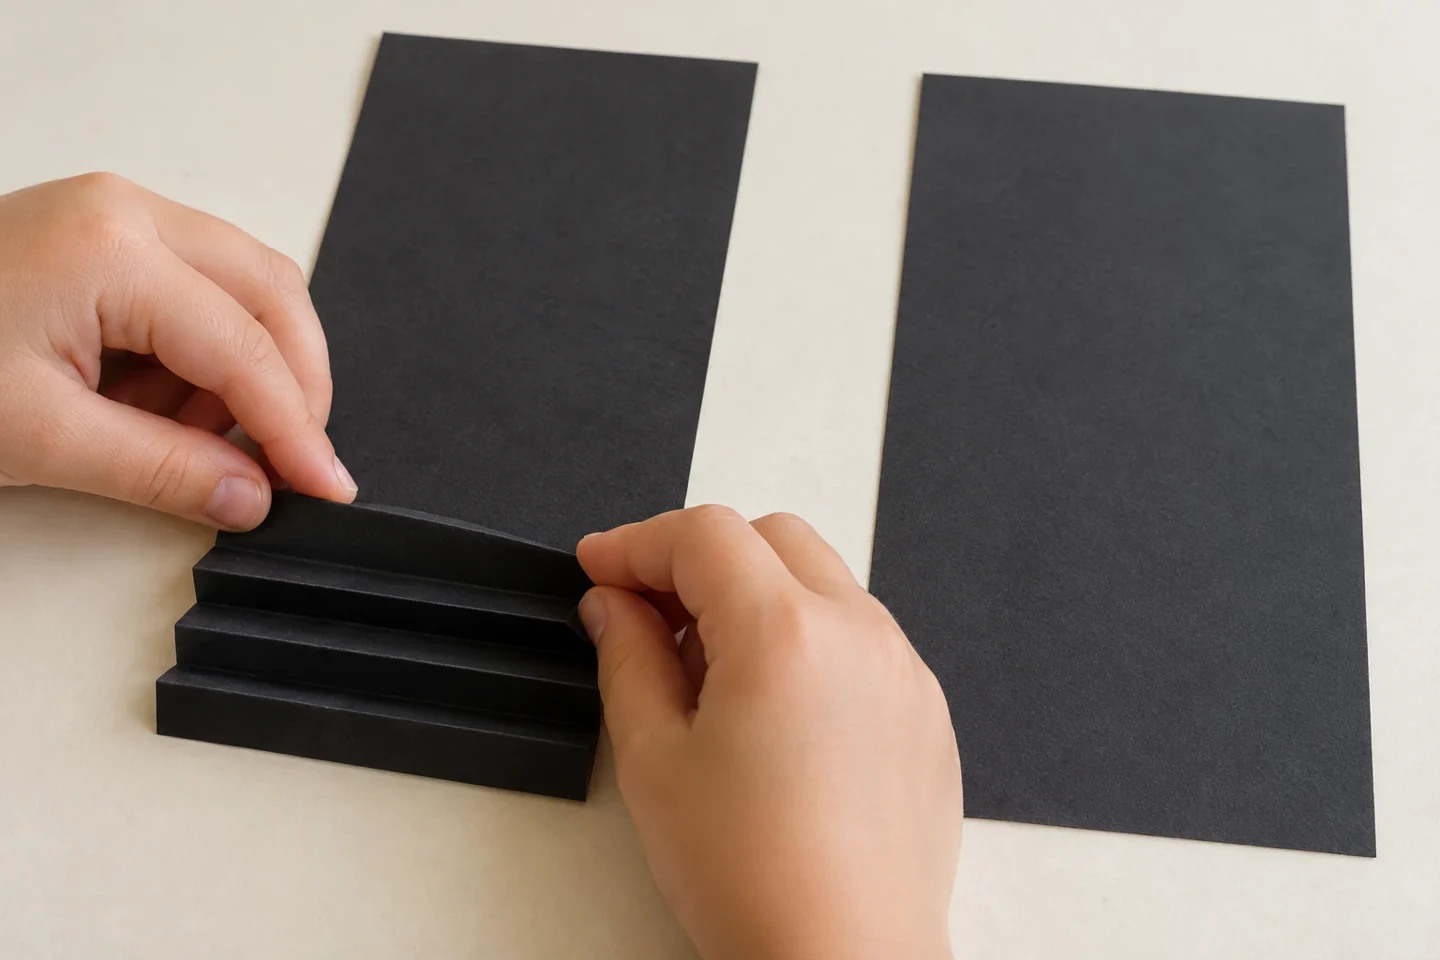
Turn the paper over after each fold to make an accordion rather than a roll. - Pinch one end of each accordion. Tape that narrow end behind the left or right edge of the body, midway down.
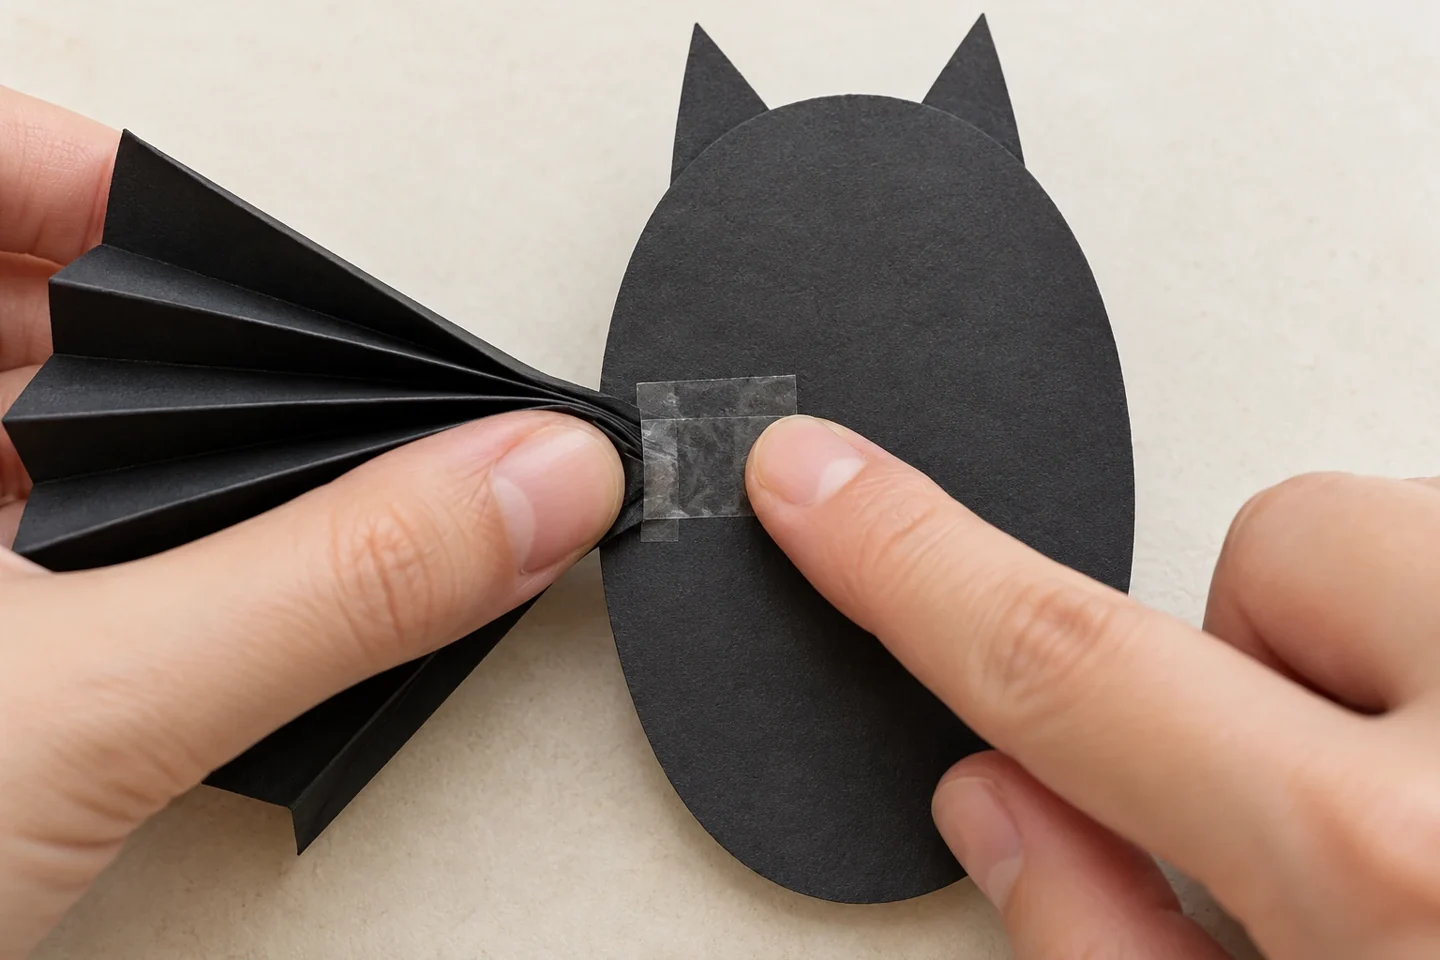
Make sure the tape touches both the folded wing end and the back of the body. - Fan the loose wing ends outward. Add large white eyes and a small paper smile to the body.
- Display the bat against a pale background. Make a second bat with wider folds and compare how the wings spread.
Make it work at home or in your classroom
Children who find folding difficult can use wider 1.5 cm folds with an adult marking the first few lines. An adult may start the accordion and let the child finish two or three turns. In a classroom, show the turn-over action with a brightly colored practice strip before using black paper, where creases can be harder to see. Older makers can experiment with longer wings, changing only the rectangle length while keeping fold width and body size constant.
Talk, notice, and learn together
What changes when the folds are wider? How can we make both wings look balanced?
Compare the folded and spread wings. How much table space does the closed accordion use, and how much does its open fan need? Fold width, paper length, and the pinched end all affect the visible shape. Invite a child to draw their bat above a pretend nighttime scene or invent a gentle story about where it rests. This paper model is a craft, not an anatomically accurate bat diagram; a nature conversation can begin with questions to explore separately.
Helpful fixes
A wing pulls off: reinforce its pinched end with tape before attaching. Folds become uneven: mark the first few intervals as a guide.
Compare wide and narrow folds
Try a wing comparison using one spare strip folded at 1 cm intervals and another folded at 2 cm intervals. Keep both strips the same length and width. Place the folded stacks together, then fan them without attaching them to a body. Children can notice the number of folds, the width of each panel, and how the fans look when opened. There is no need to decide which is better: one may suit a small bat and another a larger decoration. Draw a tiny picture of each fan or trace its outline on scrap paper to preserve the comparison before choosing a favorite pair of wings.
Finish display and clean up
Attach wings behind the body rather than onto its face. Check that the tape touches both the pinched folds and the body paper, then support the join while opening the fan. Display the bat lying flat or attached to a board by its body so the wings do not carry its weight. Store it with the fans gently closed rather than crushed. Keep spare black strips for replacement wings, and put unused eye pieces into a small paper envelope.