Spring & Easter
Make a Christian Easter Story Wheel
 Facebook
 Pinterest
 X
X LinkedIn
 Reddit
 WhatsApp
 Telegram
 Bluesky
 Email
Email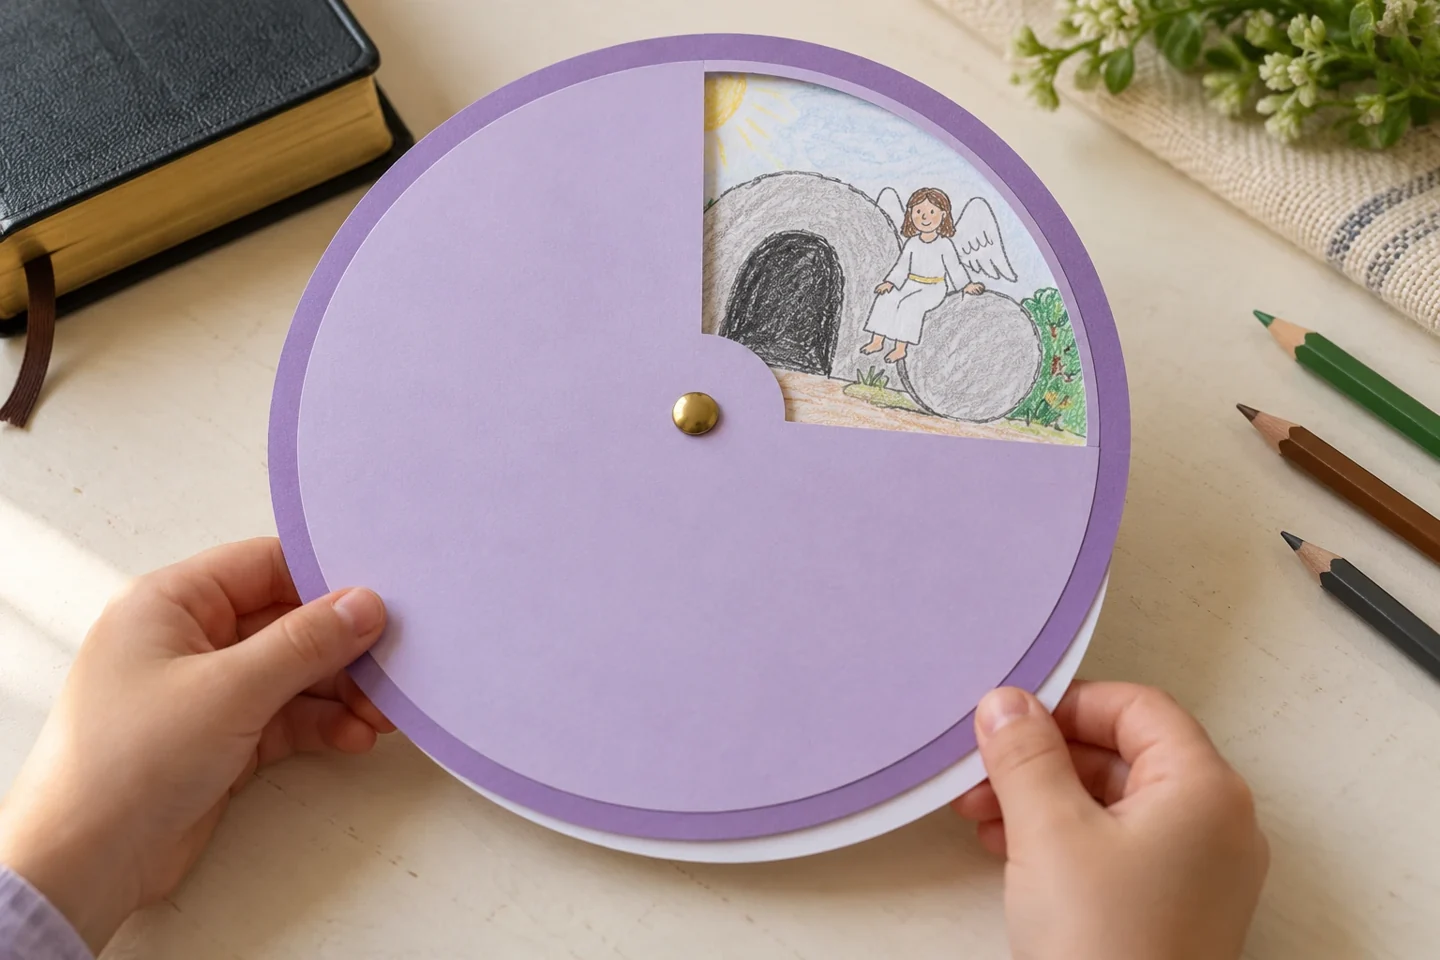
Your activity at a glance
| Suggested ages | 6–10 with an adult |
|---|---|
| Activity time | 45 minutes |
What you need
- 2 cardstock sheets for an 8-inch lower circle and a 7½-inch cover
- One paper fastener fitted by an adult
- Pencil, colored pencils, child-friendly scissors, ruler, and compass or round tracing guides
- A Bible or an age-appropriate Christian Easter story

Turn the wheel and retell the story
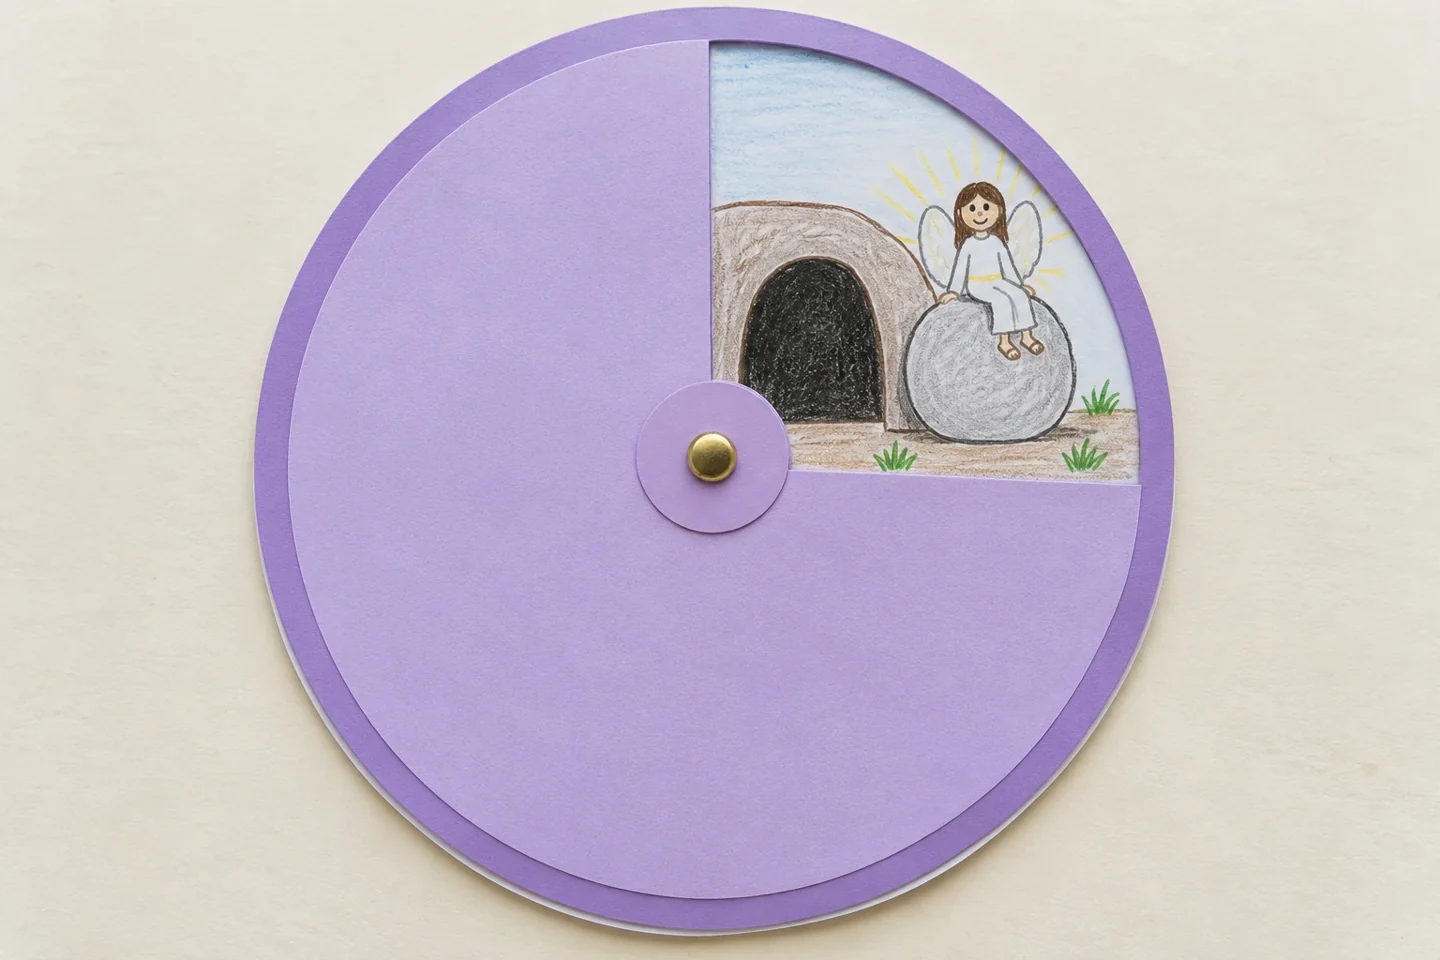
This explicitly Christian Easter activity helps children retell a short sequence through a rotating picture wheel. A window reveals one drawing at a time: Jesus is laid in the tomb, the women visit the tomb, an angel announces that Jesus has risen, and the women go to share the news. Read the chosen passage together first, keeping the craft conversation suited to the children’s ages.
Get ready together
Choose the account you will read before preparing the craft. The suggested sequence draws from Jesus’ burial at the end of Matthew 27 and the women’s visit and news in Matthew 28. This is a Christian story-retelling activity, so explain that purpose at the beginning. Prepare a lower picture circle about 8 inches across and a cover slightly smaller, leaving an exposed edge to turn. Keep a central area about an inch across free from drawings and from the viewing-window cut. An adult prepares the holes and handles the fastener.
Make it step by step
- Read or summarize the end of Matthew 27 and the beginning of Matthew 28. Explain that the wheel uses selected moments, not every event in the Easter account. Invite children to describe the story in their own words.
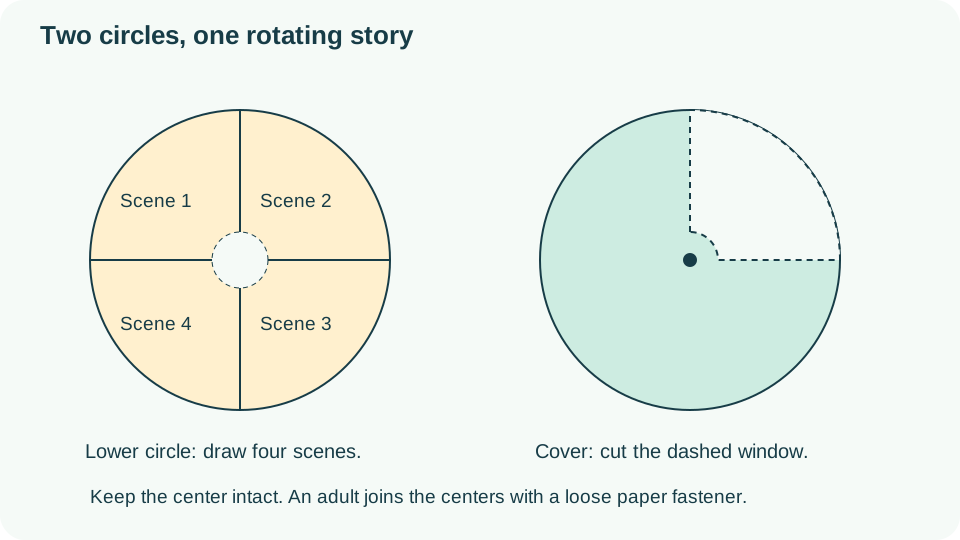
- Trace and cut an 8-inch lower circle and a 7½-inch cover. Divide the lower circle into four equal quarters with two perpendicular pencil lines. Mark a central circle 1 inch across, and keep drawings outside this hub.
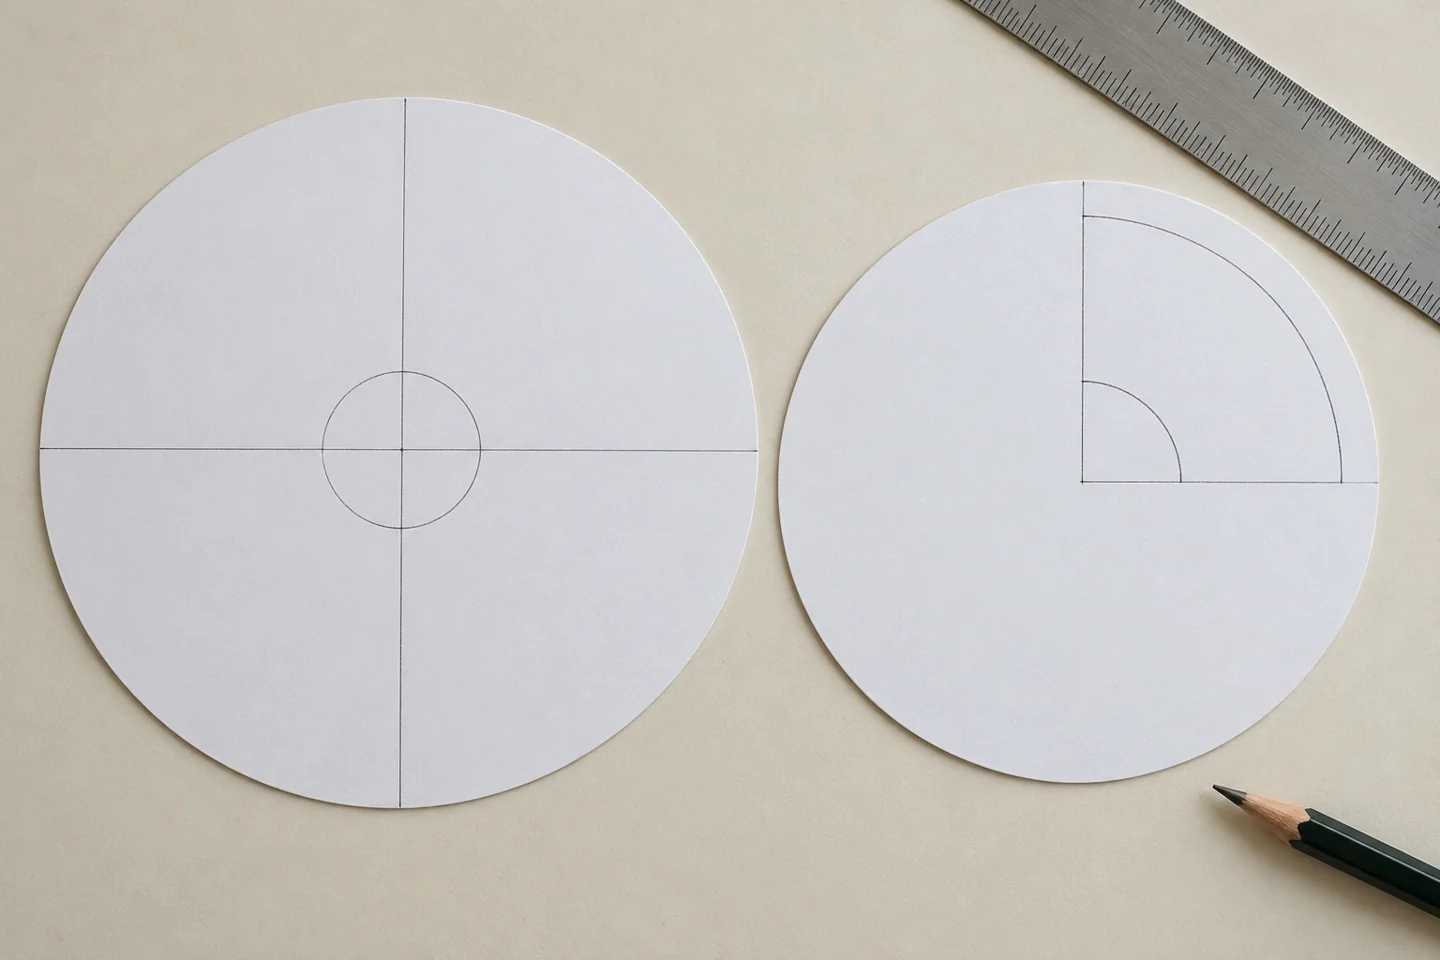
Leave the central hub and outer rim intact when marking the cover window. - Draw one scene in each quarter: a closed tomb, the women arriving, the open tomb with an angel, and the women going to tell the disciples. Keep the drawings simple enough to recognize through a window.
- An adult marks one quarter-shaped viewing window on the cover. Keep the central 1-inch hub intact and leave an outer rim about ⅜ inch wide. Cut only the area between hub and rim, making a window with two straight sides and two curved edges. Draw each scene inside the corresponding visible area on the lower wheel.
- Align the circles and have an adult fit the paper fastener through their centers. Leave it loose enough to rotate. Turn the lower wheel slowly and retell each scene as it appears.
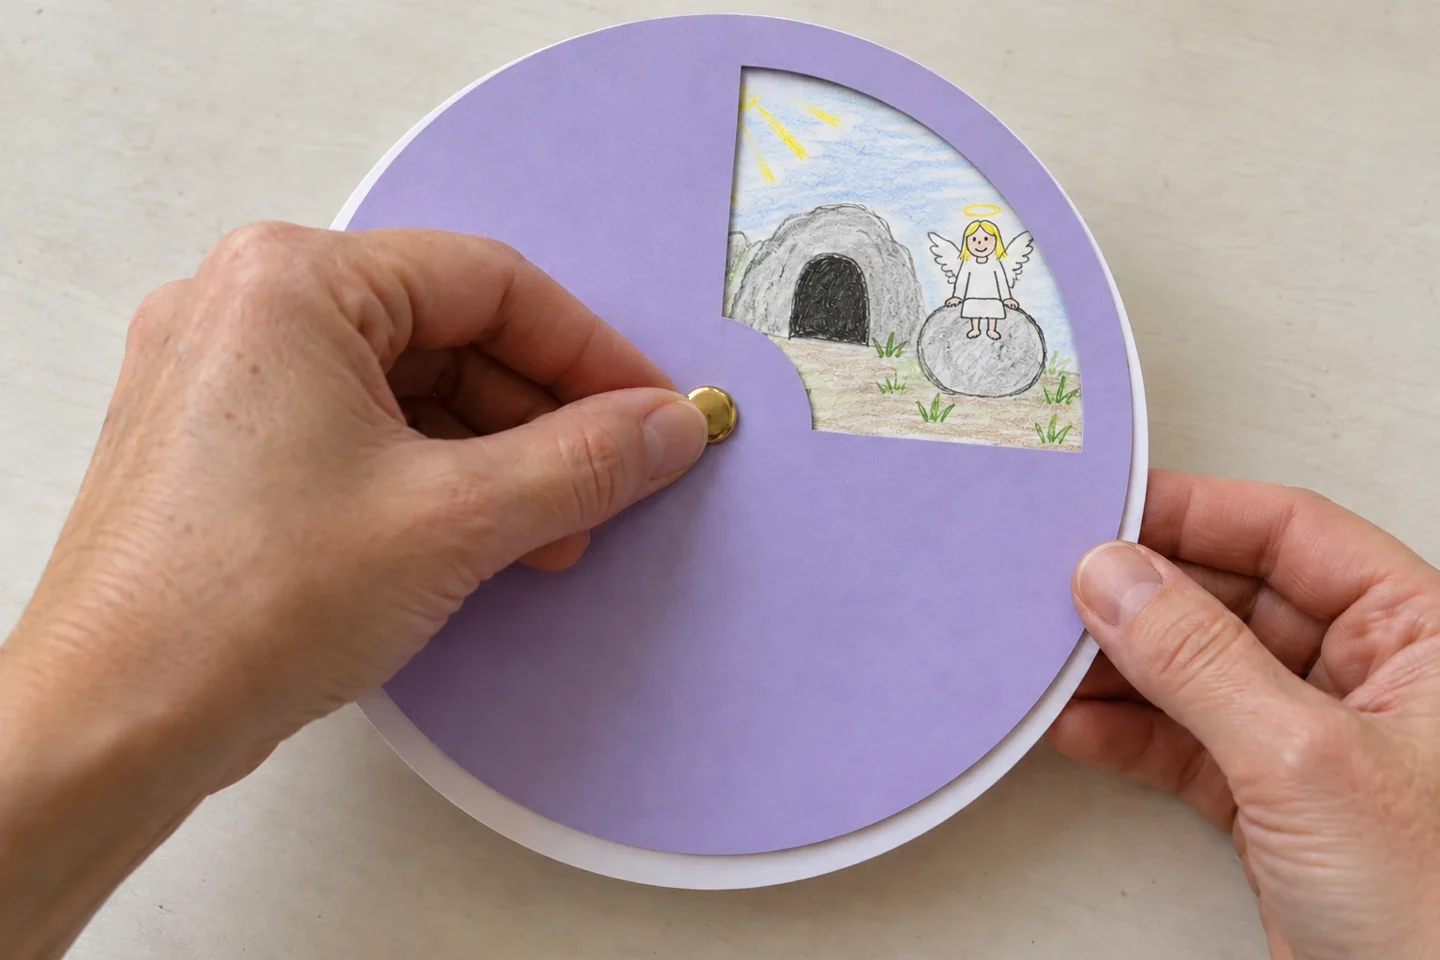
Align the center holes and fit the fastener loosely enough for rotation.
Try it, notice it, talk about it
Practice the rotation with two blank circles before making detailed pictures. Divide the lower circle into four equal quarters, and keep each scene inside its own quarter. The cover window reveals the drawing area of one quarter while hiding the others; its intact outer rim helps the cover stay flat. Draw broad recognizable objects such as the tomb entrance, the arriving women, an angel, and the women departing to share the news. Children can dictate short explanations for the adult to write on the back. Avoid packing every event into one picture, because the wheel works best when each turn has a clear focus.
Ask: What did the women expect to find? What message did the angel give them? What happened next? Invite questions and revisit the passage together rather than asking children to memorize an exact script.
Make it work for your children
After assembly, invite the child to turn the wheel slowly and tell one moment at a time. Ask what the women expected, what message they heard, and what they did next. Reopen the passage when a detail is uncertain. A younger child can choose colors for adult-prepared outlines while an older child selects simple drawings from the account. For a Christian classroom or church group, partners can take turns operating the wheel and explaining a scene. Retelling in their own words matters more than repeating a memorized caption.
If the wheel catches, loosen the fastener slightly and check for raised decorations near the center. Children who prefer not to draw figures can use simple symbols with an adult’s written explanation. Keep the fastener out of reach of very young children and store the wheel flat.
Finish and tidy up
Small paper fasteners need adult handling and secure storage away from very young children. If the cover scrapes the drawings, check that decorations lie flat and loosen the attachment just enough to move. Do not remove the central connection while the child is holding the wheel. Store the finished piece flat in a folder and avoid pressing on the fastener. A separate written summary on the back can help the family revisit the same four moments without treating the craft as a complete account of every Easter event.