Thanksgiving
Cardboard Harvest Stand
 Facebook
 Pinterest
 X
X LinkedIn
 Reddit
 WhatsApp
 Telegram
 Bluesky
 Email
Email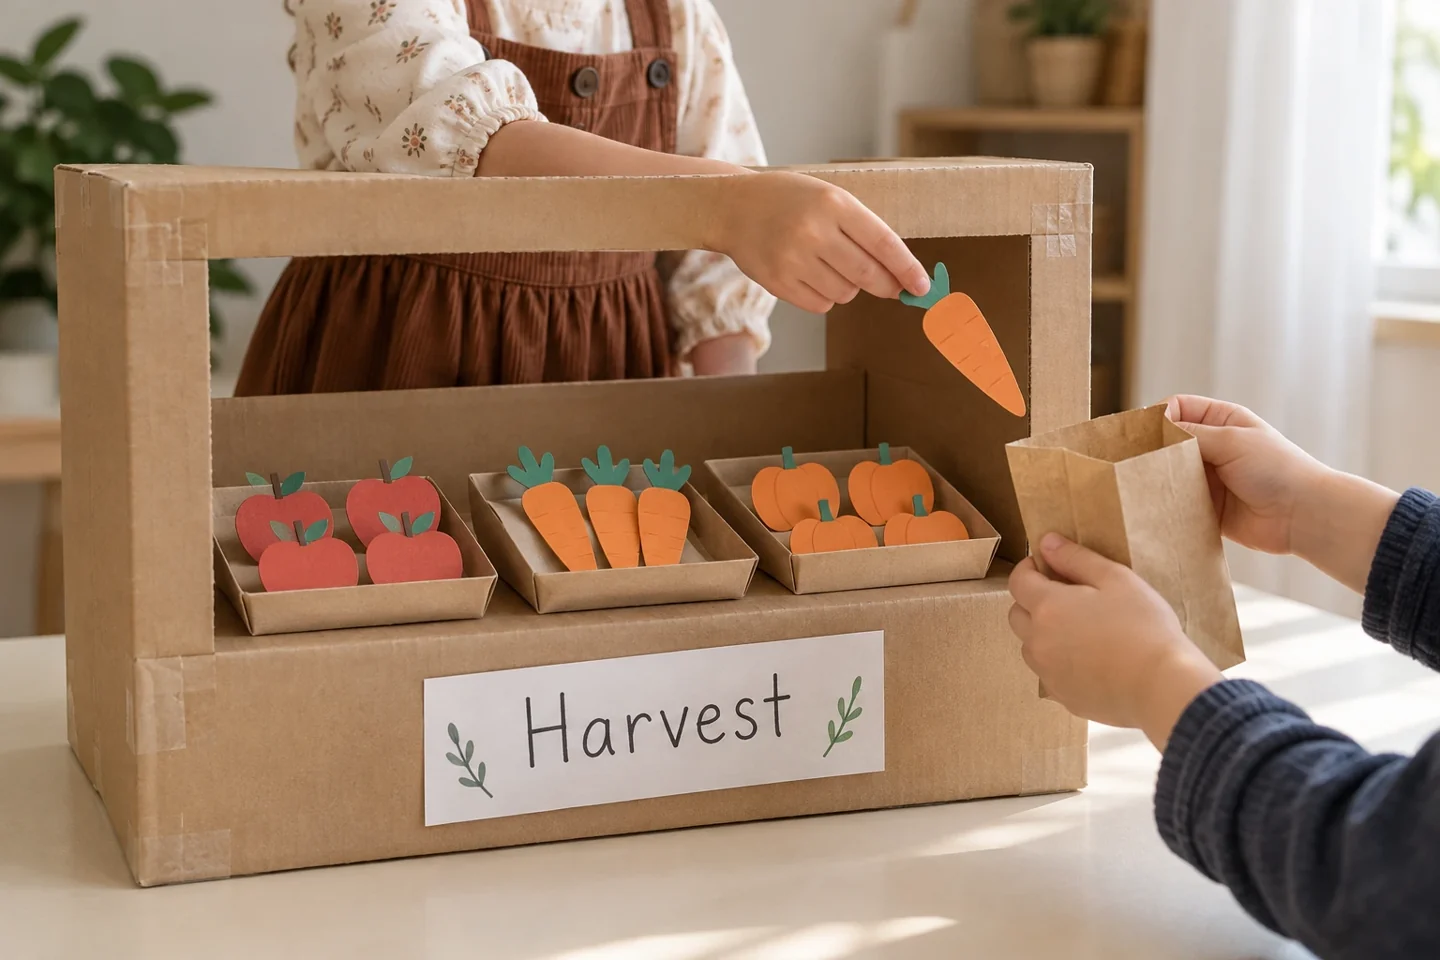
Your activity at a glance
| Suggested ages | 5–11 |
|---|---|
| Activity time | 45 minutes |
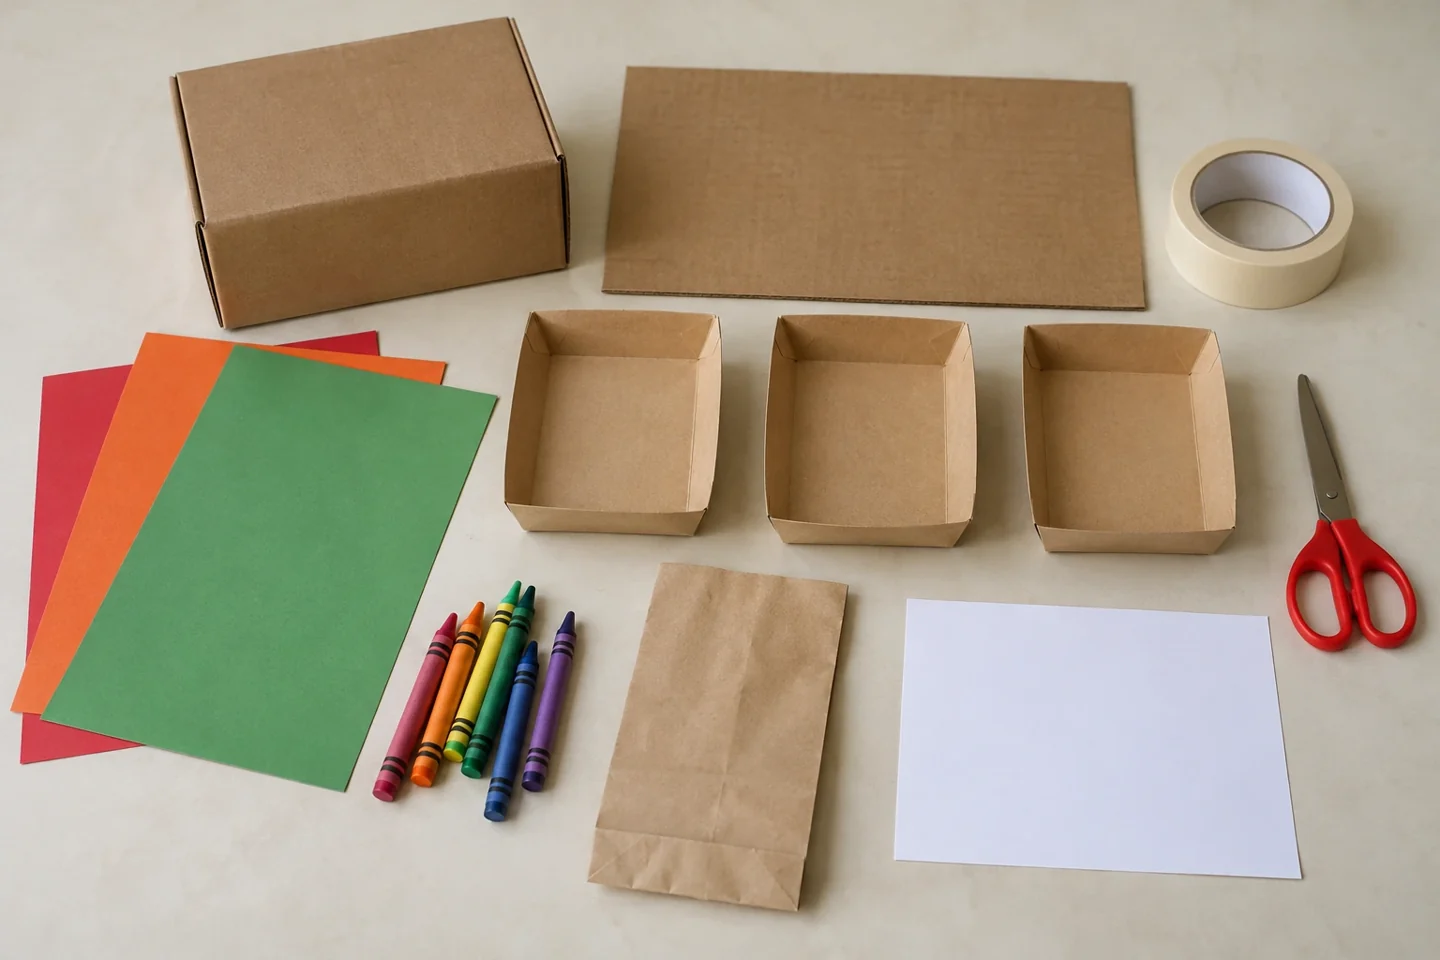
What you need
- One clean small cardboard box
- one extra cardboard rectangle
- masking tape
- colored paper
- crayons
- scissors
- three shallow paper trays
- One paper bag for collecting pretend orders
- One spare sheet for a shop sign
A little project with plenty to discover
A small market stand becomes a setting for harvest pretend play. Children make produce, organize displays, and invent conversations between seller and customer.
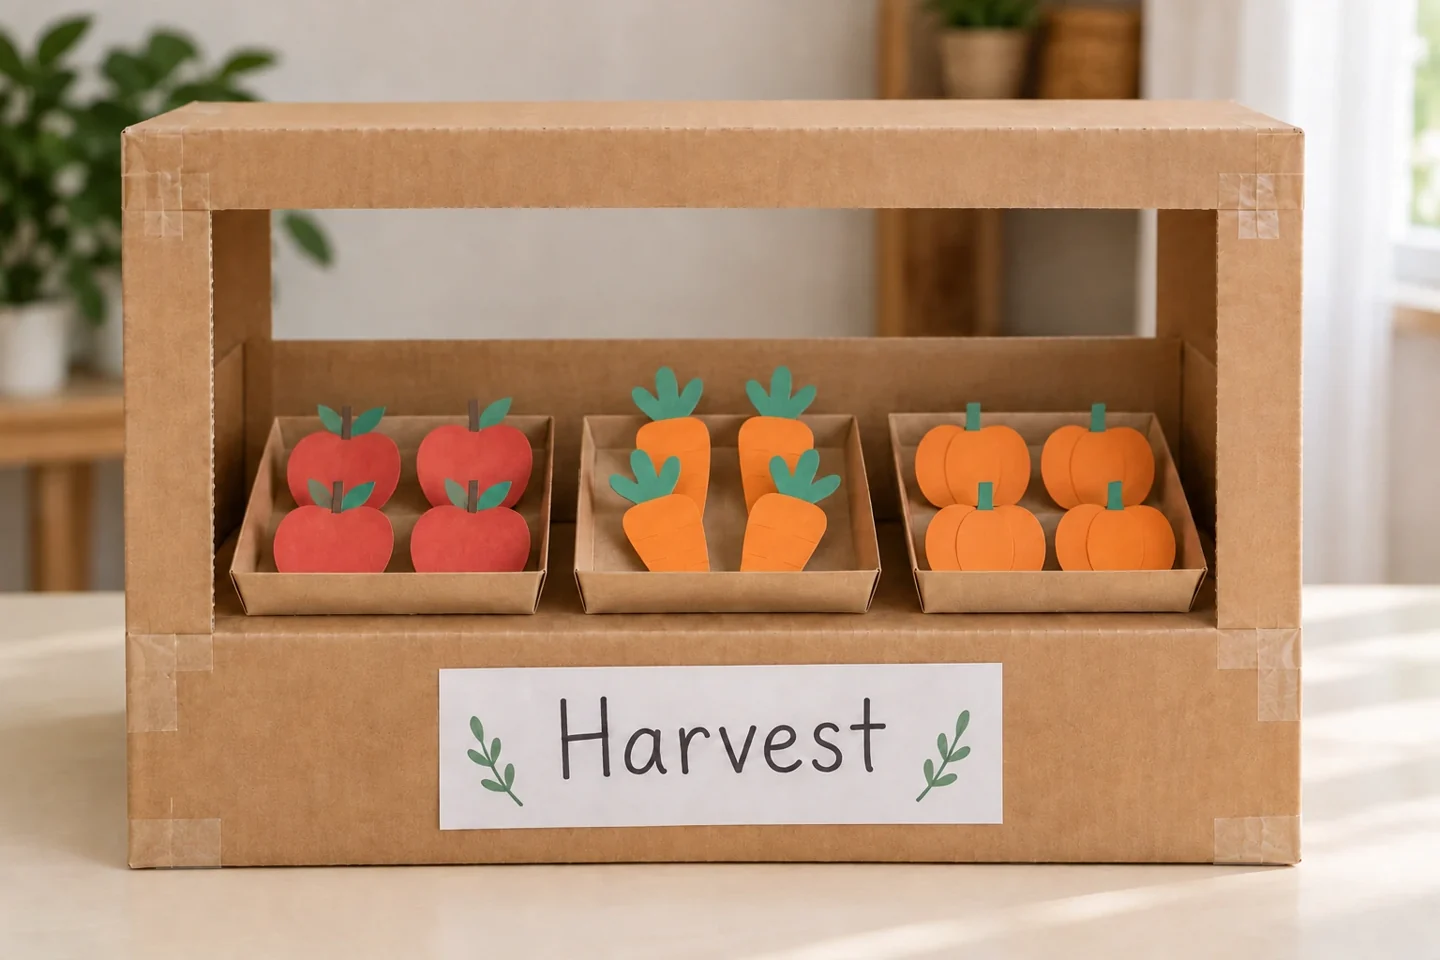
Choose a small clean box that can sit firmly on its base. The pretend produce will be flat paper pieces, so the counter needs to support only a light load. An adult opens one broad side while leaving a border around the opening, checks for staples, and tapes rough edges. Make the counter from another rectangle folded into an L shape: the short vertical section attaches inside the box and the longer section forms the ledge. A wide box can use two folded supports beneath it.
Prepare and introduce the activity
Test the counter with three empty paper trays before decorating. If it bends, shorten the ledge or reinforce it with another cardboard layer. Draw apples, carrots, and pumpkins on colored paper and cut at least four of each. Their shapes should be large enough to pick up easily and clearly different from one another. Place a produce type in each tray, then add a sign. No real food or money is needed; the stand is a simple setting for counting and conversation.
Provide one paper bag and one spare sheet for the shop sign. For a cereal-box-size stand, keep the ledge about 5 cm deep: a deep shelf projects too far and pulls on its tape join. Fold the extra cardboard into a short upright tab and a shallow ledge, tape the tab inside the opening, and test with all three trays before adding produce. A pretend customer can ask, “Could I have two apples, please?” The seller counts them into the bag, checks the order, and returns the pieces for the next turn.
Make it step by step
- An adult opens one broad side of the box, leaving the top and bottom edges intact. Tape any rough edges flat.
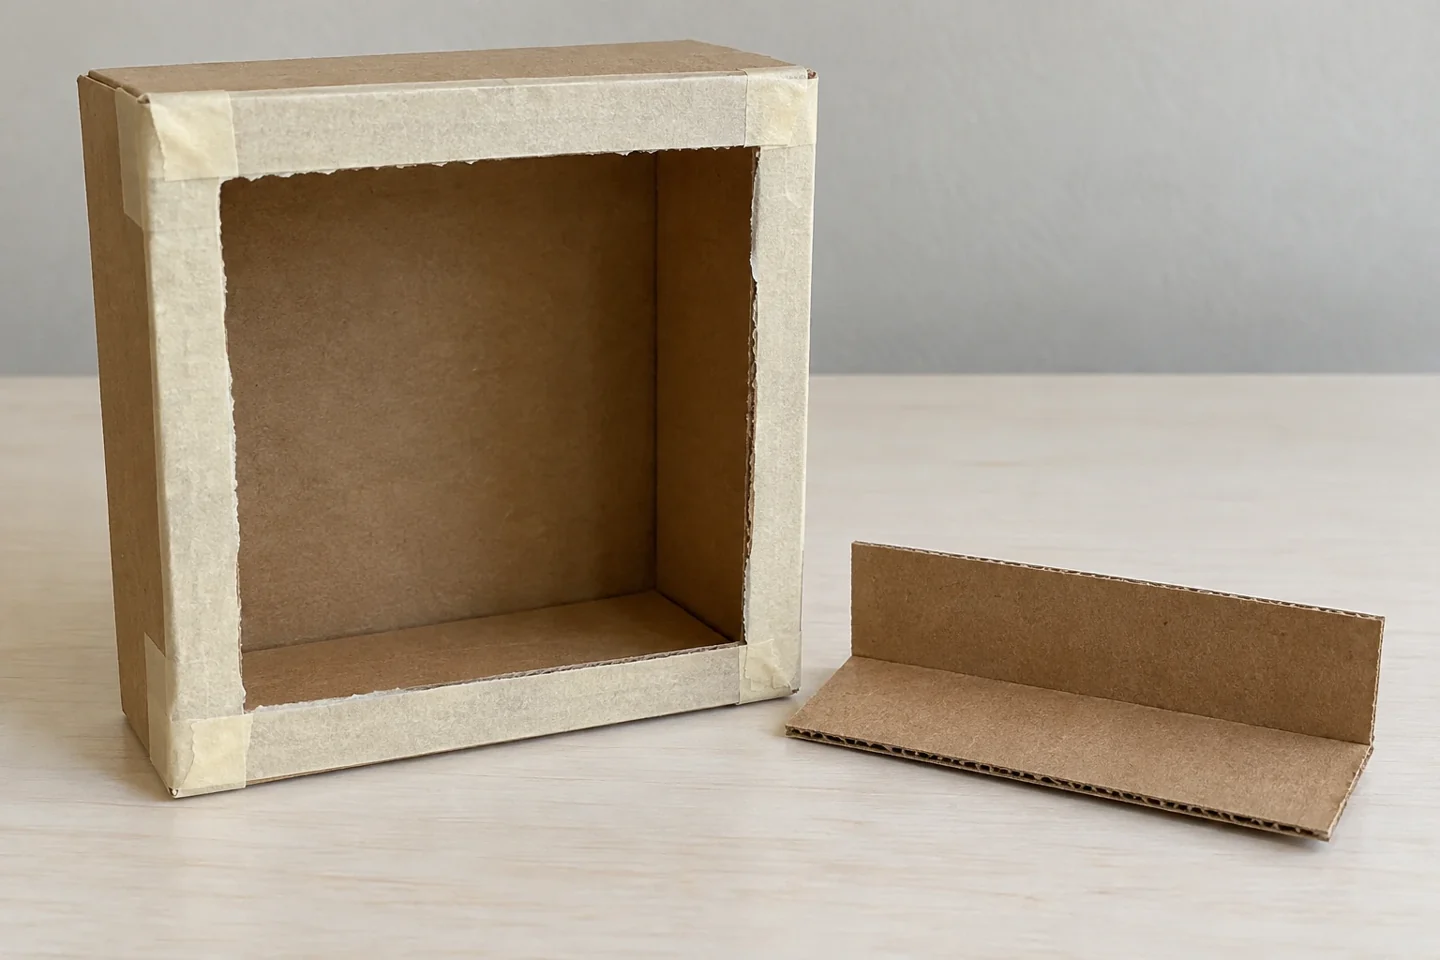
Keep the ledge shallow and leave a short upright tab for taping inside the opening. - Fold the extra rectangle to make a shallow counter ledge. Tape it securely inside the opening and test it with lightweight paper pieces.
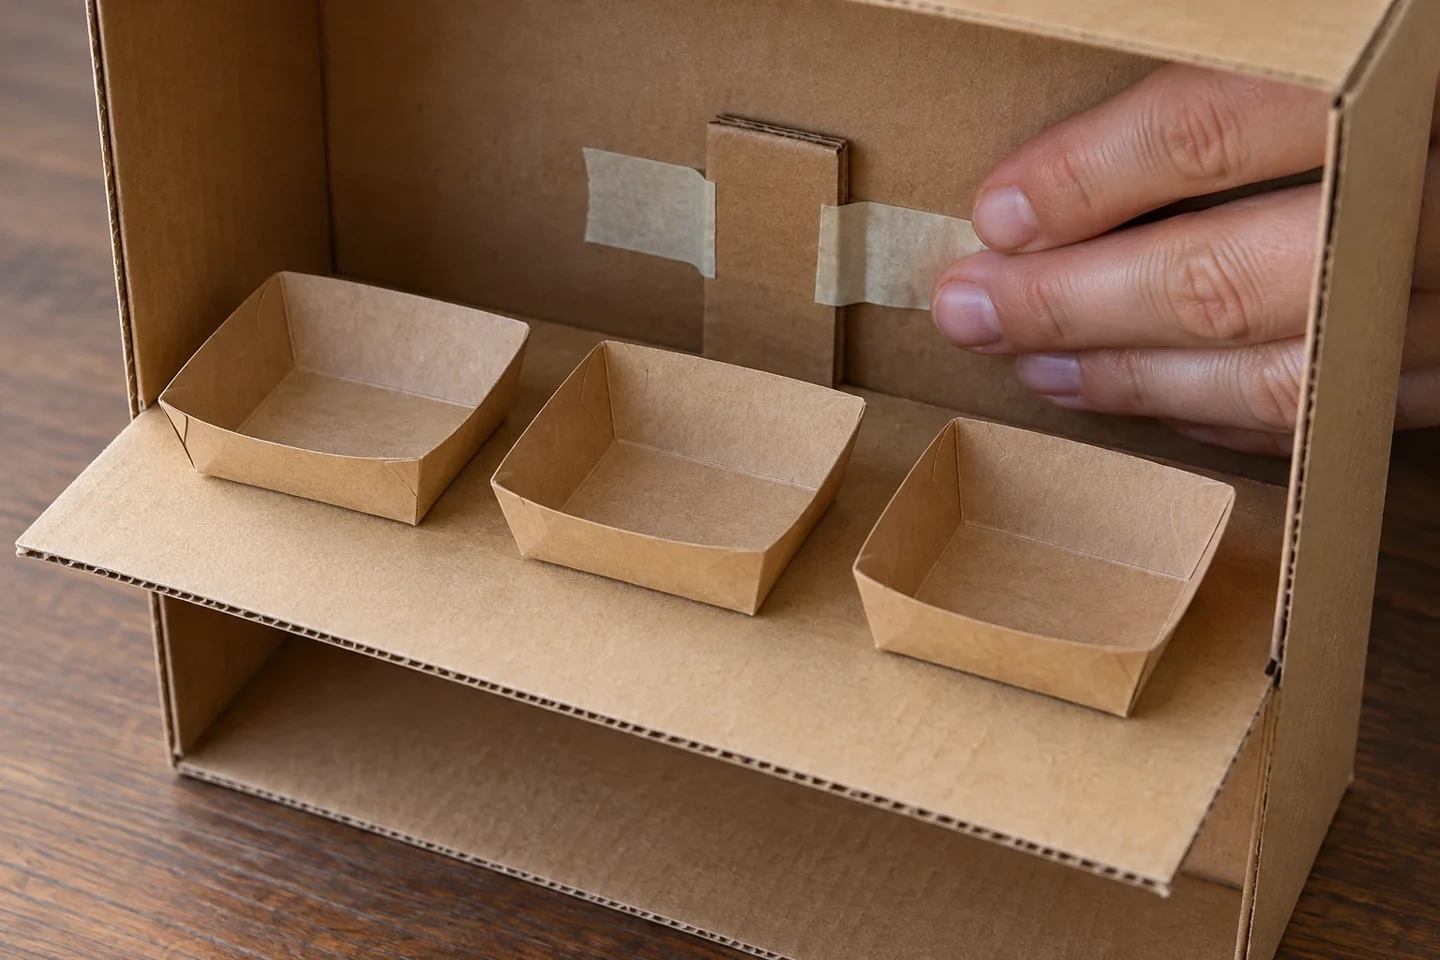
Test the shallow counter with empty trays before adding the paper produce. - Cut and draw paper apples, carrots, and pumpkins. Make at least four of each so children can group or count them.
- Put one produce type in each tray and arrange the trays on the counter. Add a hand-drawn sign with the stand’s name.
- Take turns asking for small orders, such as two apples and one carrot. Count the pieces into the customer’s paper bag, check the order together, then return them for the next customer.
Make it work at home or in your classroom
Younger children can color pre-cut produce and choose where the trays sit. Older children can draw the stock, label the trays, and help design the stand’s name. In a classroom, partners can alternate customer and seller roles after two or three orders. Offer a picture order card for children who prefer pointing to speaking. At home, use a paper bag as the customer’s basket and return the stock after each order. Adults handle box cutting so the play station itself needs only the prepared materials.
Talk, notice, and learn together
How could we organize the display? What changes when a customer asks for one more apple?
Begin with one-item requests, such as two apples. The seller touches each paper piece while counting it into the bag. Then try a mixed order: one carrot and two pumpkins. Ask whether the tray has enough to fill the request and what the seller could say if it does not. Children can practice greetings, clarifying questions, and checking an order without scripted lines. A mistaken count becomes a chance to recount together, not a reason to end the pretend transaction.
Helpful fixes
Counter bends: shorten the ledge or add a folded support underneath. Orders are confusing: begin with one produce type at a time.
Try a restocking challenge
Add a restocking challenge by moving all produce into one mixed basket. Ask the shopkeeper to sort it back into the three trays and explain the rule used. Older children can invent paper produce in a second size and decide whether to sort by kind or size. Another useful extension is drawing a new picture order for a partner to fill. Keep any added choices manageable; a stand crowded with dozens of tiny pieces makes counting and role play more difficult rather than more engaging.
Finish and clean up
Pack each produce group into an envelope and store the trays inside the stand. Check the counter tape before the next session, because repeated reaching can loosen a join. Put the box where it will not block walking routes or tempt climbing. If the stand becomes worn, save the produce and rebuild only the structure. Flat signs and paper stock are easy to reuse in another pretend shop. Collect cardboard offcuts and put adult cutting tools away before inviting children to begin shopping.