Thanksgiving
Harvest Basket Paper Weaving
 Facebook
 Pinterest
 X
X LinkedIn
 Reddit
 WhatsApp
 Telegram
 Bluesky
 Email
Email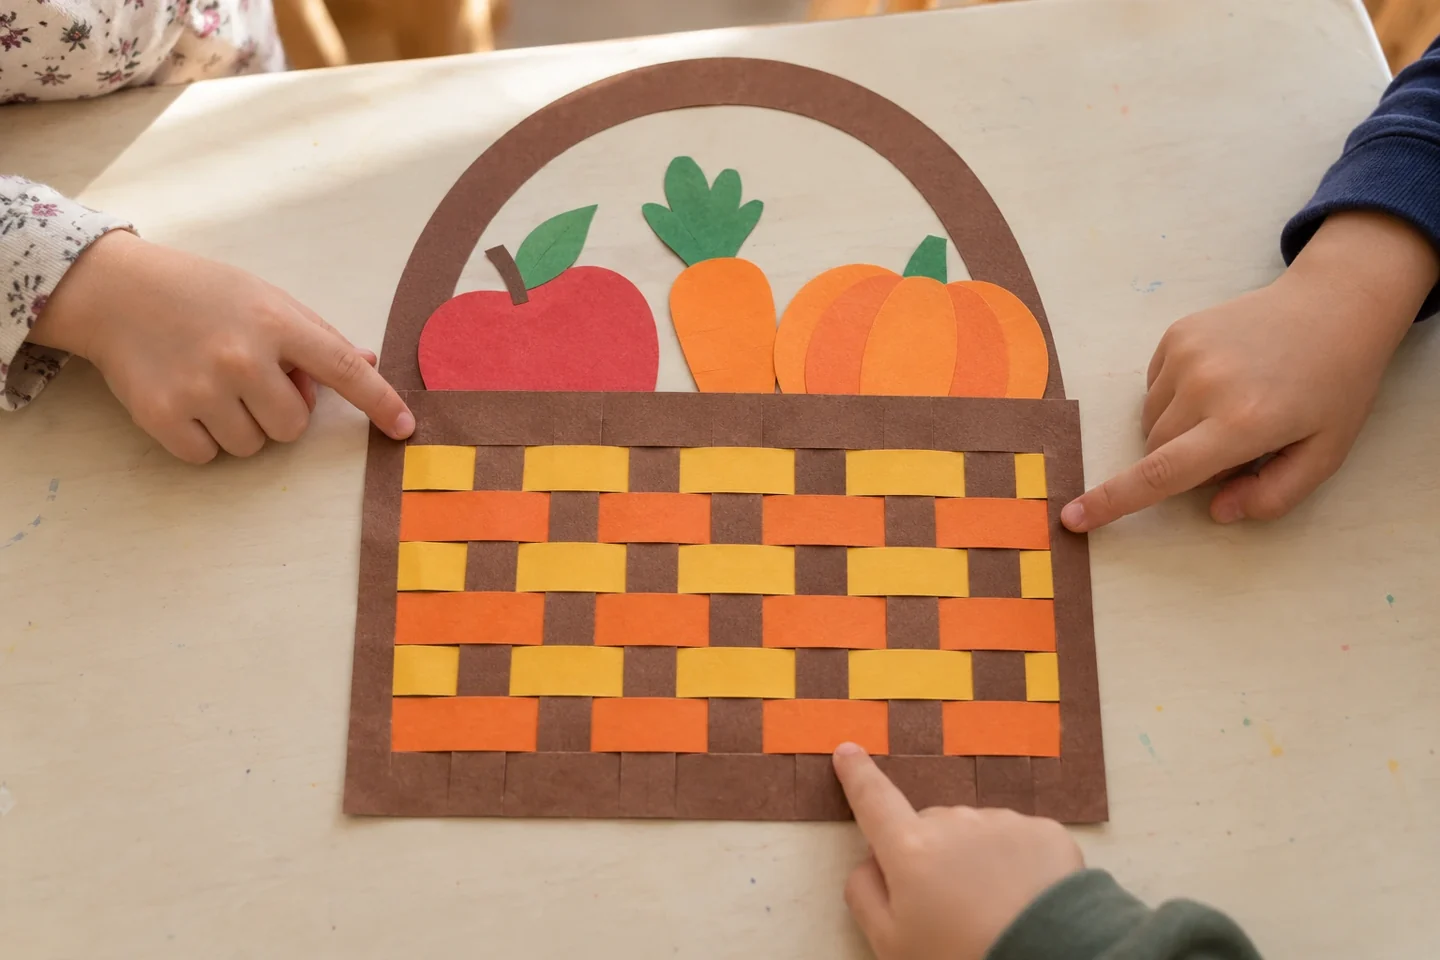
Your activity at a glance
| Suggested ages | 6–11 |
|---|---|
| Activity time | 35 minutes |
What you need
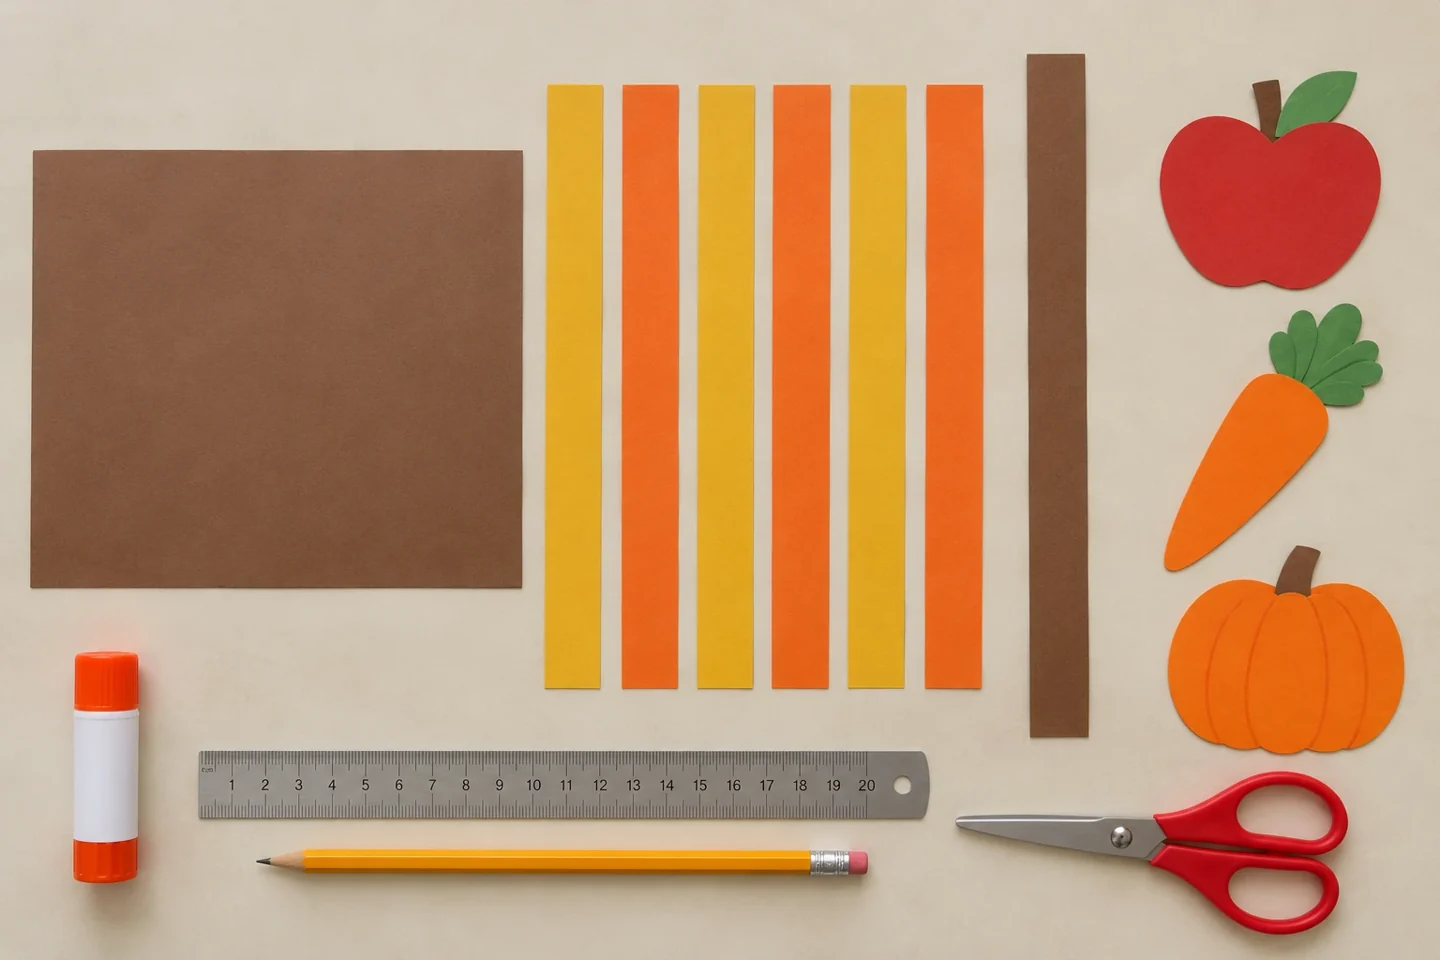
- One 18 × 20 cm brown paper rectangle
- six colored strips 2 × 22 cm
- paper vegetable shapes
- glue stick
- ruler
- pencil
- scissors
- One extra brown paper strip 2 × 24 cm for a curved flat handle
- Three large flat paper vegetable shapes
A little project with plenty to discover
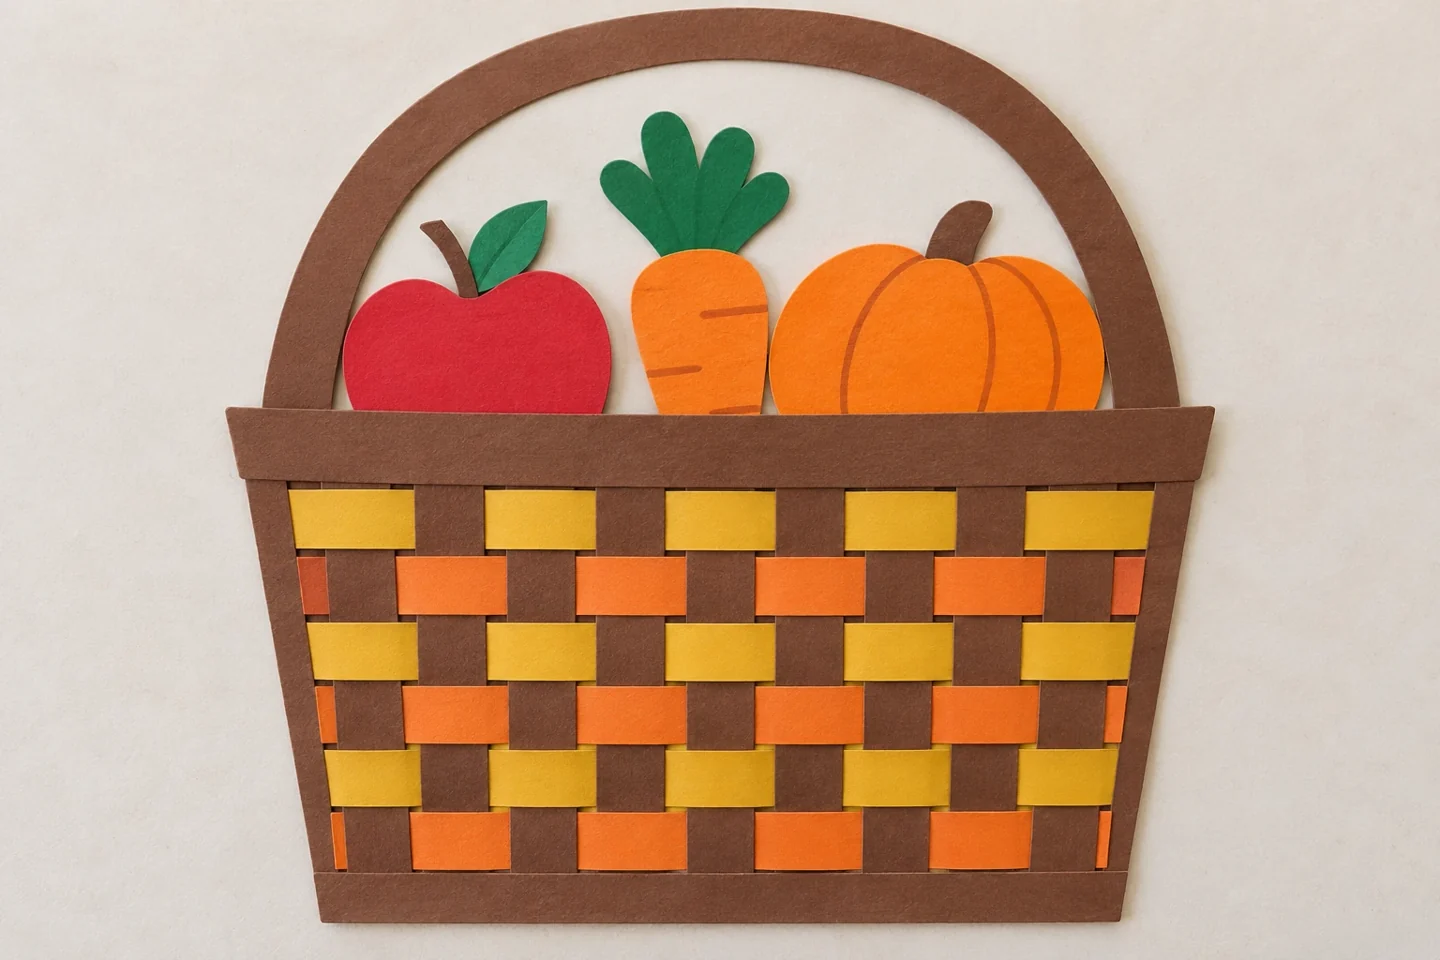
Over-under weaving creates the look of a basket without requiring a three-dimensional container. Paper vegetables turn the finished texture into a harvest collage.
This project makes a flat basket picture, not a container for holding objects. Use a brown rectangle 18 by 20 cm and strips approximately 2 by 22 cm so their ends extend beyond the weaving base. Fold the rectangle so the 20 cm edges meet, leaving a folded height of 9 cm. Mark cut lines from the fold toward the open edge, stopping 2 cm short. That uncut band is important: it keeps the slit base in one connected piece.
Prepare and introduce the activity
An adult can prepare the slit base before children begin. Open it flat and identify the long bands between cuts. The first strip goes over one band and under the next, continuing across the base. The second strip begins under the band that the first went over. Lift each band gently with a fingertip rather than pulling hard on the weaving strip. Slide completed rows into place before gluing any ends; once they are fixed, adjusting the spacing is much harder.
Turn the 18 × 20 cm brown rectangle so it is 20 cm wide and 18 cm tall. Fold the height in half. Mark eight vertical cuts at 2, 4, 6, 8, 10, 12, 14, and 16 cm from the left edge, stopping 2 cm short of the open top edge. Unfold to reveal eight 14 cm slots and an intact outer border. Six 2 cm-wide strips fill 12 cm of that slotted height with a little space to adjust. Use a separate brown paper strip for the curved handle and three large paper vegetables; this stays a flat basket collage.
Make it step by step
- Place the rectangle 20 cm wide and 18 cm tall, then fold the height in half. Mark eight cuts 2 cm apart across the fold, leaving a 2 cm border at each side and stopping 2 cm before the open edge.
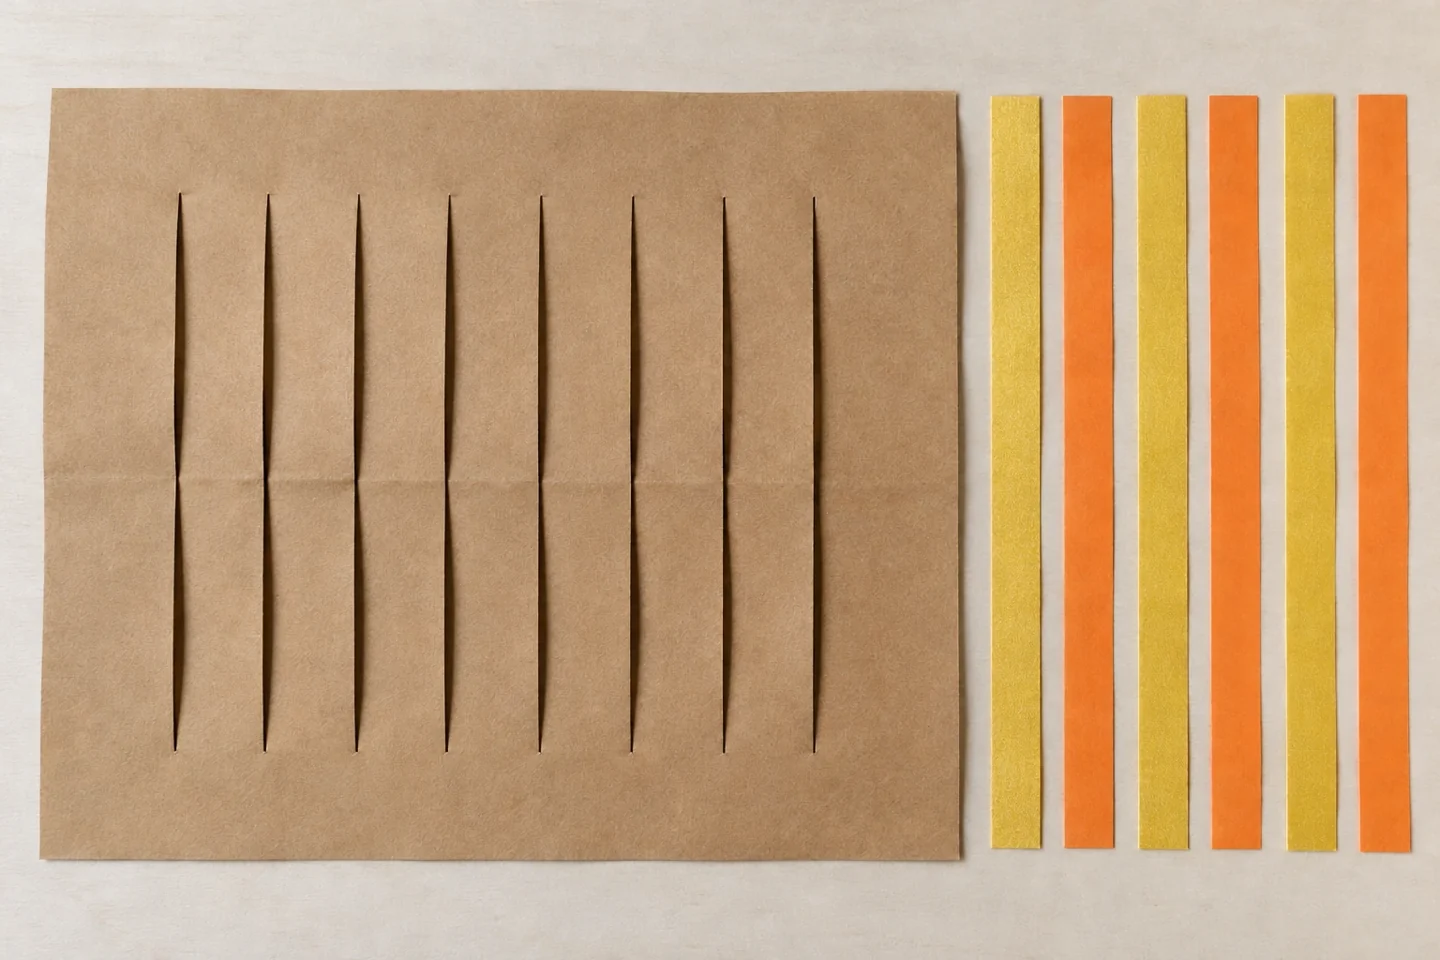
Unfold the eight-slot base, keeping the outer border intact. - Cut along the marked lines from the folded edge, then unfold. The uncut outer border keeps the base together.
- Weave the first colored strip over one band and under the next across the whole base. Slide it gently toward one edge.
- Weave the next strip in the opposite order. Continue alternating, then glue only the loose strip ends to the border.
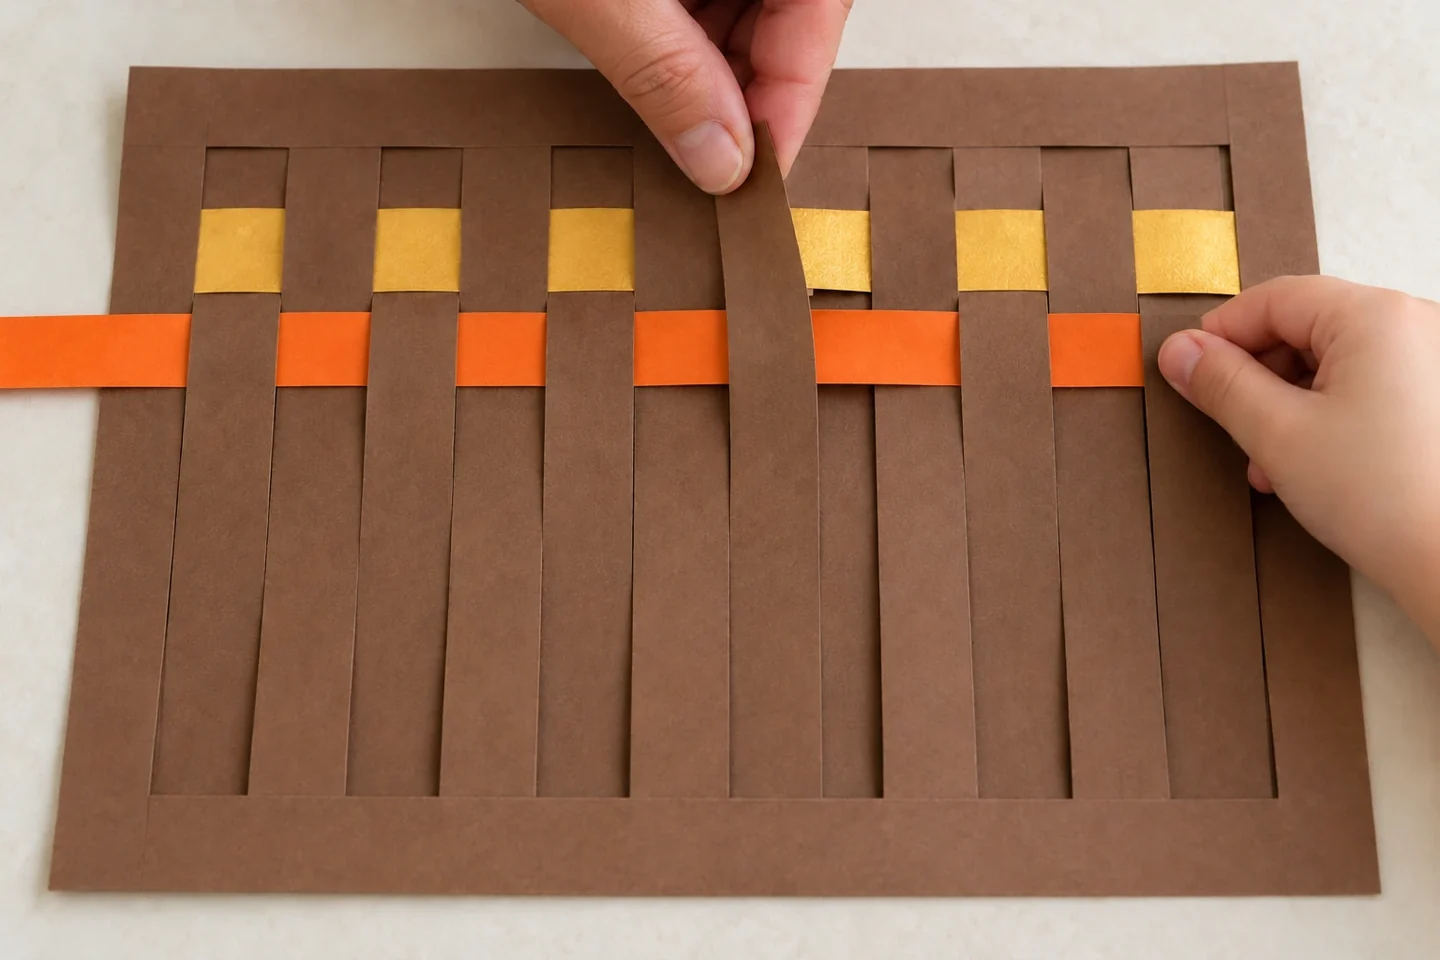
Start the next row in the opposite over-under order and lift the bands gently. - Trim protruding ends and add a curved paper handle. Glue paper carrots, pumpkins, or apples above the basket opening.
Make it work at home or in your classroom
For an easier version, cut wider slots and provide only three broad weaving strips. Young children can help lift alternating bands while an adult threads the strip through. Older makers can measure the spacing and plan color patterns across the rows. In a classroom, keep one partly woven base available so children can inspect the over-under route from both sides. Partners can swap the jobs of lifting and threading after each row. The slower rhythm is more useful than racing to finish.
Talk, notice, and learn together
How does the second row differ from the first? What holds the woven strips together?
Look at the front and back of the woven area. A color that appears on the front in one space appears behind the next band. Ask why the neighboring row shows a different arrangement. When children add a handle and paper produce, keep those shapes above the basket opening so the woven texture remains visible. A carrot or apple can be drawn simply; this is an imaginative harvest collage, not a botanical identification activity. Let children choose which produce their pretend basket carries.
Helpful fixes
A strip tears: use a wider strip and lift bands gently. Rows bunch: loosen them and slide them into even spaces before gluing.
Compare two weaving patterns
Try weaving two neighboring rows in the same over-under order on a spare base, then compare them with alternating rows. Ask which version shows a checkerboard-like arrangement and which creates longer visible bands of color. Both are possible designs, but alternating rows demonstrates the usual plain-weave structure clearly. Children can also draw a small plan of the strip colors before threading them. Keep the plan beside the base and invite changes if the actual paper colors suggest a new arrangement.
Finish and clean up
Glue only the loose ends once the rows sit comfortably, then trim the protruding paper. If a band tears, tape the repair on the back before threading another strip. Dry the collage flat and keep it in a folder so the woven strips do not snag. Save long offcuts for another weaving attempt and shorter pieces for paper vegetables. Put scissors away before clearing the narrow scraps. A second base can be prepared later if children want to revisit the same structure.