Thanksgiving
Leaf-Print Thanksgiving Table Runner
 Facebook
 Pinterest
 X
X LinkedIn
 Reddit
 WhatsApp
 Telegram
 Bluesky
 Email
Email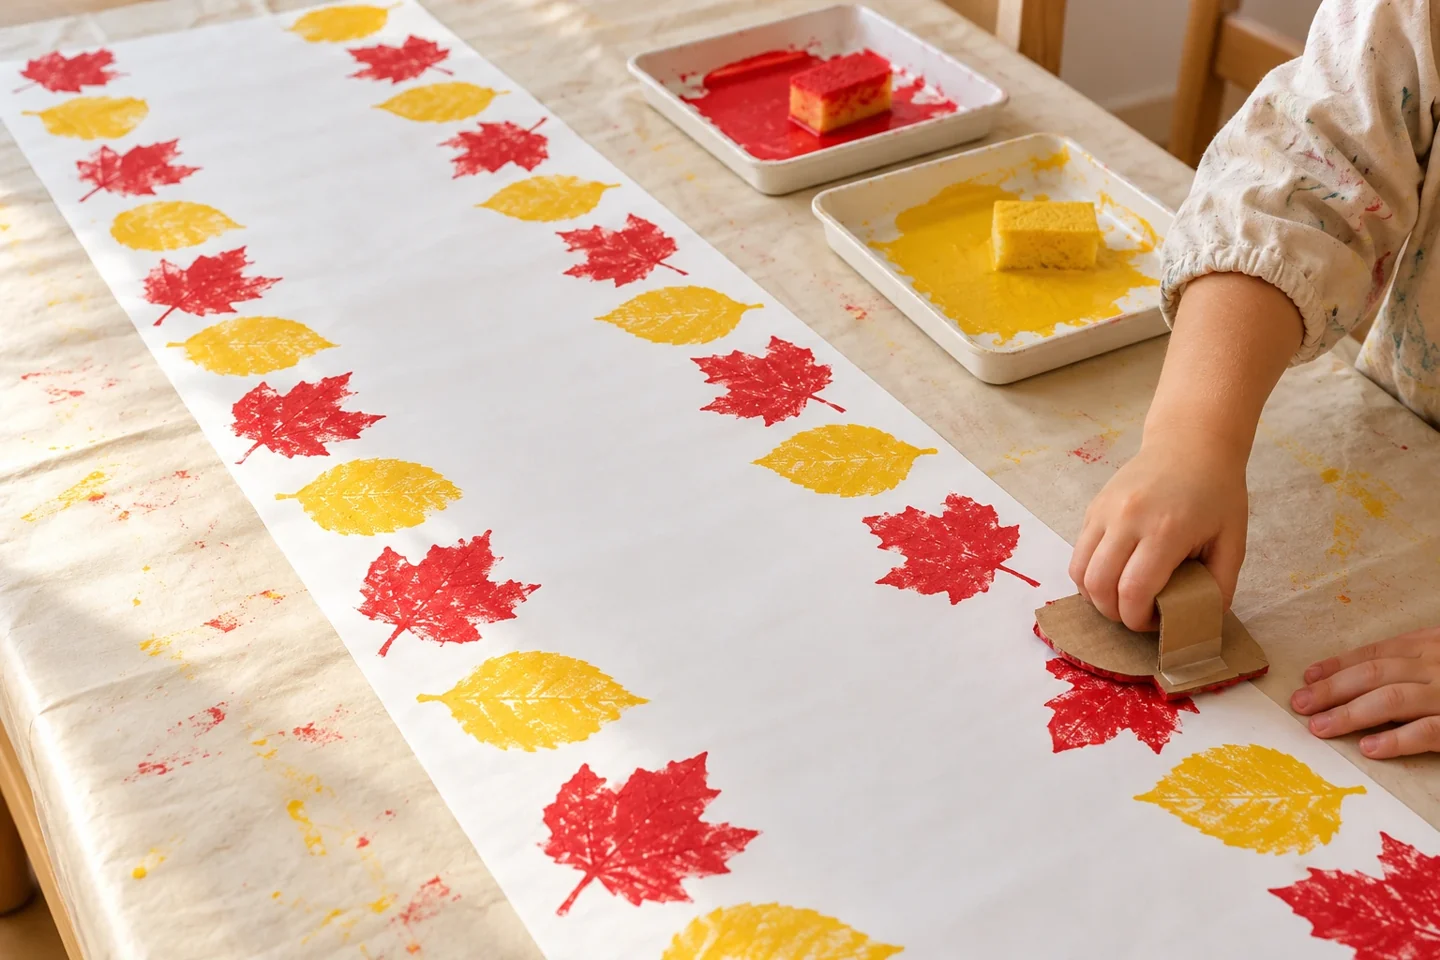
Your activity at a glance
| Suggested ages | 4–10 |
|---|---|
| Activity time | 35 minutes plus drying |
What you need
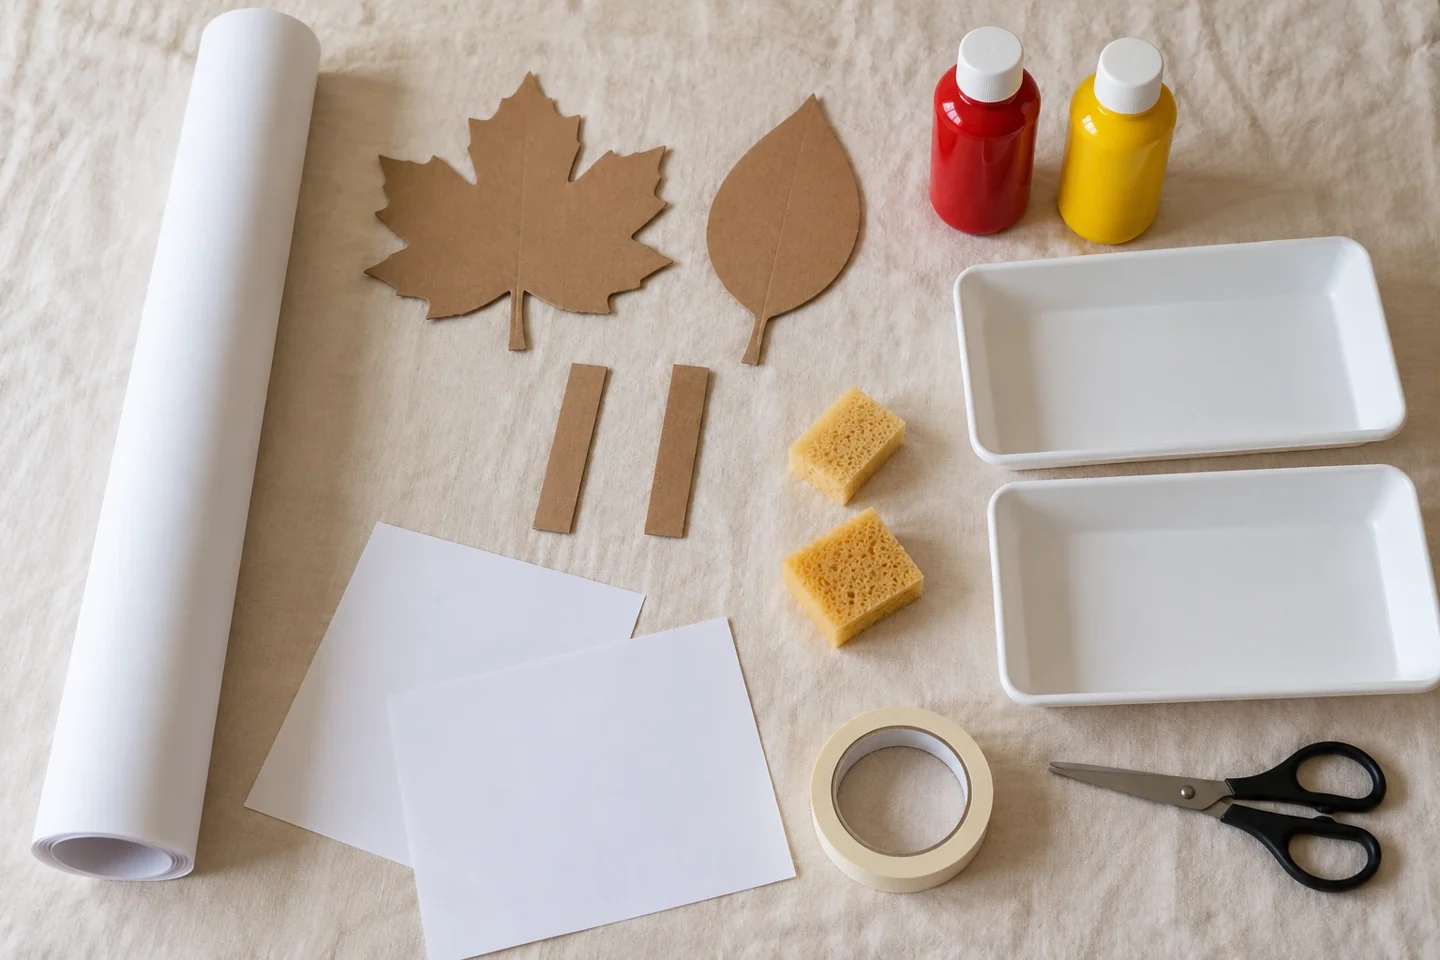
- One plain paper strip approximately 30 × 100 cm
- Two broad cardboard leaf shapes and two folded-cardboard handle strips
- Washable red and yellow paint
- Two shallow trays
- Two small sponges
- Table covering
- Two scrap sheets for practice prints
- Masking tape for cardboard handles
- Adult scissors for preparing the stamps
A little project with plenty to discover
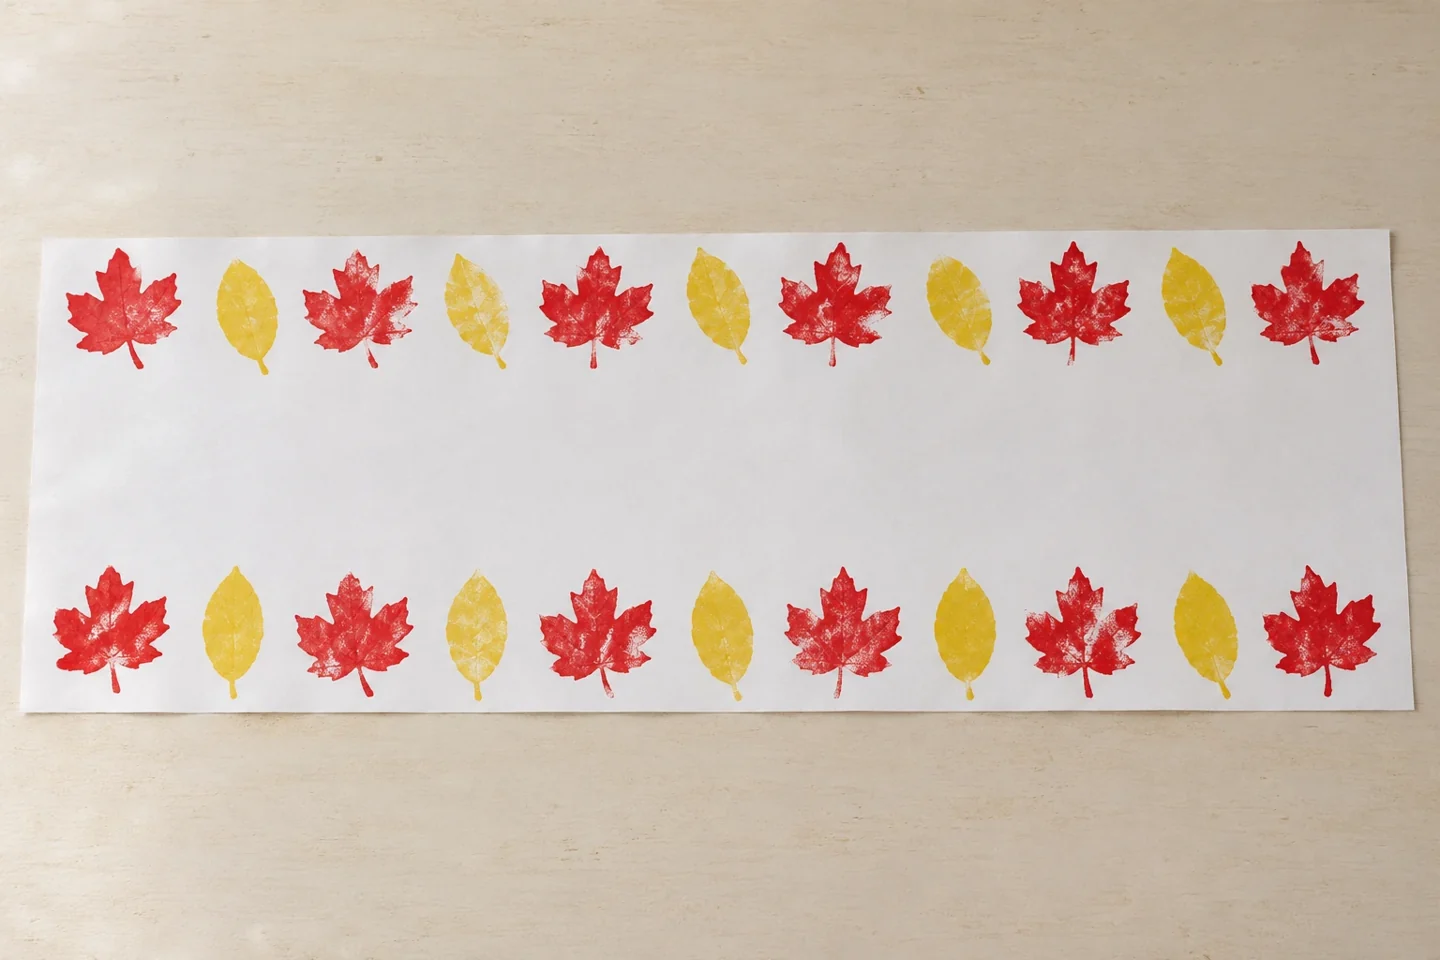
Repeating leaf prints turn plain paper into a table decoration. Children can plan a border, scatter leaves, or make alternating color rows.
Use a plain paper strip about 30 cm wide and 100 cm long for a manageable small runner. Protect the entire work surface underneath, including the area where painted stamps will rest. An adult can cut two broad cardboard leaf silhouettes and attach folded-cardboard handles. These are shape stamps, not real leaves. A thin sponge in a shallow tray spreads the paint more evenly than a deep puddle. Begin with one color and add another only when the printing action is comfortable.
Prepare and introduce the activity
Test a stamp on scrap paper before printing the runner. Press it onto the paint sponge gently, then lower it straight onto the paper. Press across the leaf surface without sliding, and lift it straight up by the handle. If the first print looks patchy, adjust the paint amount or pressure on the practice sheet. A homemade stamp may show small gaps and cardboard texture; those marks are part of its appearance. Keep the runner flat so wet areas do not fold onto one another.
Add scrap paper for test prints and masking tape for the stamp handles. Use two shallow trays and two small sponges if you want two colors without mixing them. Apply only a thin patch of paint to each sponge; the cardboard touches the damp surface rather than dipping into a puddle. For a clear first pattern, alternate one red leaf and one yellow leaf along an edge. Leave the middle open or fill it with the child’s own arrangement after the border is underway. Give the full strip a flat drying space before beginning.
Make it step by step
- An adult cuts two broad leaf shapes from cardboard and tapes a folded-cardboard handle to the back of each.
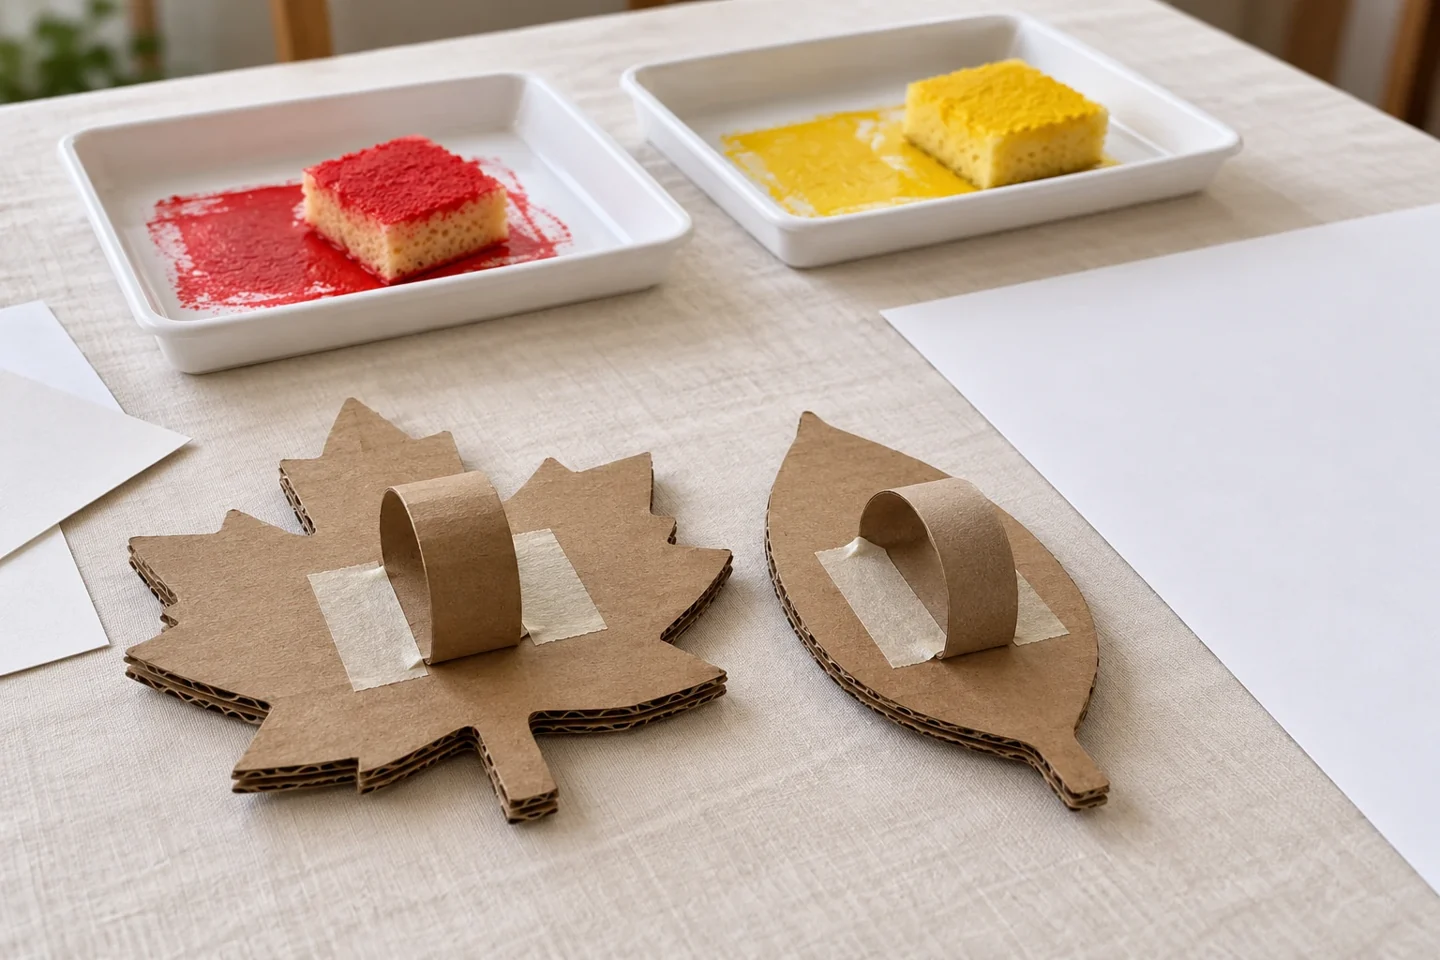
Tape both ends of each folded handle to the back of its cardboard leaf. - Cover the work surface and lay the paper flat. Place a thin paint layer on a sponge in a shallow tray.
- Press a stamp onto the sponge, then make a practice print on scrap paper. Use only enough paint to cover the leaf surface.
- Print onto the runner, pressing straight down and lifting straight up. Leave space between prints or overlap a few deliberately.
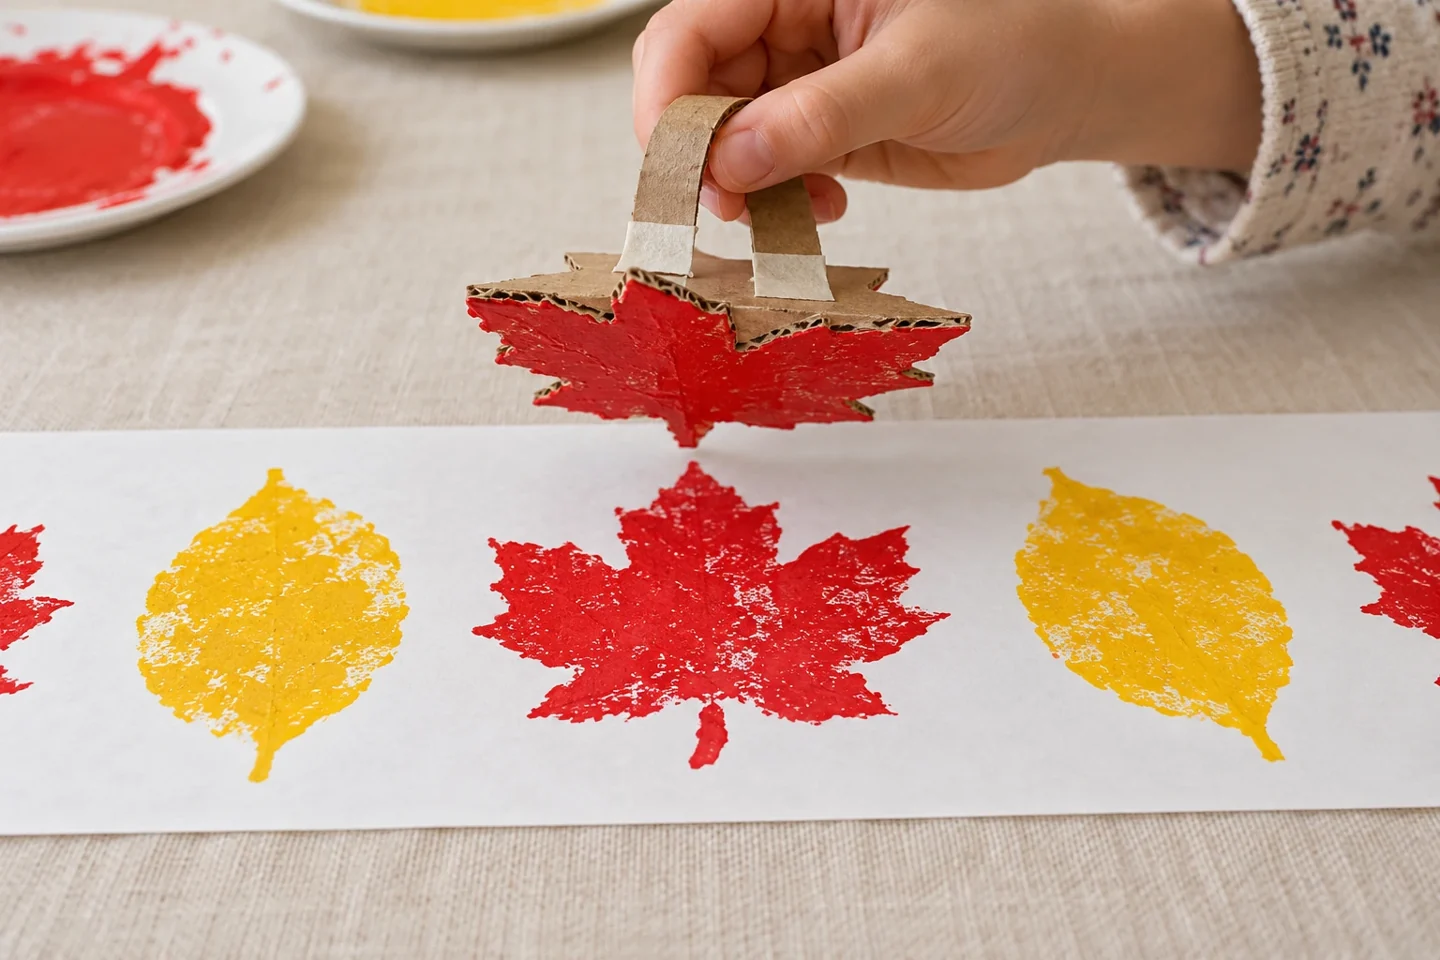
Lift the stamp straight up to reveal the print without smearing it. - Dry the paper completely before placing it on a table. Keep it away from hot dishes and open flames; use it as decoration rather than a protective mat.
Make it work at home or in your classroom
Young children can make large spaced prints while an adult steadies the paper. Older makers can mark a light pencil border or plan alternating colors before stamping. In a classroom, work on shorter paper sections that can be displayed side by side after drying, rather than crowding many children around one long strip. Give each station a place for the stamp to rest between prints. Children can rotate the leaf to change its direction without needing additional tools or decorations.
Talk, notice, and learn together
What makes a clear print? How could the same leaf create a repeating border?
Compare prints made with a light touch and a firmer even press. Ask what changed and whether the stamp slid. Look at the empty spaces as well as the printed shapes: a widely spaced pattern feels different from a closely overlapping one. Invite children to choose a repeated direction or deliberately scatter the leaves. Do not insist that every print be perfect or replace a child’s work with an adult print. The useful skill is noticing how a material action changes the mark.
Helpful fixes
Prints blur: use less paint and lift without sliding. Cardboard softens: replace the stamp or let it dry between rounds.
Plan a repeating leaf border
Create a small practice strip with three repeated groups, such as red leaf, yellow leaf, red leaf, yellow leaf. Ask the child to continue the pattern and then decide whether to use it on the long runner. A second option is a border along each long edge with the middle left clear. Children can measure the open center or compare where prints fit near the edges. Keep the design simple enough to complete within the available drying space, especially if the runner is being made before a gathering.
Finish and clean up
Dry the runner completely before placing it on a table. It is a decoration, not protection from hot cookware, spills, or flame, so an adult should choose a suitable position away from those hazards. Rinse reusable trays and sponges according to the paint guidance. Cardboard stamps can be dried for reuse if they remain firm; softened ones are better replaced. Roll the dry runner loosely for storage rather than folding through the paint. Remove the table covering only after the surrounding surface has been checked.